Images
How to upload and manage custom images in the Clew Platform
Contents
- 1. Introduction & Context
- 2. Key Features & Functions
- 3. Requirements
- 4. Step-by-Step Guide
- 5. Common Issues & Troubleshooting
- 6. Related Articles
1. Introduction & Context
The Images feature lets you upload and manage custom images in the Clew Platform, controlling how logos and visual references appear across the system for all users in your organisation.
Who is it for? System administrators responsible for configuring and maintaining the Clew Platform.
What does it impact? Images appear in designated areas of the platform, including the application header, reports, mobile landing screen, and schemas where custom fields are displayed. Disabling an image assigned to one of these areas reverts the display to the platform default immediately for all users.
2. Key Features & Functions
- Multiple reference points: Assign images to specific positions in the platform, or leave the reference field blank to make the image available for use in custom fields.
- Supported display positions:Images can be set for the following areas:
- Business Objectives and Control Effectiveness Information Image (appears on schemas where the referenced field is displayed)
- Default Header Logo
- Default Report Logo
- Mobile Landing Logo
- Risk Authorisation Information Image
- Risk Current Authoriser Information Image
- Risk Rating Information Image
- Enable/disable control: Toggle individual images on or off without deleting them. This is useful when testing or temporarily reverting to the platform default.
- Supported file formats: BMP, GIF, JPEG, PNG, SVG, TIFF, WEBP.
3. Requirements
- Administrator access to the Clew Platform.
- An image file in one of the supported formats: BMP, GIF, JPEG, PNG, SVG, TIFF, or WEBP.
- If you intend to display the image against a custom field, that field must already exist and be visible on a schema or form.
4. Step-by-Step Guide
Adding a New Image
- Navigate to the Admin section.
- Click Imagesin the left-hand navigation bar.
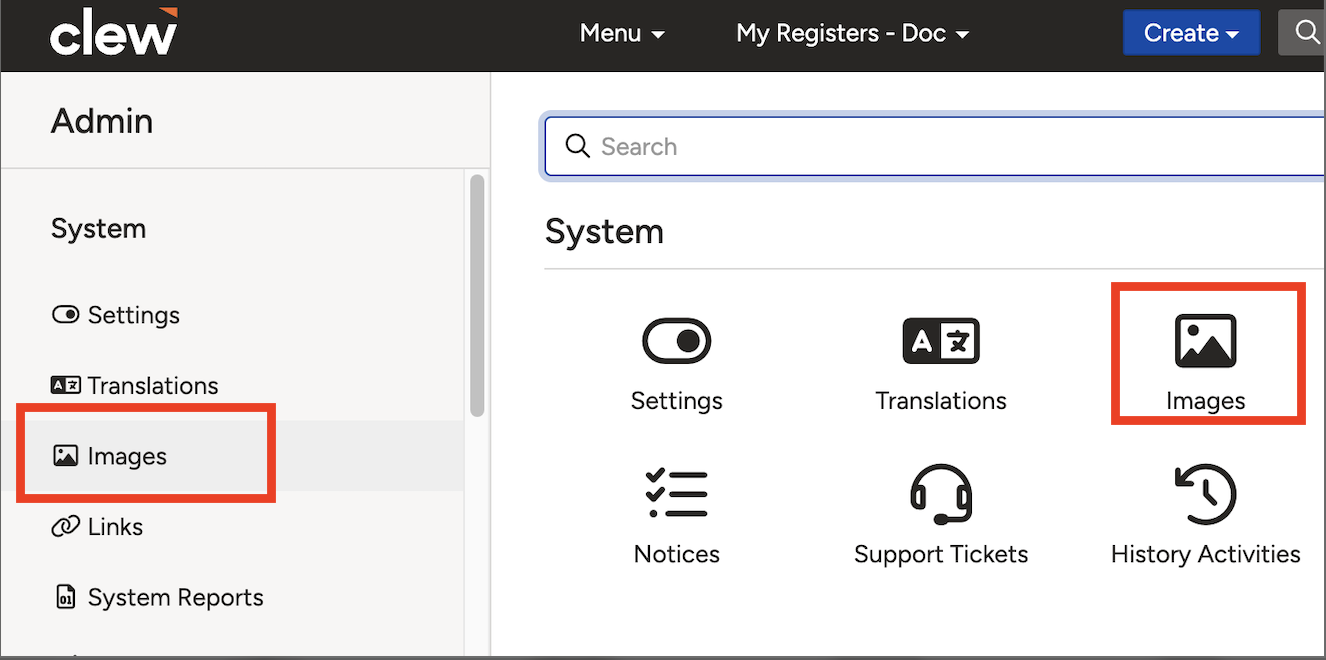
The Images option in the Admin navigation bar.
- The system displays a list of existing images.
- Click Addto upload a new image.

The Images list with the Add button.
- Enter a title for the image.
- Click Choose Fileto select an image file from your computer.

The Add Image form with the title and file upload fields.
- Select the reference pointwhere the image should be displayed. Common options include:
- Default Header Logo
- Default Report Logo
- Mobile Landing Logo (for organisations using the mobile app)
- Note: If you leave the reference field blank, the image will be available for use in custom fields. If you select a reference point, the image will be assigned to that specific area (for example, the application header).

The reference point dropdown with available display positions.
- Choose whether to enable the image immediately by selecting Yes or No.
- Click Save to finalise the upload.
Editing Images
- In the Images section, locate the image you want to modify.
- Click the Editbutton (pencil icon).

The Edit button (pencil icon) on the Images list.
- Make the necessary changes.
- Click Save to apply the updates.
Enabling or Disabling Images
- In the Images section, find the image you want to enable or disable.
- Click the toggle buttonto switch between enabled and disabled.

The toggle button used to enable or disable an image.
5. Common Issues & Troubleshooting
| Issue | Likely Cause | Solution |
| Uploaded image is not displaying | The wrong reference point was selected, the image is disabled, or the relevant field or schema has not been refreshed | Confirm the correct reference point was selected when uploading. Check that the image is enabled. Refresh the page or sync the schema. If displaying against a custom field, verify the field is visible on a schema or form. |
| Changes to an image are not saving | A mandatory field may be incomplete, or a network issue is preventing the update from being applied | Check that all required fields are filled in before clicking Save. Check your network connection and try again. |
Best practices:
- Give each image a clear, descriptive title so it is easy to identify in the list, particularly when multiple images are uploaded.
- Before disabling a logo image, confirm which areas of the platform will revert to the default so users are not caught off guard by a sudden visual change.
- Upload images in SVG format where possible for the sharpest display at any screen resolution.
Click a title to preview it here. Use the Open full article button to read the full version in a new tab.
▾Get Started With Internal & External Links Open full article »
Related article
Explains how to set up internal and external links in the Clew Platform to connect records and point users to related resources.
Was this article helpful?
That’s Great!
Thank you for your feedback
Sorry! We couldn't be helpful
Thank you for your feedback
Feedback sent
We appreciate your effort and will try to fix the article