Merging Roles
How to merge two or more Roles so their associated data appears seamlessly under a single Role
Contents
- 1. Introduction & Context
- 2. Key Features & Functions
- 3. Requirements
- 4. Step-by-Step Guide
- 5. Common Issues & Troubleshooting
- 6. Related Articles
1. Introduction & Context
Merging roles lets you combine two or more Roles into one, so that all the associated data appears seamlessly under the remaining Role.
Roles in the Clew Platform represent the roles of your employees in your organisation (for example, Joe Bloggs, CFO). In certain situations a role may become redundant, in which case you can disable it. In other cases the role merges with another role, for example when two functions are combined during a restructure, and you need to ensure the associated data appears under the new role. That is when you merge roles.
Who is it for? System Administrators who maintain the organisation's Role structure.
What does it impact? All data associated with the merged Roles is brought together under the target Role. The merge is irreversible, so it should be carried out with care.
2. Key Features & Functions
- Merge multiple Roles: select two or more Roles and combine them into a single target Role of your choice.
- Seamless data transfer: data associated with the merged Roles appears under the target Role after the merge.
- Filters: the Roles list shows active Roles by default. Use the filters button to include inactive Roles when searching for Roles to merge.
- Disable as an alternative: if a Role is simply redundant and its data does not need to move elsewhere, disable it instead of merging.
3. Requirements
- System Administrator access is required to merge Roles.
- Your Clew Platform needs to be set up to use Roles.
- Multiple users can be in the same Role, and when a person leaves and the role becomes vacant, another person can take over.
4. Step-by-Step Guide
Merging Roles
- Navigate to Admin > Roles. This page shows all Roles available in the software. By default it displays only the active Roles, but you can change this by clicking the filters button as shown below.
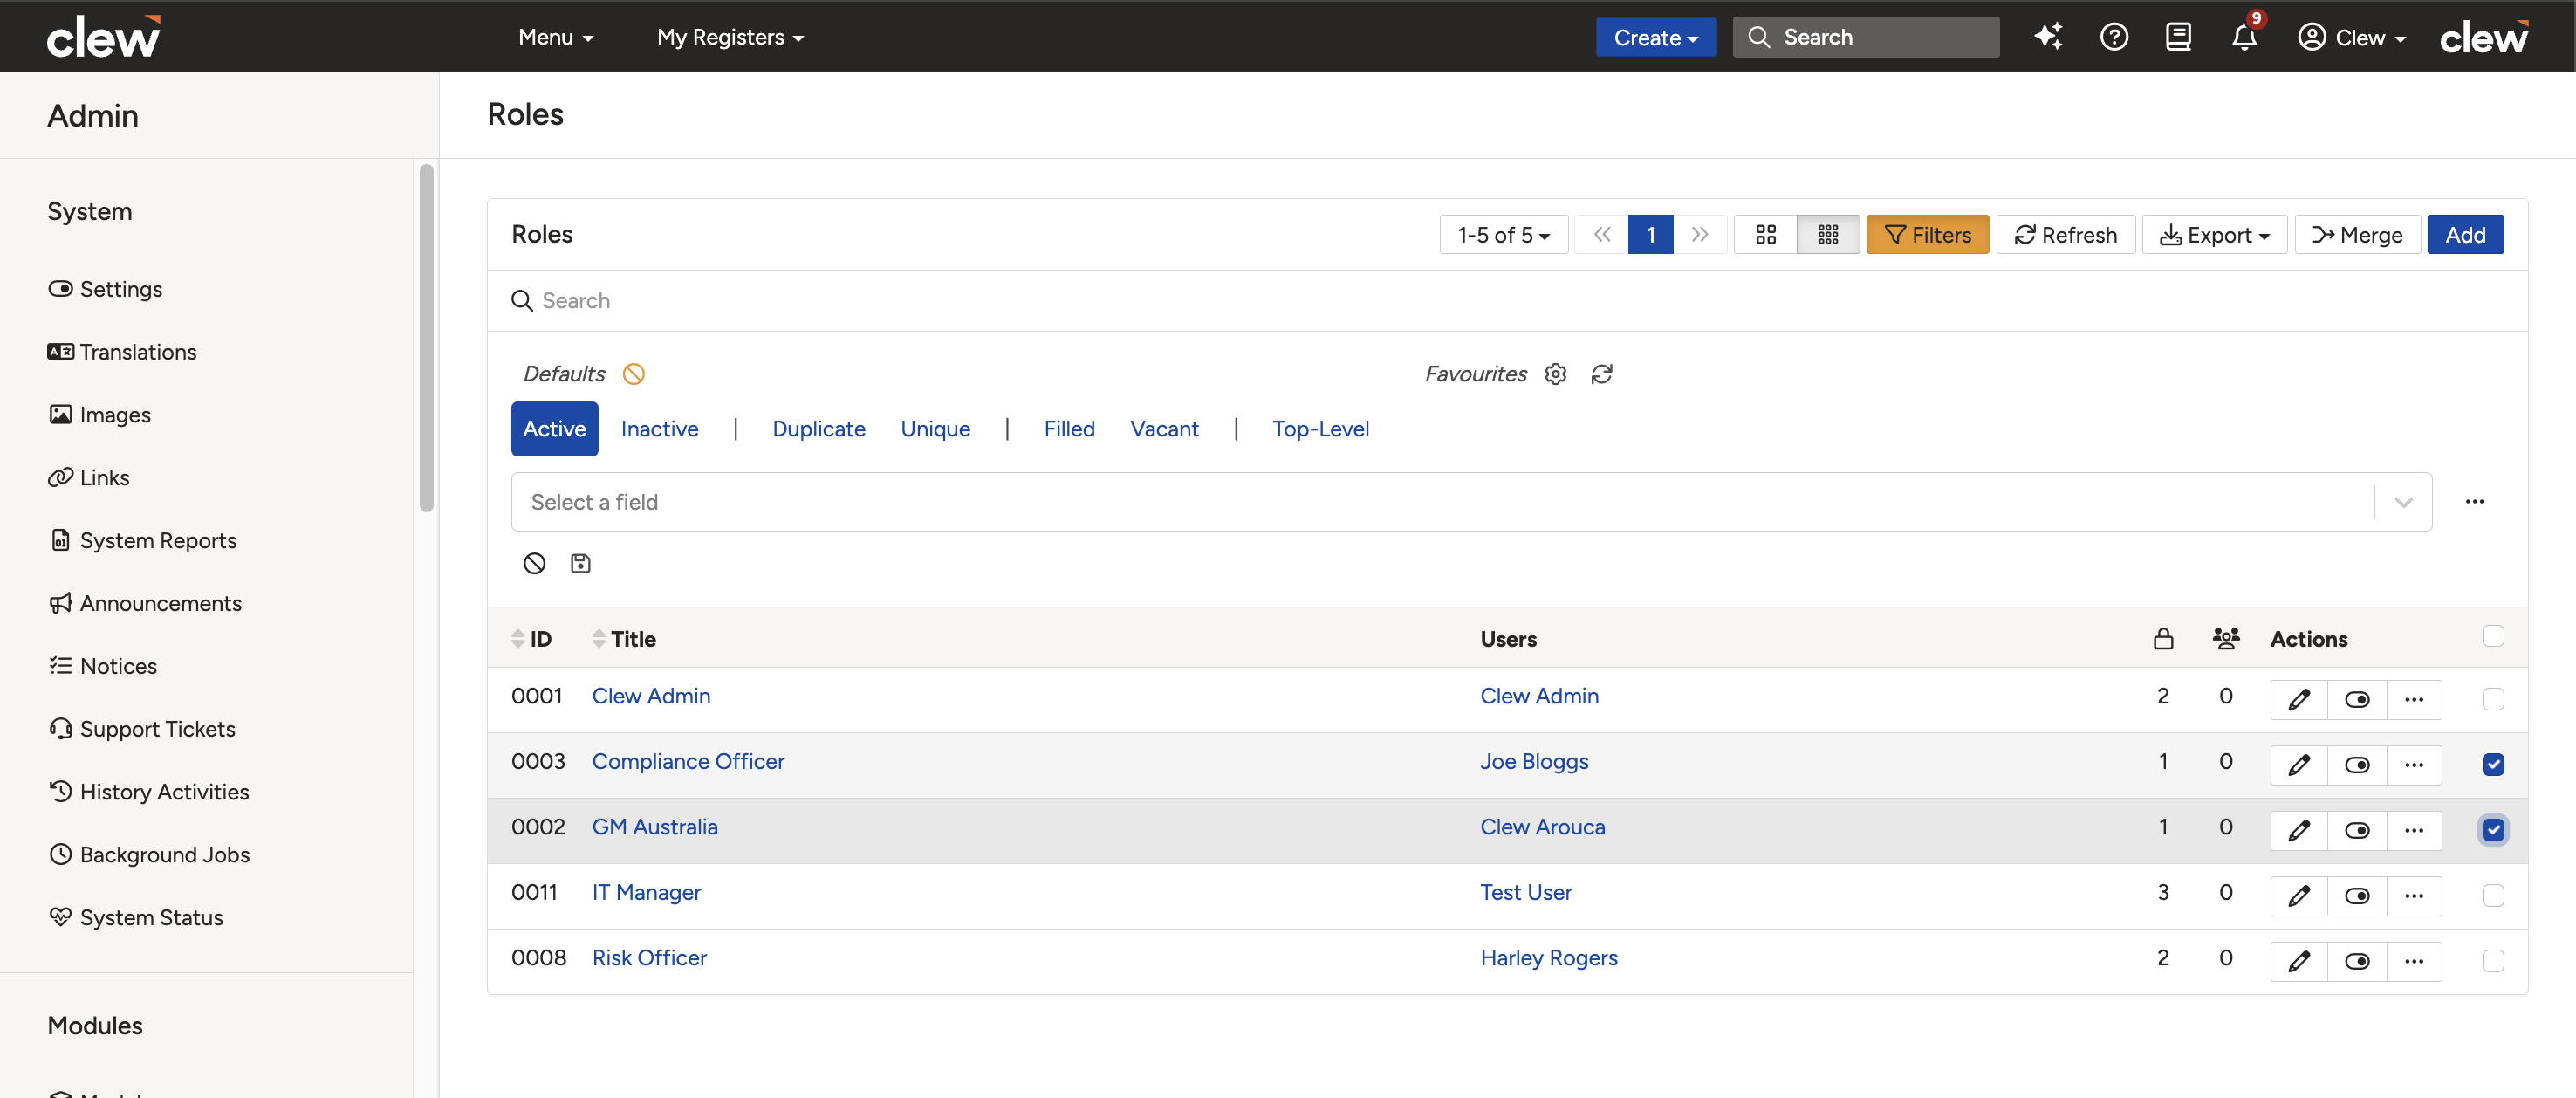
The Roles list with the filters button and selection checkboxes.
- Search for and select the Roles you wish to merge by clicking the checkboxes on the right side (see the image above).
- Click the Merge button on the top bar. This button remains disabled until you select two or more Roles.
- A form will pop up where you can choose the Role that all the other selected Roles will merge into.
- Click Confirm to complete the merge. This action is irreversible.
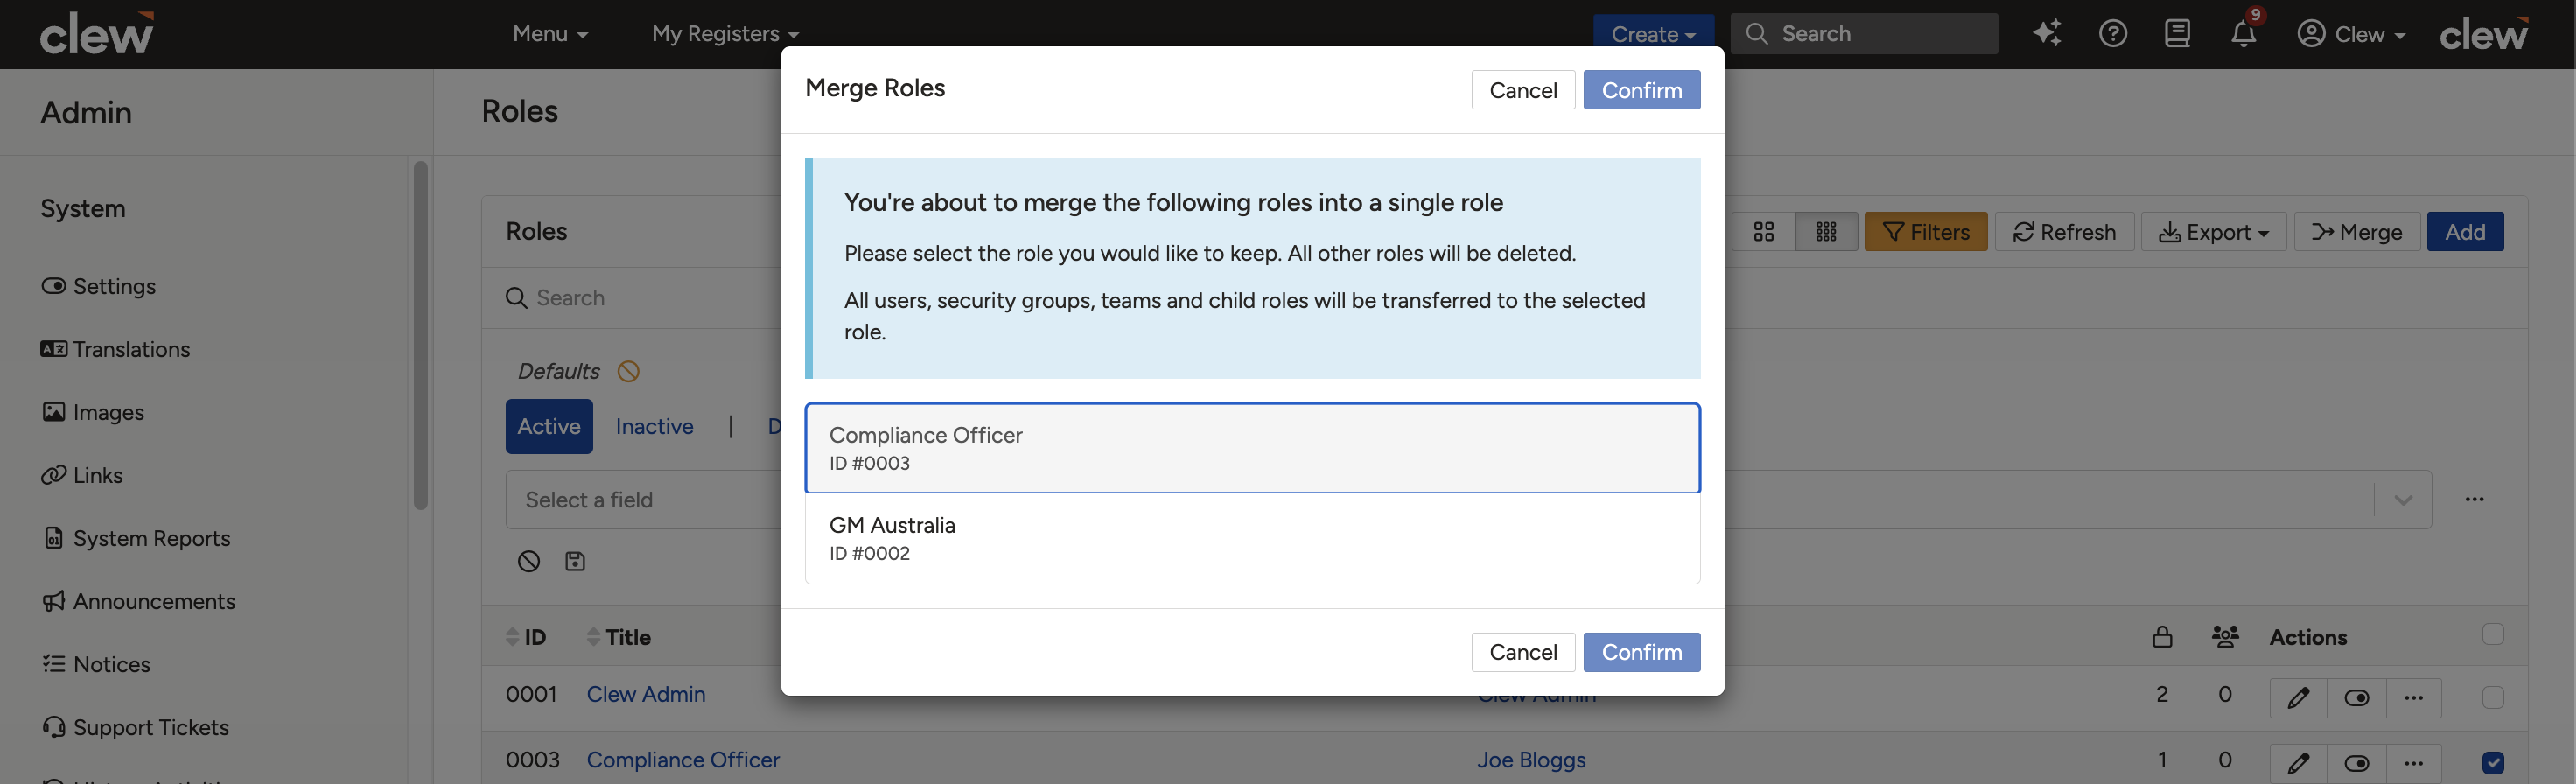
The merge form. Choose the target Role, then click Confirm.
5. Common Issues & Troubleshooting
| Issue | Likely Cause | Solution |
| The Merge button is disabled | Fewer than two Roles are selected | Select at least two Roles using the checkboxes. The Merge button becomes active once two or more are selected |
| A Role I want to merge is not visible in the list | The list shows only active Roles by default | Click the filters button and adjust the filter settings to include inactive Roles |
| Roles were merged by mistake | The merge was confirmed with the wrong Roles or target selected | Merging is irreversible and cannot be undone in the platform. Contact Clew support for assistance |
| I cannot access Admin > Roles | You do not have System Administrator access | Contact your System Administrator to merge the Roles on your behalf, or to review your access level |
Best practices:
- Double-check which Role is selected as the target before confirming, as the merge cannot be undone.
- If a Role is simply redundant and its data does not need to move to another Role, disable it instead of merging.
- Review the Security Groups and users on each Role before merging, so you understand what access the target Role will carry afterwards.
- Merge during quiet periods where possible and let affected users know, since their access is defined by the Roles involved.
Click a title to preview it here. Use the Open full article button to read the full version in a new tab.
▾Roles Open full article »
Related article
What Roles are and how to create and assign them, connecting Users, Teams, and Security Groups to control access.
▾Security Groups Open full article »
Related article
How Security Groups assign permission sets to registers, which is what Roles link to in order to grant users their access.
Was this article helpful?
That’s Great!
Thank you for your feedback
Sorry! We couldn't be helpful
Thank you for your feedback
Feedback sent
We appreciate your effort and will try to fix the article