CSV Import
How to bulk import and update records using the CSV Import tool in the Clew Platform
Contents
- 1. Introduction & Context
- 2. Key Features & Functions
- 3. Requirements
- 4. Step-by-Step Guide
- 5. Common Issues & Troubleshooting
- 6. Related Articles
1. Introduction & Context
The CSV Import tool lets system administrators bulk upload or bulk update records across multiple modules in the Clew Platform, saving significant time compared to creating or editing records one by one.
Who is it for? System administrators responsible for data setup, migrations, or large-scale record updates.
What does it impact? Imports create or modify records directly in the Clew Platform and maintain a complete audit trail. Import actions cannot be undone once confirmed, so it is important to validate your data before running an import.
2. Key Features & Functions
- Bulk record creation: Upload hundreds of new records at once instead of creating them individually in the platform.
- Bulk record updates: Mass update specific fields on existing records using a unique identifier to match each row to the right record.
- Automatic field mapping: The importer attempts to auto-map your CSV columns to system fields. Any columns it cannot match are flagged for manual mapping.
- Validation before import: Run a check pass before committing any changes. The system identifies invalid rows, warnings, and unmapped fields so you can fix issues first.
- Clone existing imports: Reuse the settings and field mapping from a previous import when bringing in data with the same structure.
- Full audit trail: Every import is logged. Successfully imported records are linked directly from the import results view.
3. Requirements
- Feature must be enabled: CSV Import is disabled by default. Contact Clew support to have it enabled for your organisation.
- System administrator access: Only system administrators can access and run CSV imports.
- CSV file format: The import file must be in CSV format with one record per row. The only exception is risk imports, where causes, consequences, and controls can be entered as multiple values within a single cell. The Clew Platform will create the separate linked records automatically.
- Nested records require separate imports: If you need to import parent and child records together (e.g. Audits with Findings), these must be done as two separate imports. Import the parent records first, then use the Clew Platform ID assigned to each parent to link the child records in the second import.
4. Step-by-Step Guide
The CSV Import tool is located in the Import & Export section at the bottom of the Admin page.
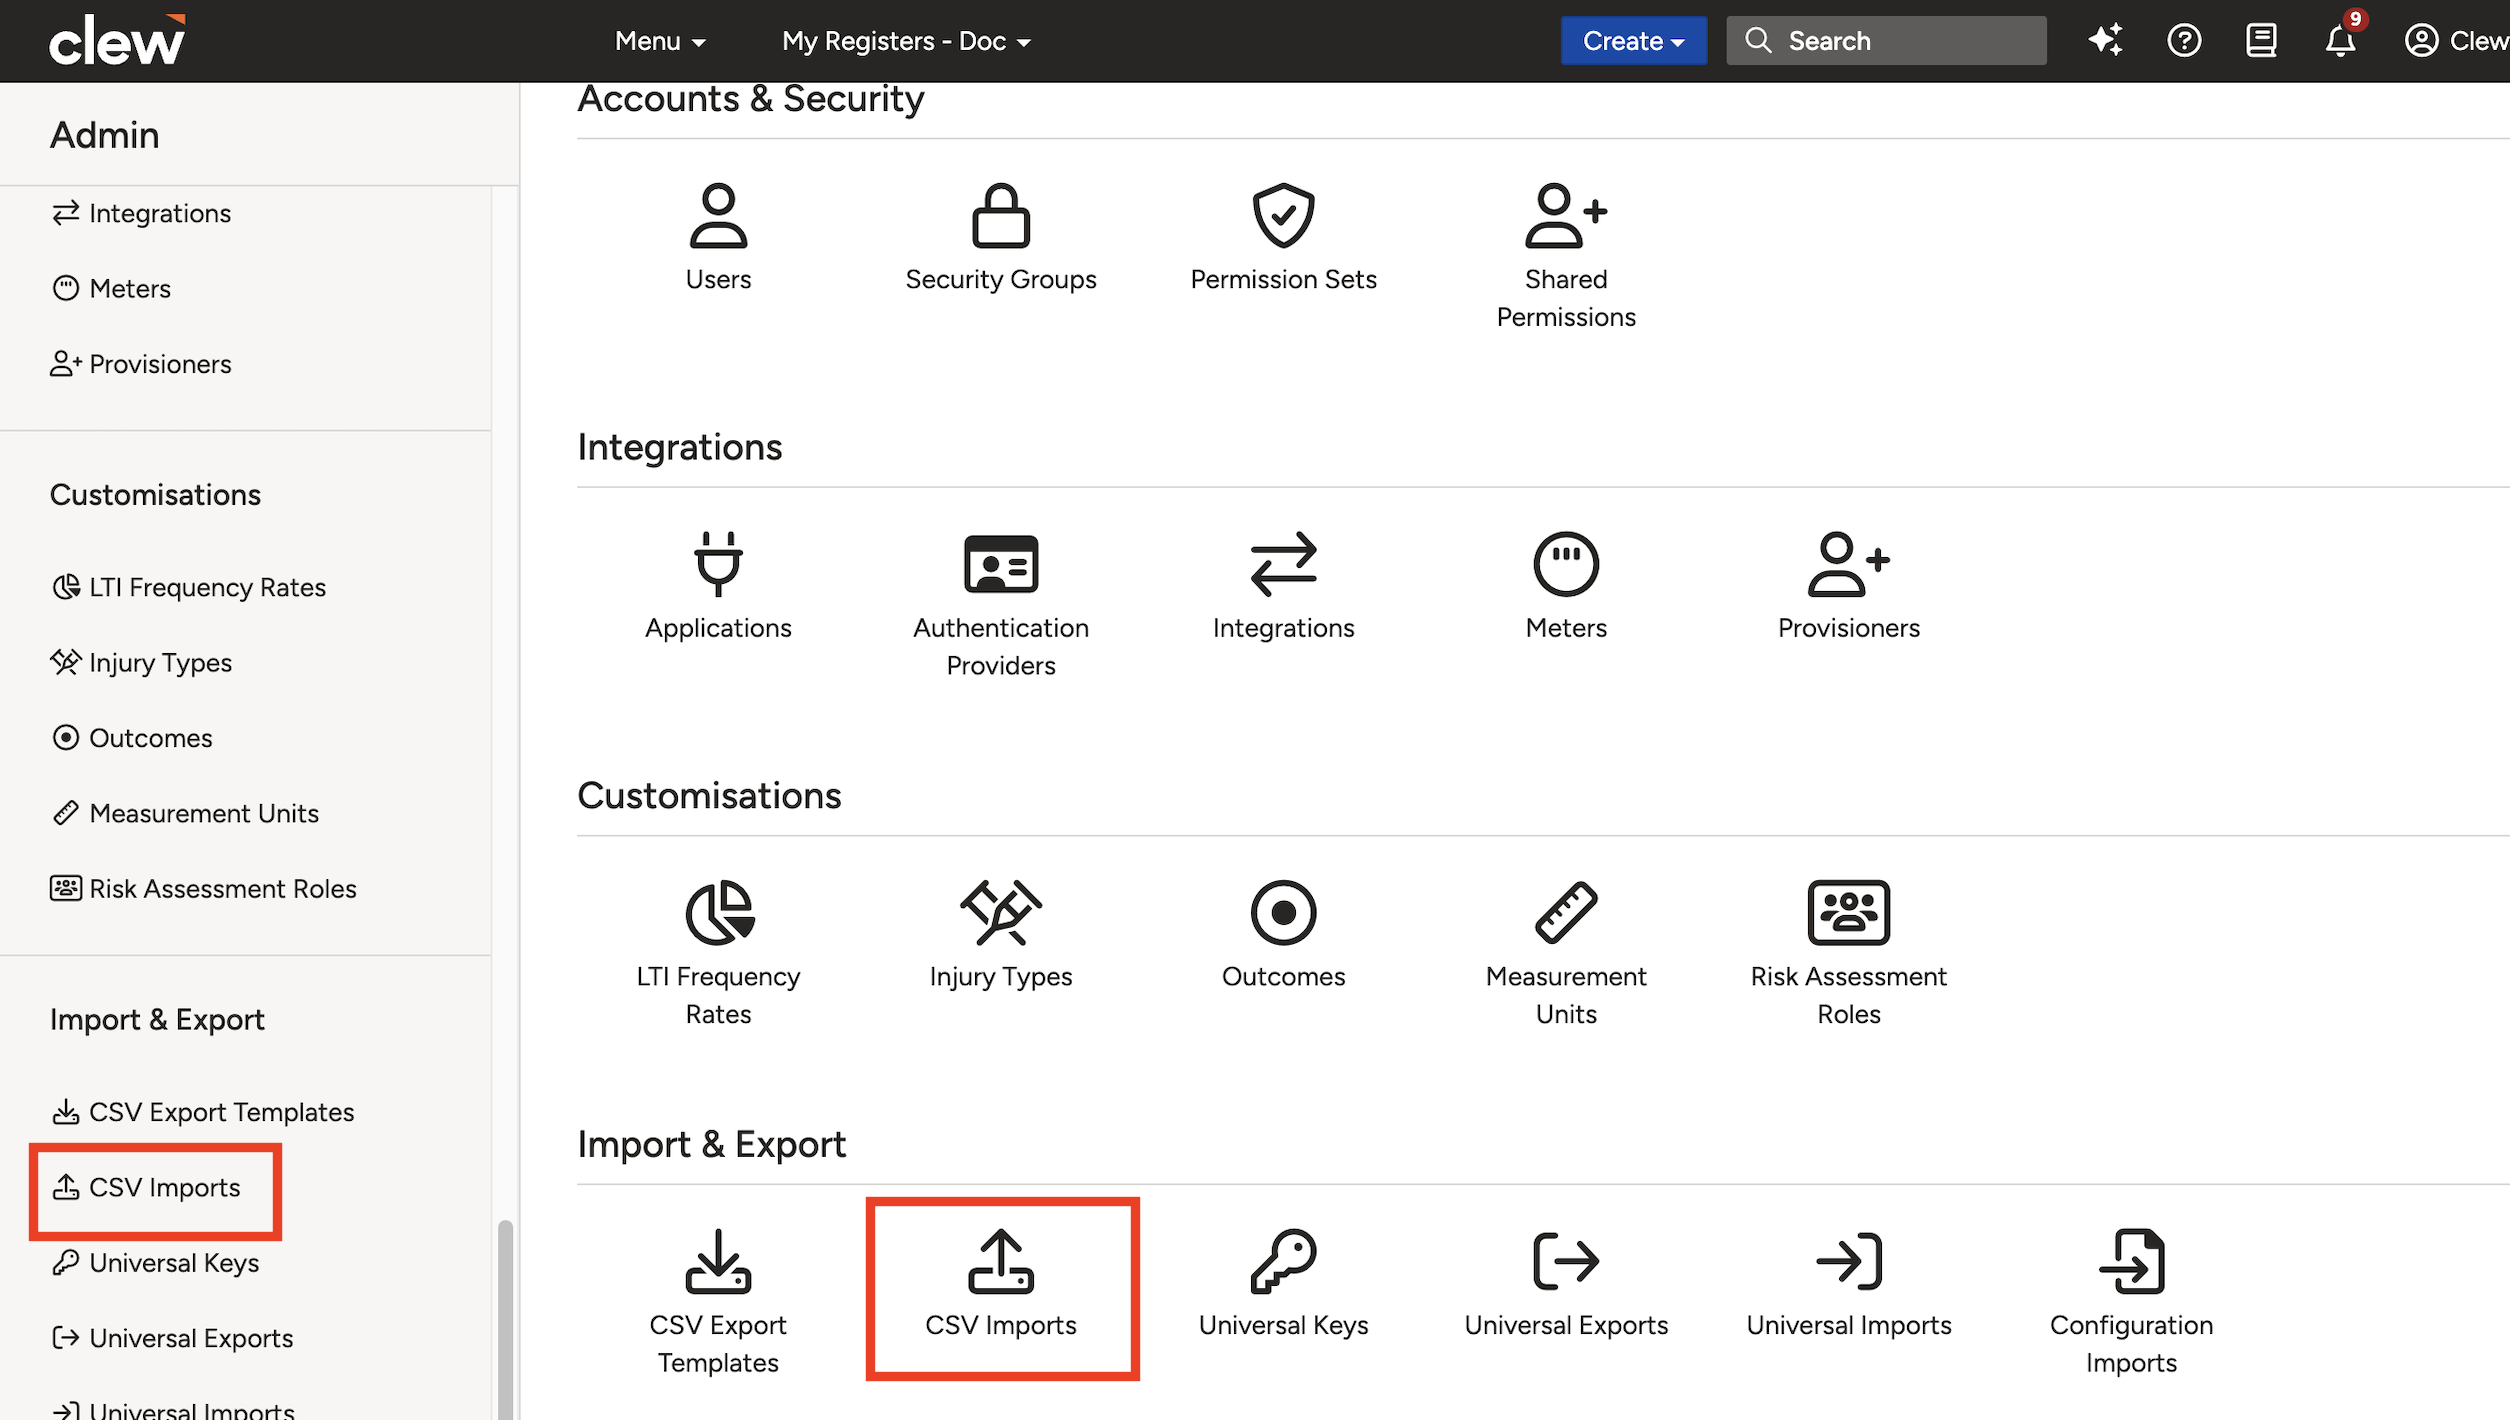
CSV Imports is found under the Import & Export section on the Admin page.
Creating New Records
Initiating a New Import
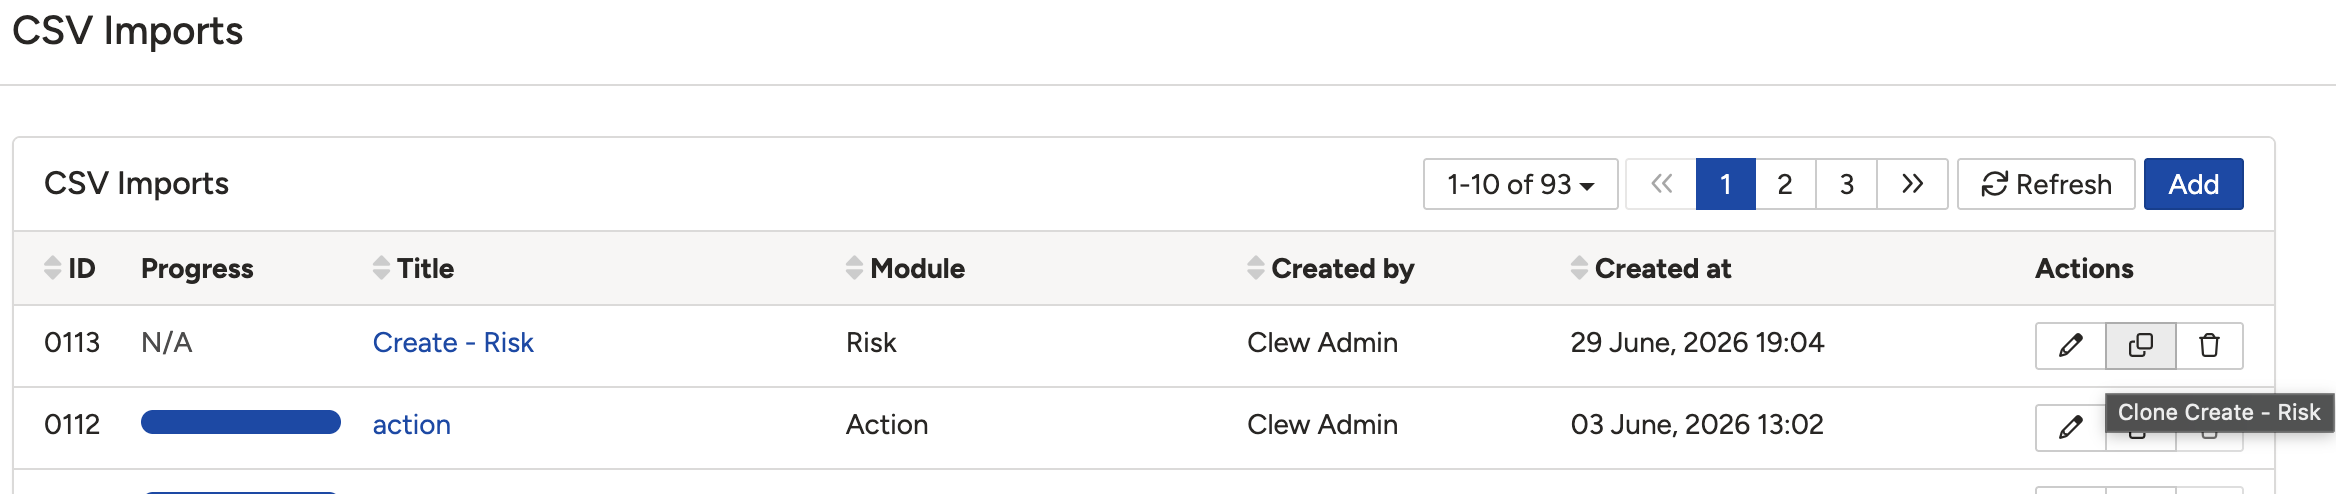
- Navigate to Admin > CSV Imports. This displays a list of all previous imports. From here you can also view, edit (title only), and clone existing imports.
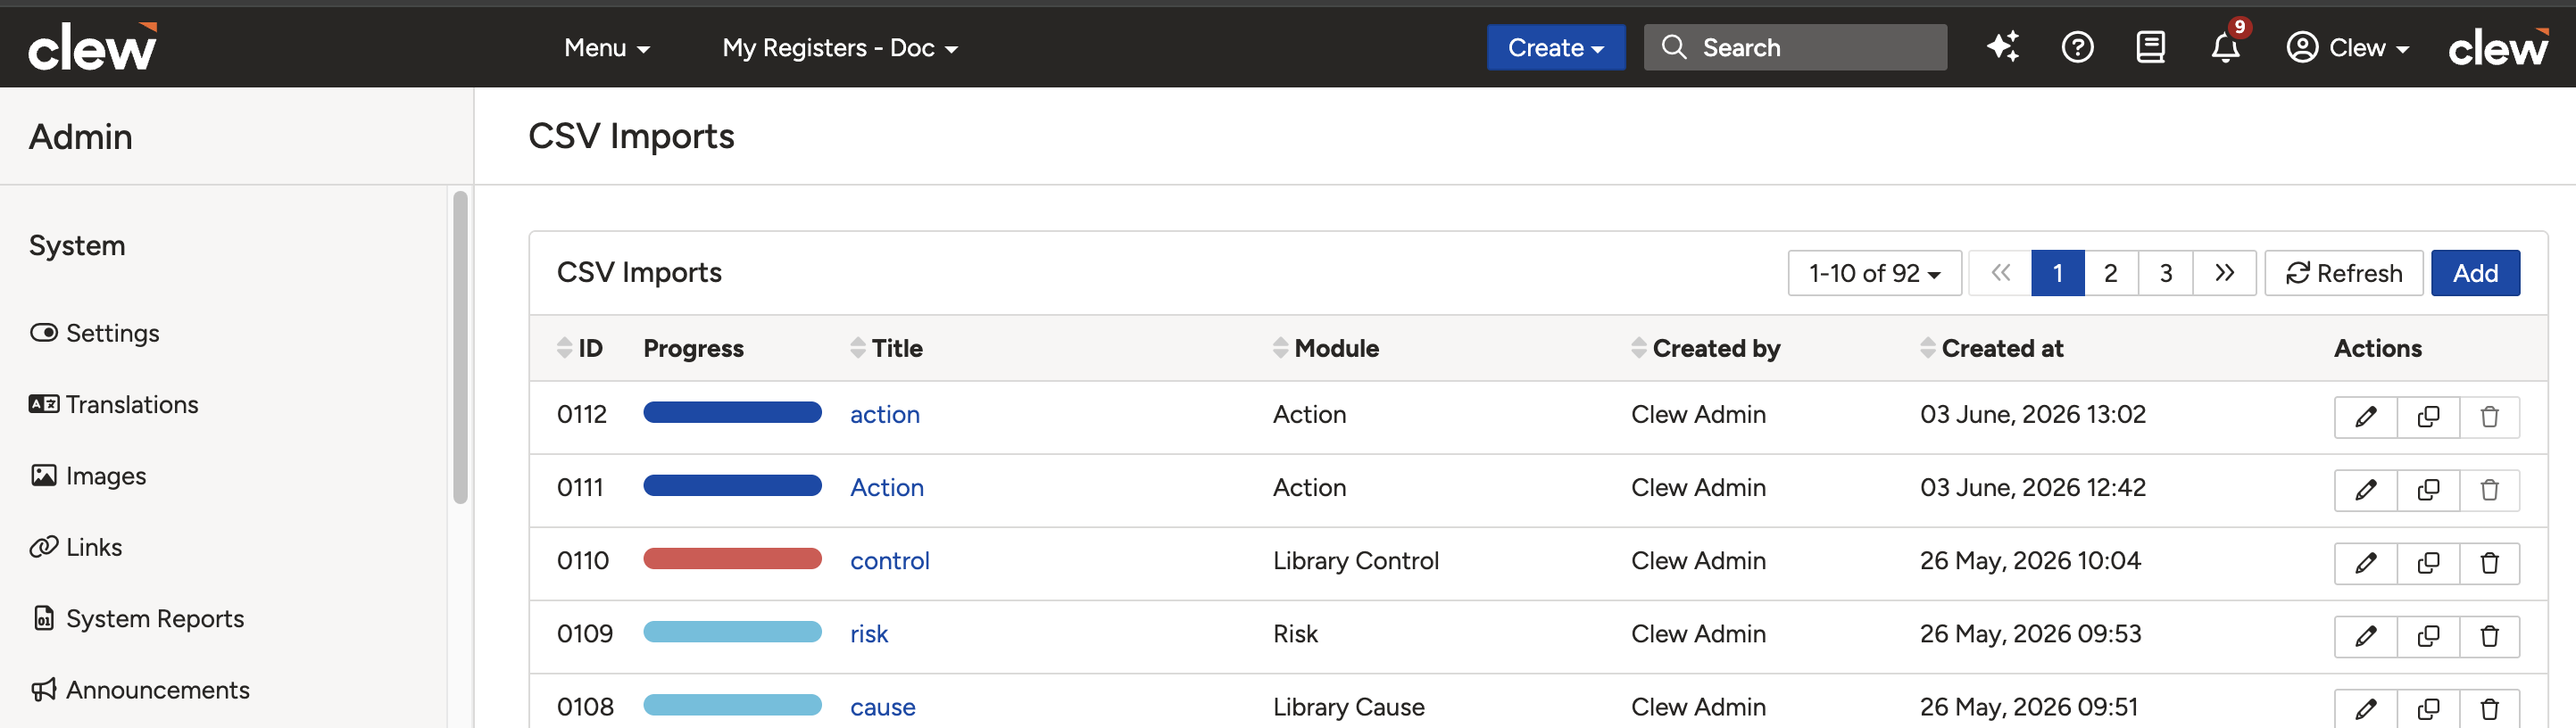
The CSV Imports list showing previous imports and the Add button.
- Click Add and give the import a clear, descriptive title. For example: Create - Strategic Risks - Test Register.
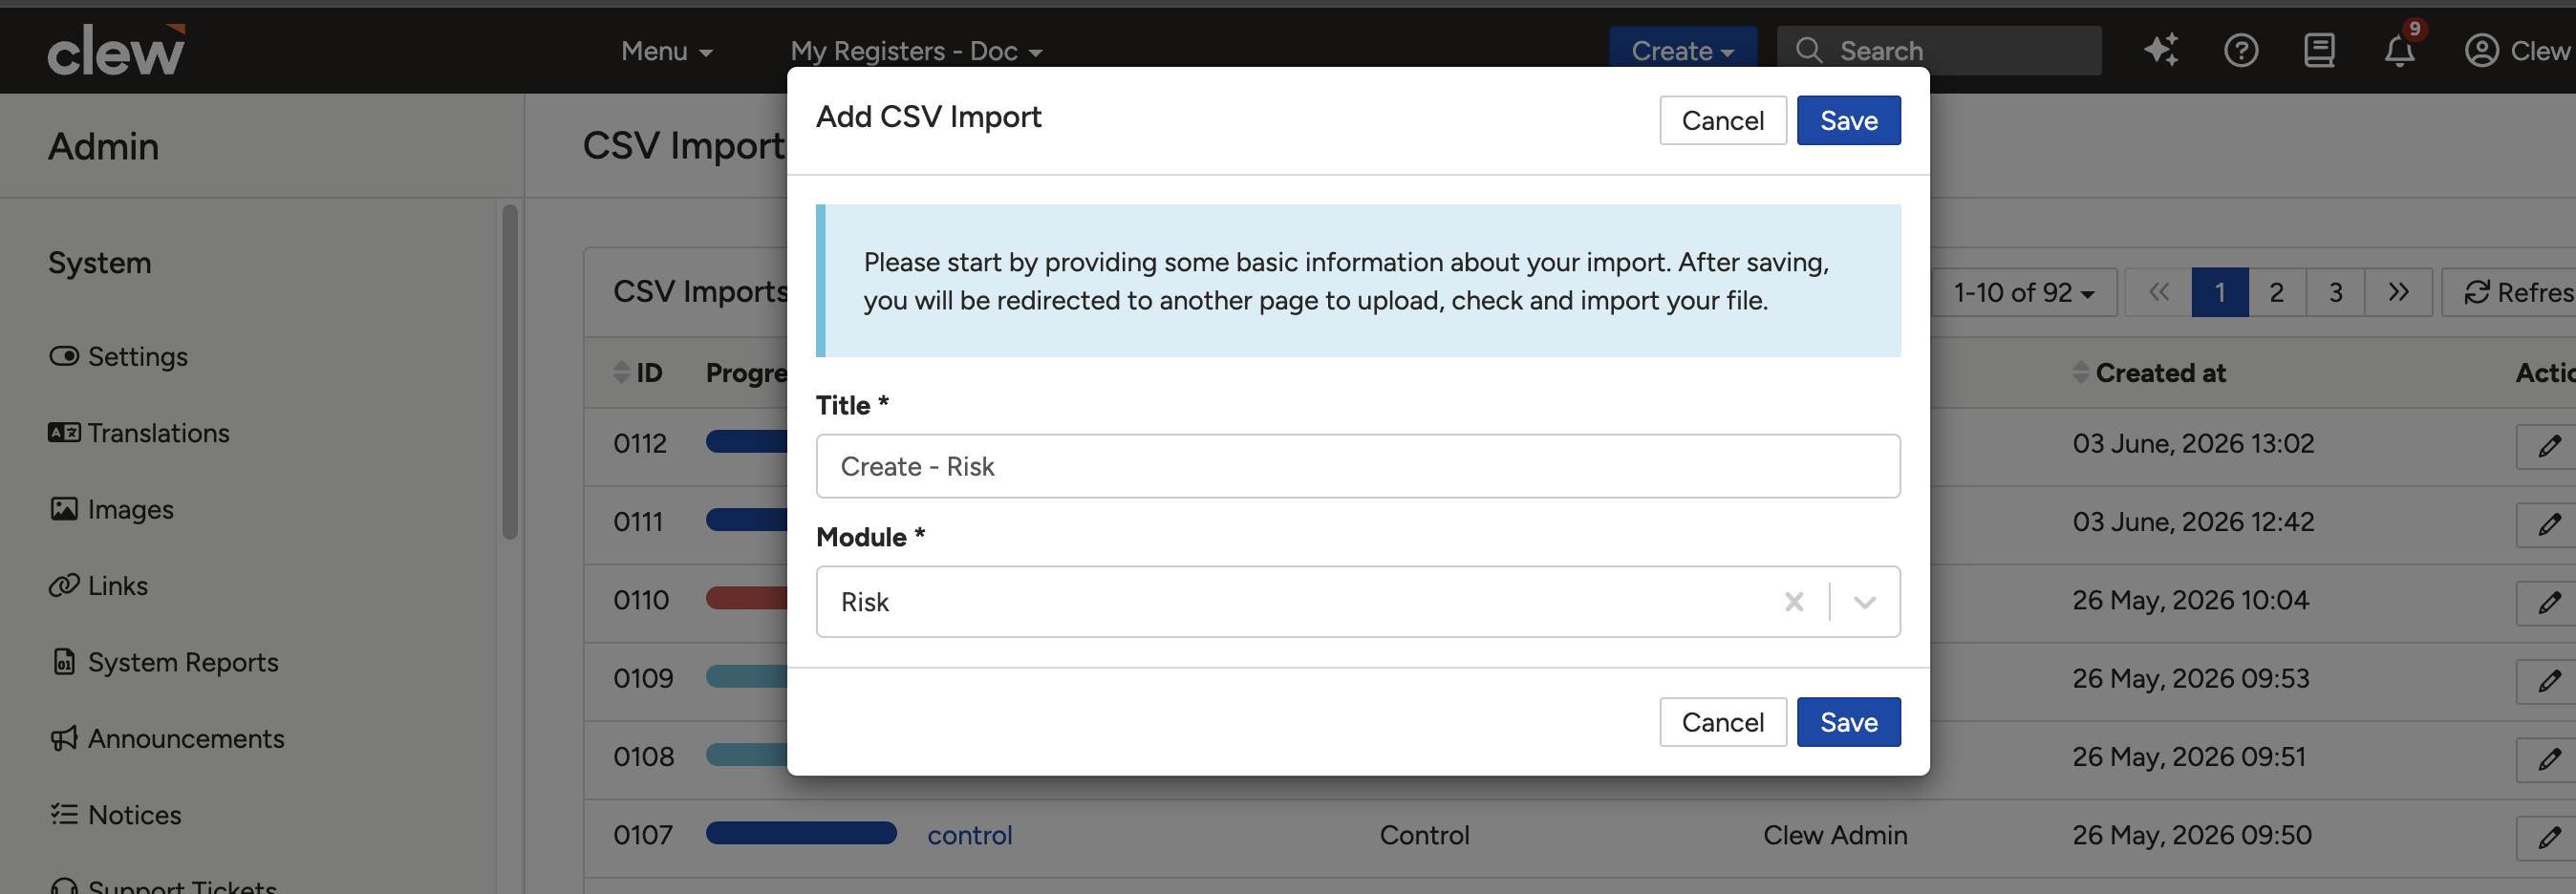
Give the import a clear title so it is easy to identify later.
- Select the module you are importing records into and click Save. You will be taken to the upload page.
Select the module before saving to proceed to the upload page.
Uploading Your CSV File
- On the upload page you will see options to download a template for the selected module. Click Upload and select your CSV file.
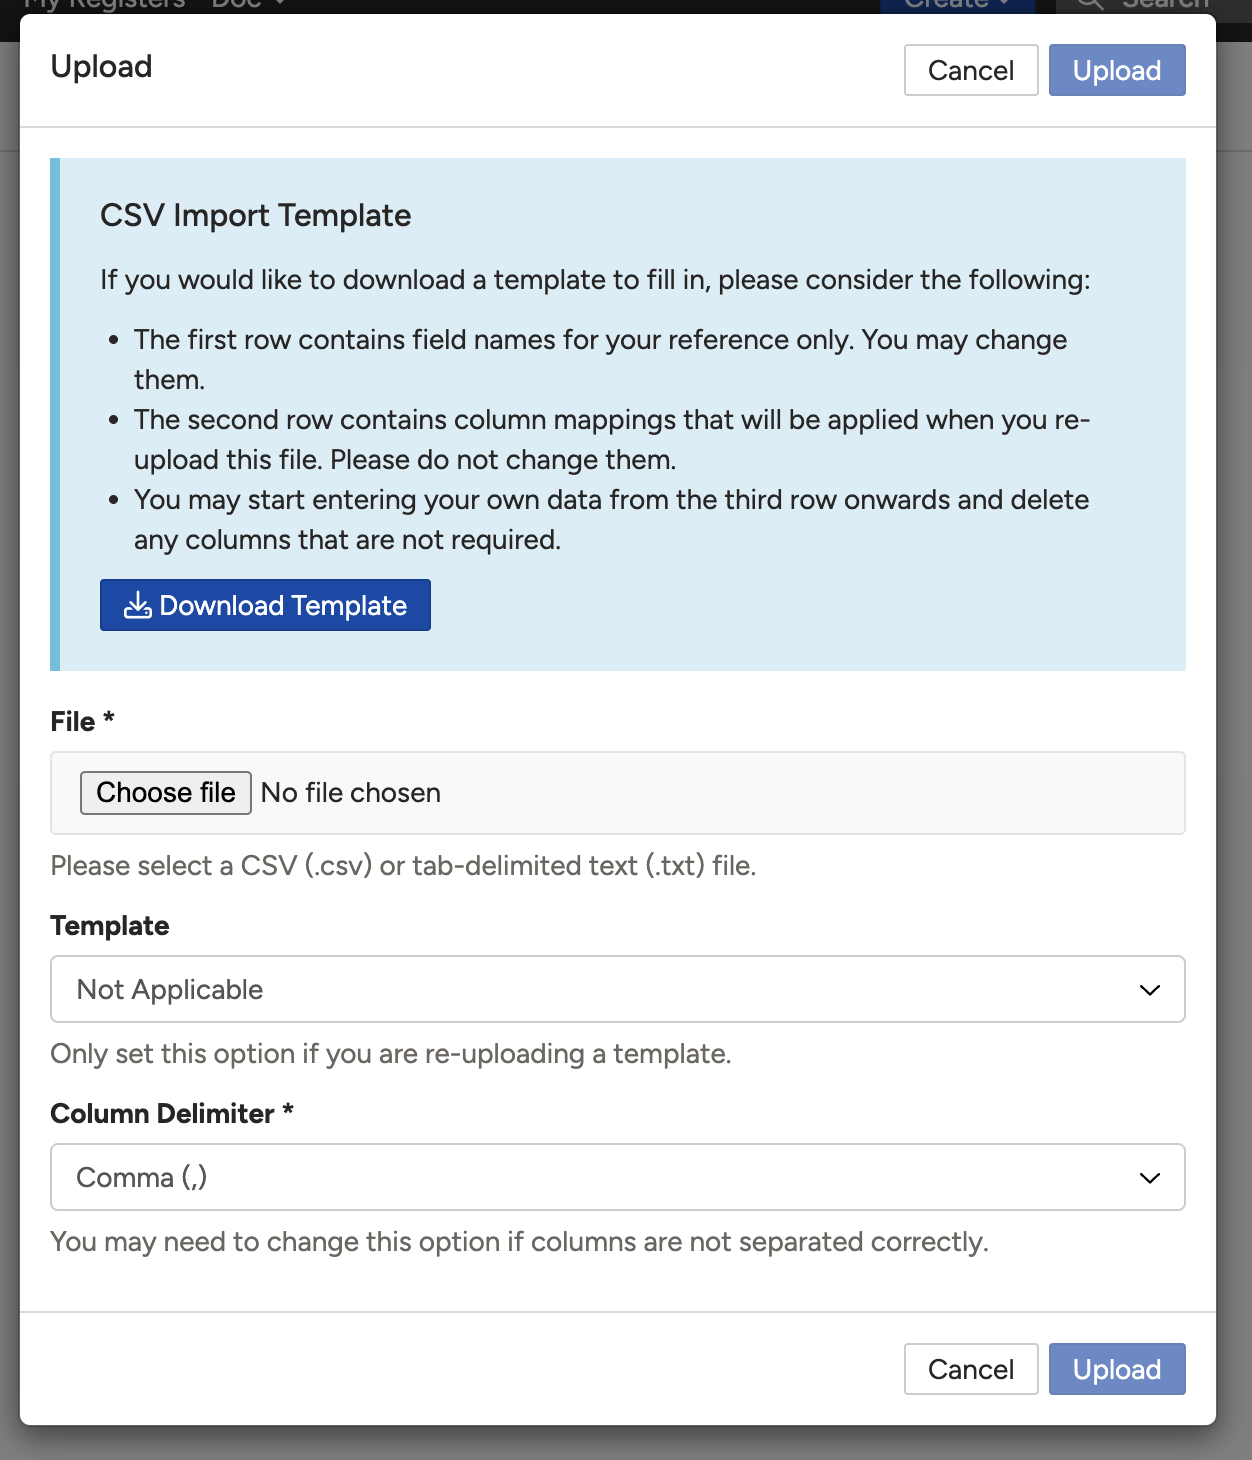
The upload form with template download, file upload, and delimiter options.
- The Template field is optional and only applies if you are using the template downloaded from this page.
- Select the correct Delimiter for your file. Available options are Comma, Pipe, Semicolon, and Tab. The delimiter defines the file format (e.g. a comma-separated CSV or a tab-separated TSV).
- Click Upload to proceed to field mapping.
Mapping Fields
- Click the Configure button to view and update the field mapping for your import.
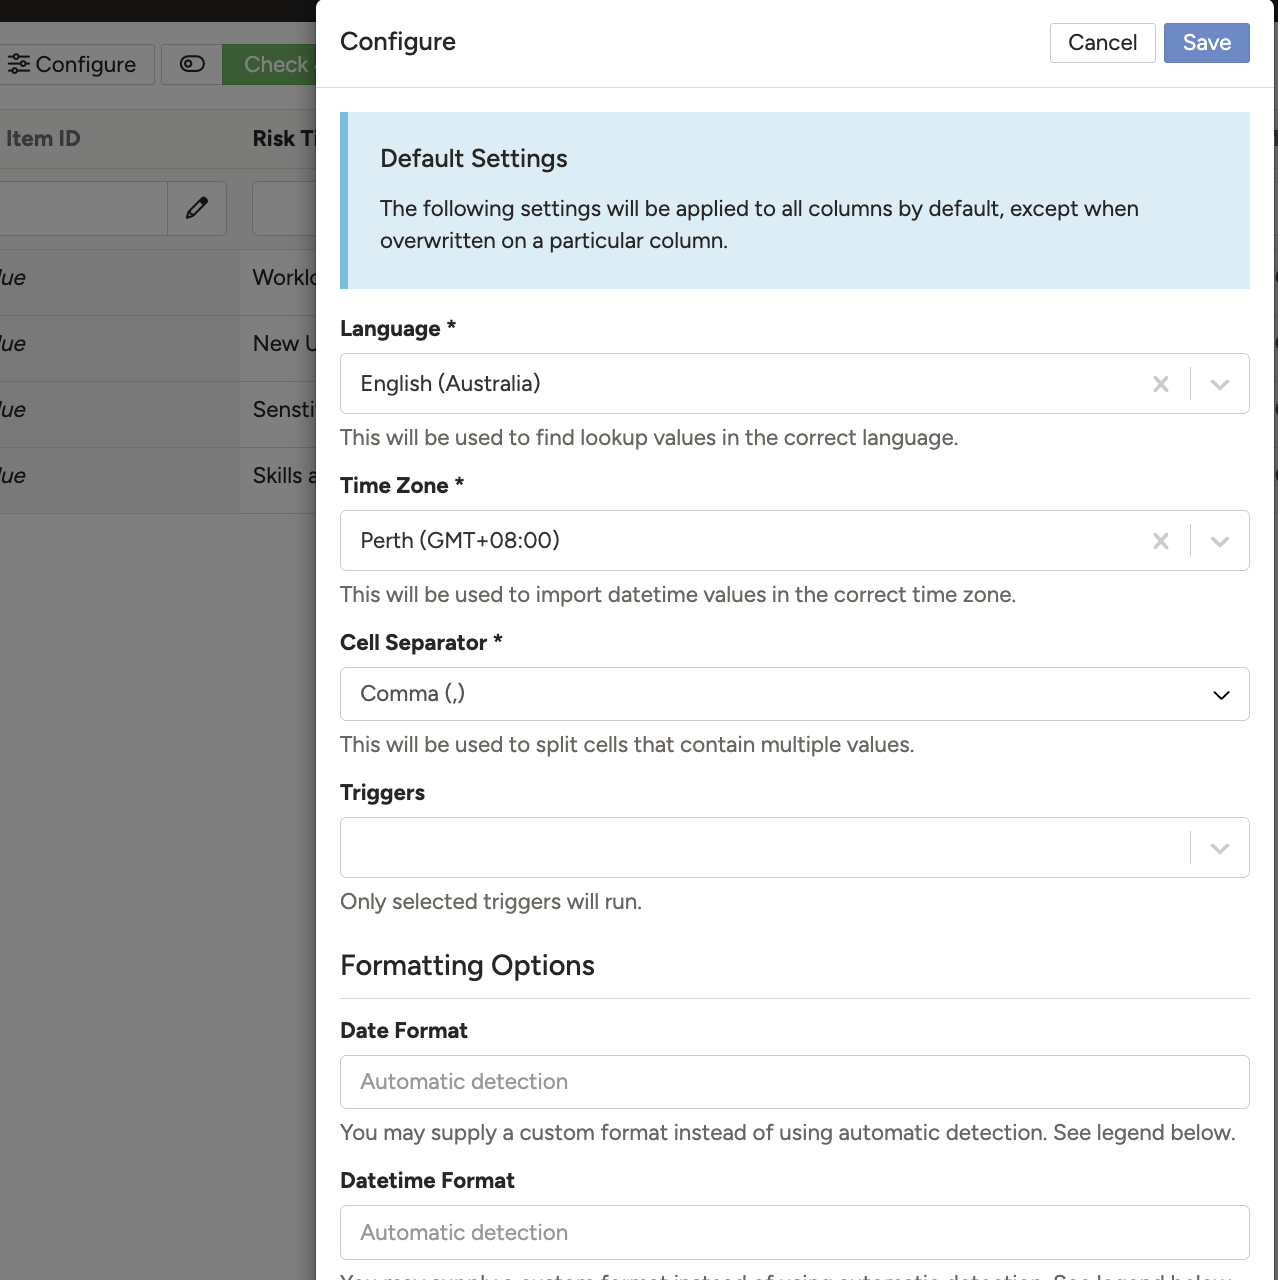
Click Configure to open the field mapping and import settings.
- The importer automatically tries to match your CSV columns to system fields. Columns it cannot match are shown with a grey background and will not be imported until manually mapped.

Unmapped columns appear with a grey background and will be skipped unless manually mapped.
- To map a column manually, click its column heading. Select the appropriate system field from the dropdown and click Save. Leave Skip blank cells unticked for new imports (it is only relevant when updating existing records).
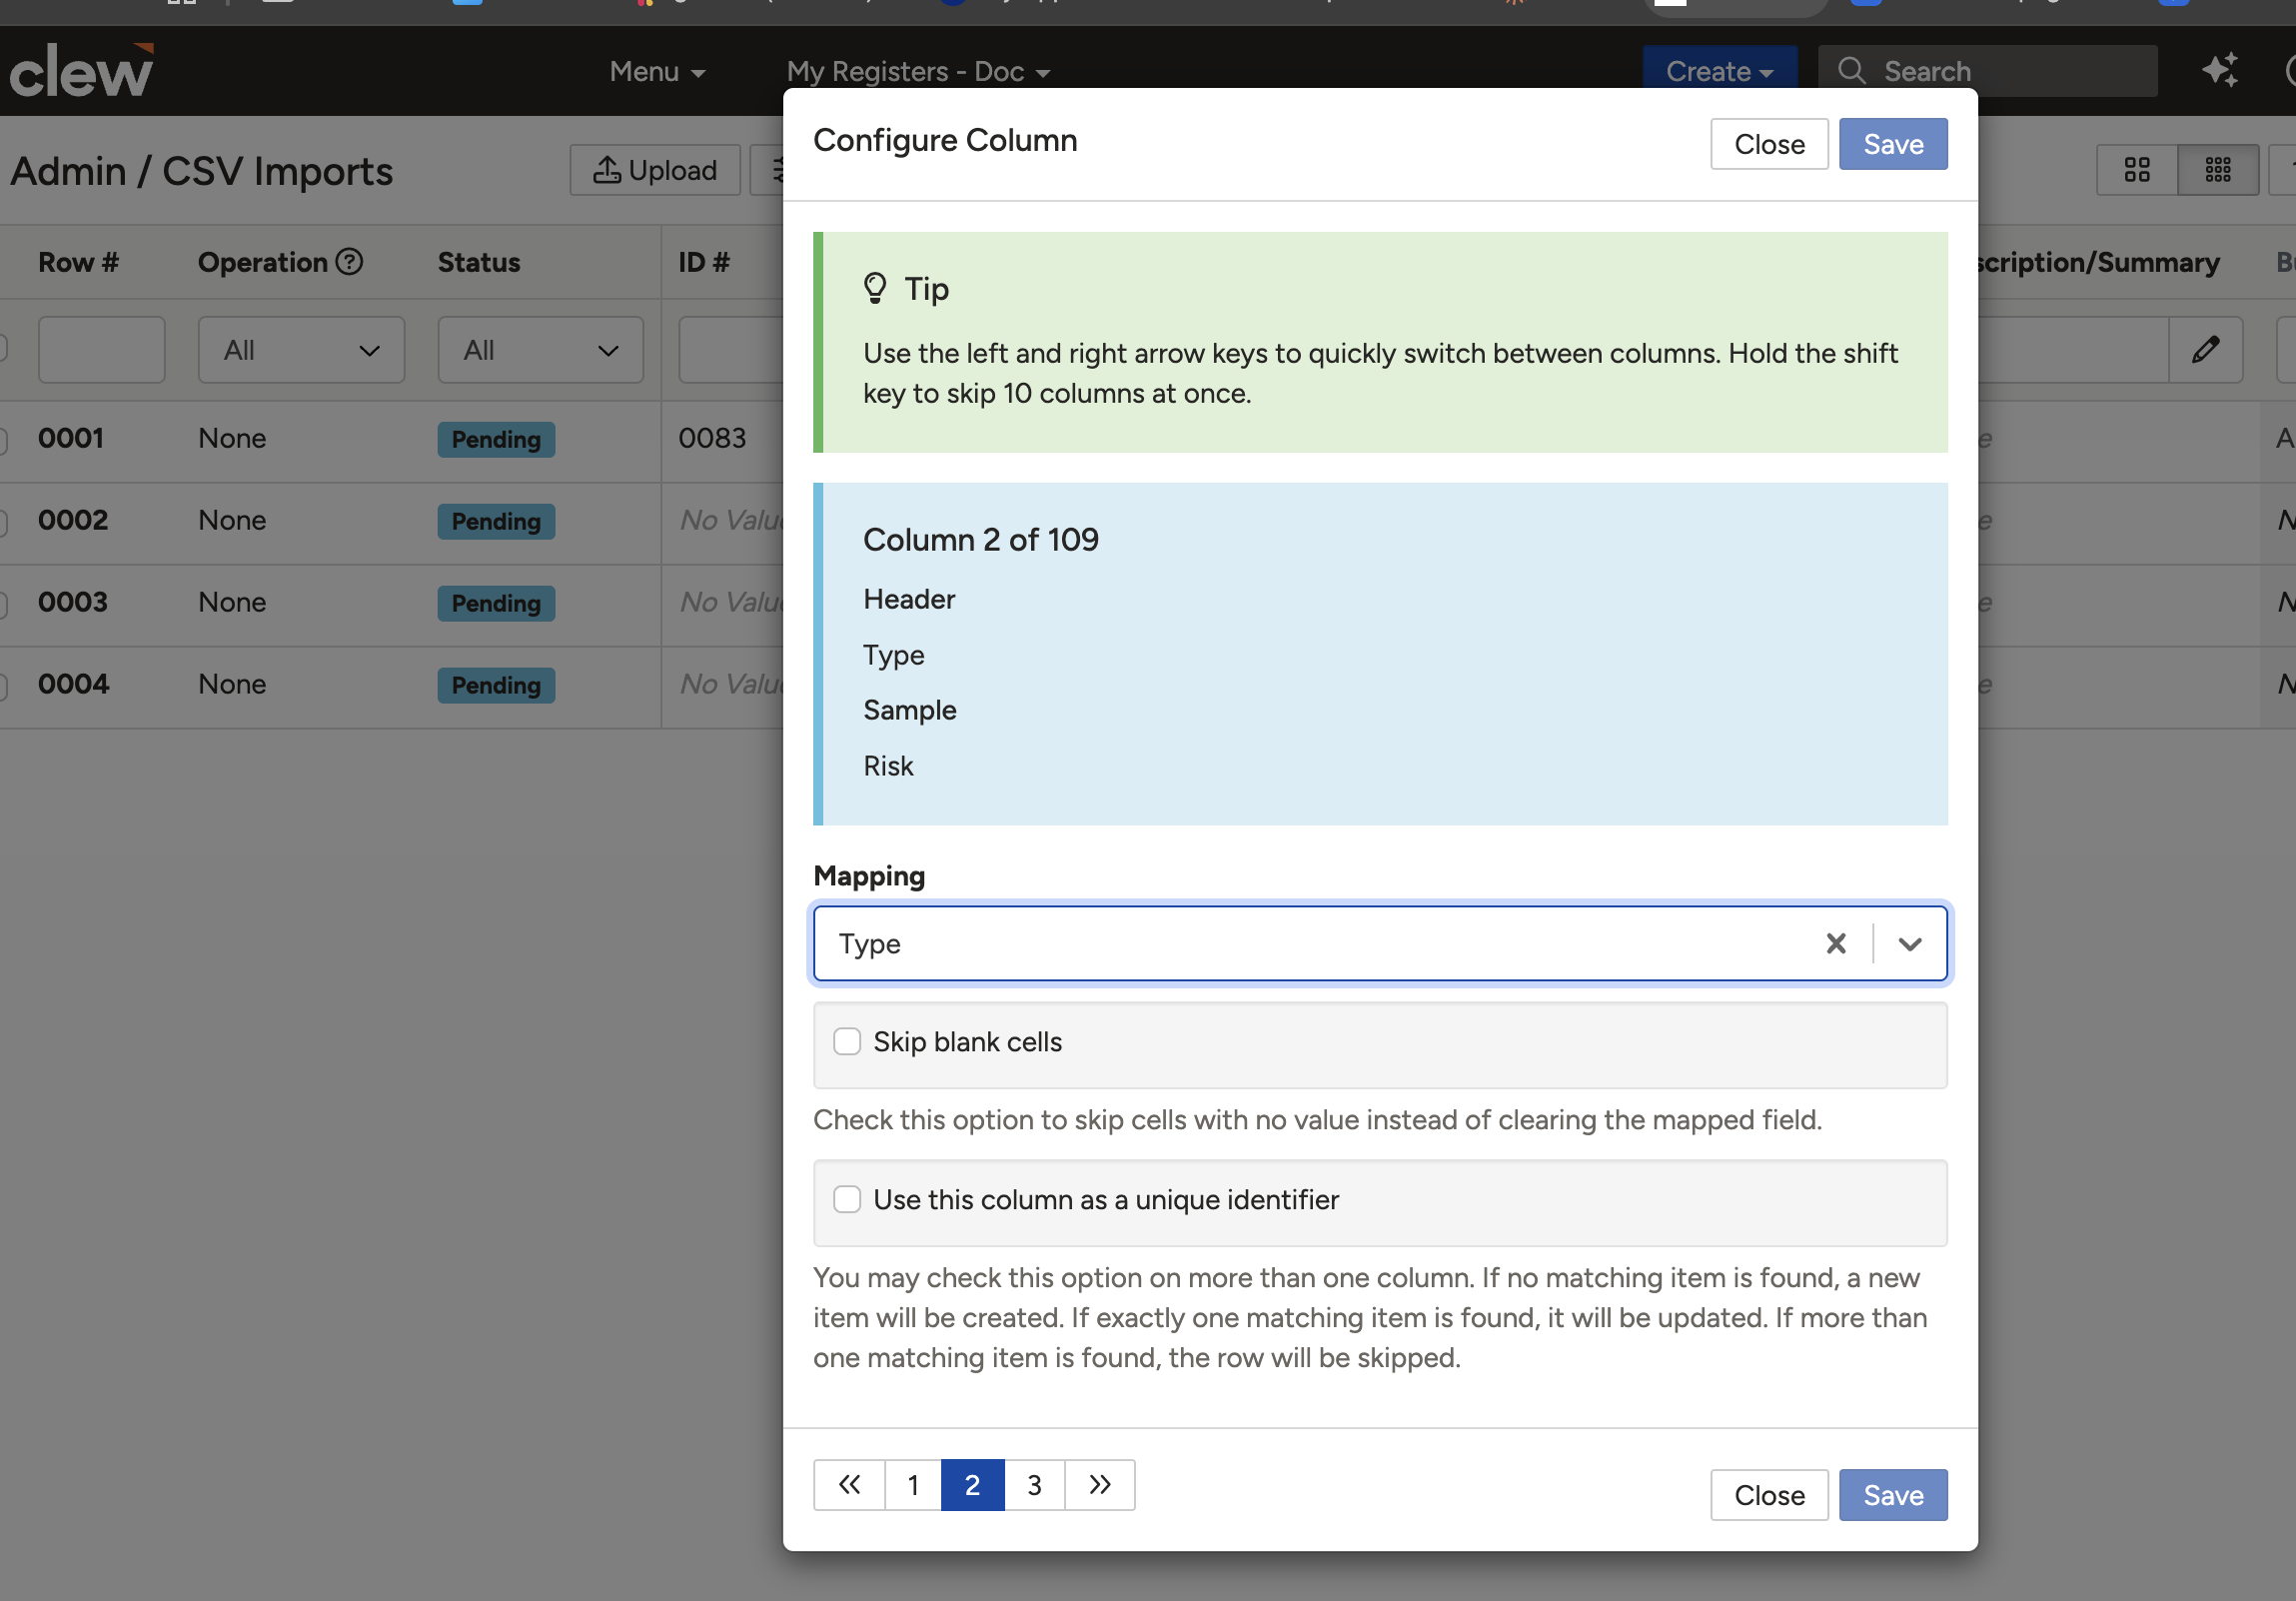
Select the correct system field for the column and save the mapping.
- Once mapped, the column will display with a white background and show the name of the system field it is mapped to.
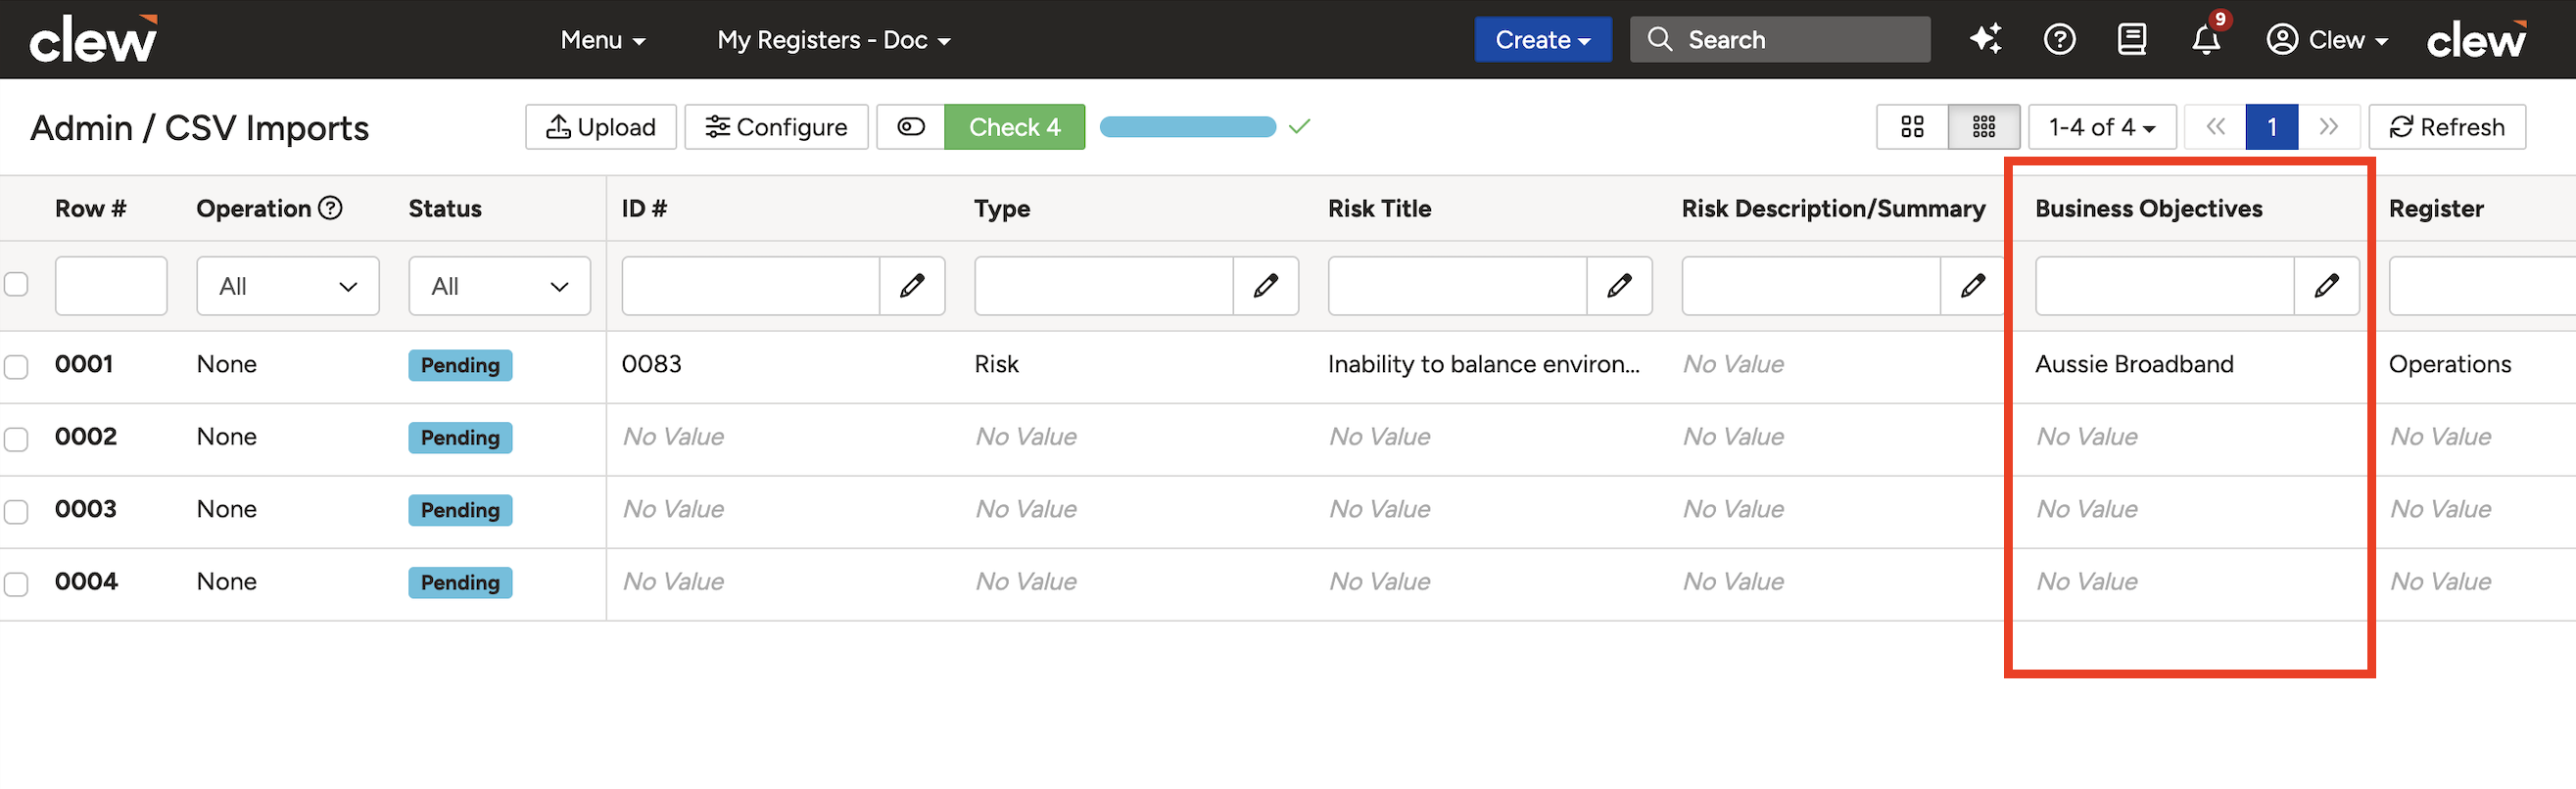
A successfully mapped column displays with a white background and the field name.
Handling Validation Errors
On the left side of the mapping screen you will see four system columns used to track and filter each row:
| Column | Description |
| Checkbox | Select specific rows to import or update rather than processing all rows. |
| Row # | The row number from your CSV file. This is not the system-generated ID that will be assigned to the record after import. |
| Operation | Updated after validation to show what action will be performed on that row (e.g. Create or Update). |
| Status | Pending: Awaiting validation. Valid: Passed validation and ready to import. Invalid: Contains critical errors and cannot be imported. Warning: Can be imported, but some fields contain issues and will be skipped. Imported: Successfully imported into the system. |
To validate and fix errors:
- Click the green Check button to run validation. The system checks every row and updates the Status column.
- Review the results. Hover over a status tag to see the detailed error message. Affected cells are highlighted in the grid.

Hover over a status tag to read the error detail. Affected cells are highlighted.
- To fix multiple rows at once, tick the checkboxes for the relevant rows and click the pencil icon next to the column heading. This lets you mass update the value across all selected rows.
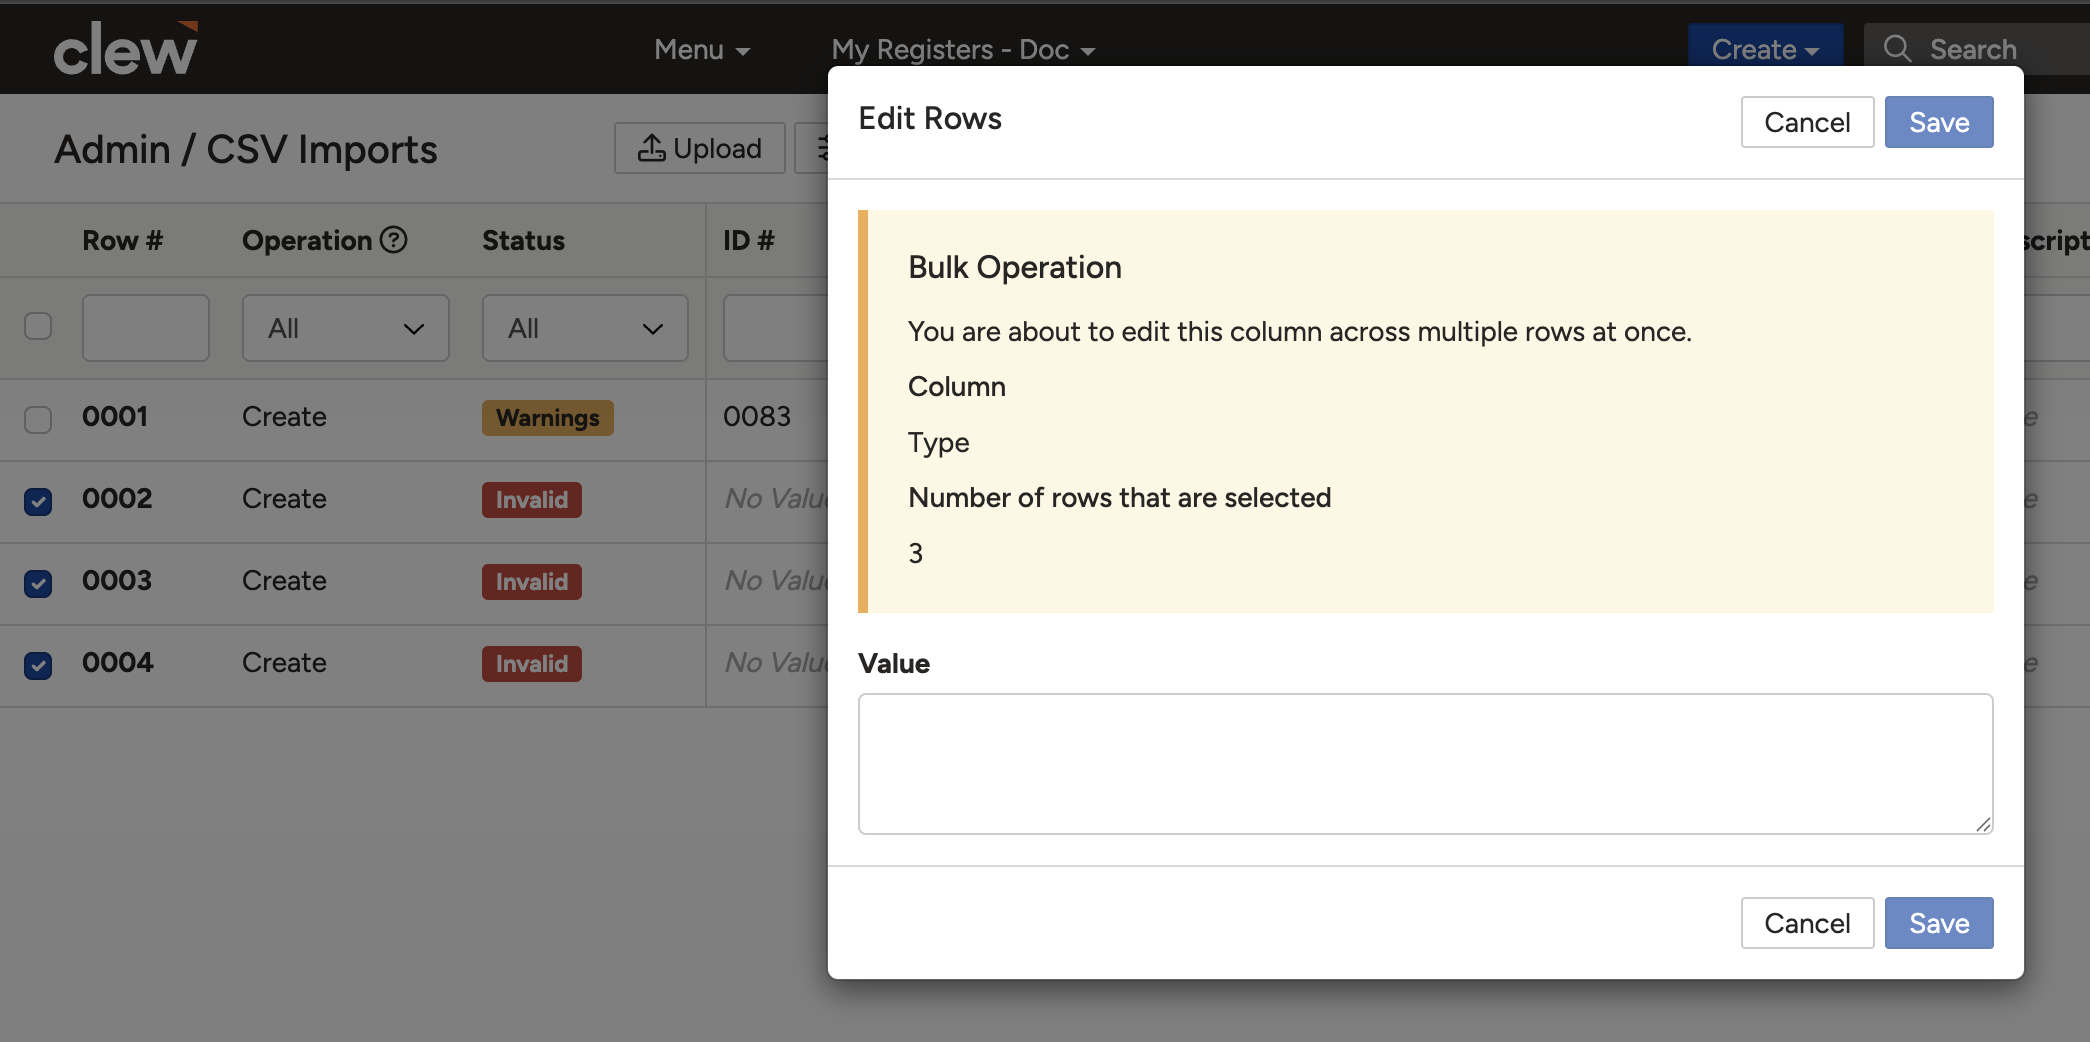
Select affected rows and use the pencil icon to mass update a value across all of them.
- Enter the correct values and click the green Check button again to re-validate.
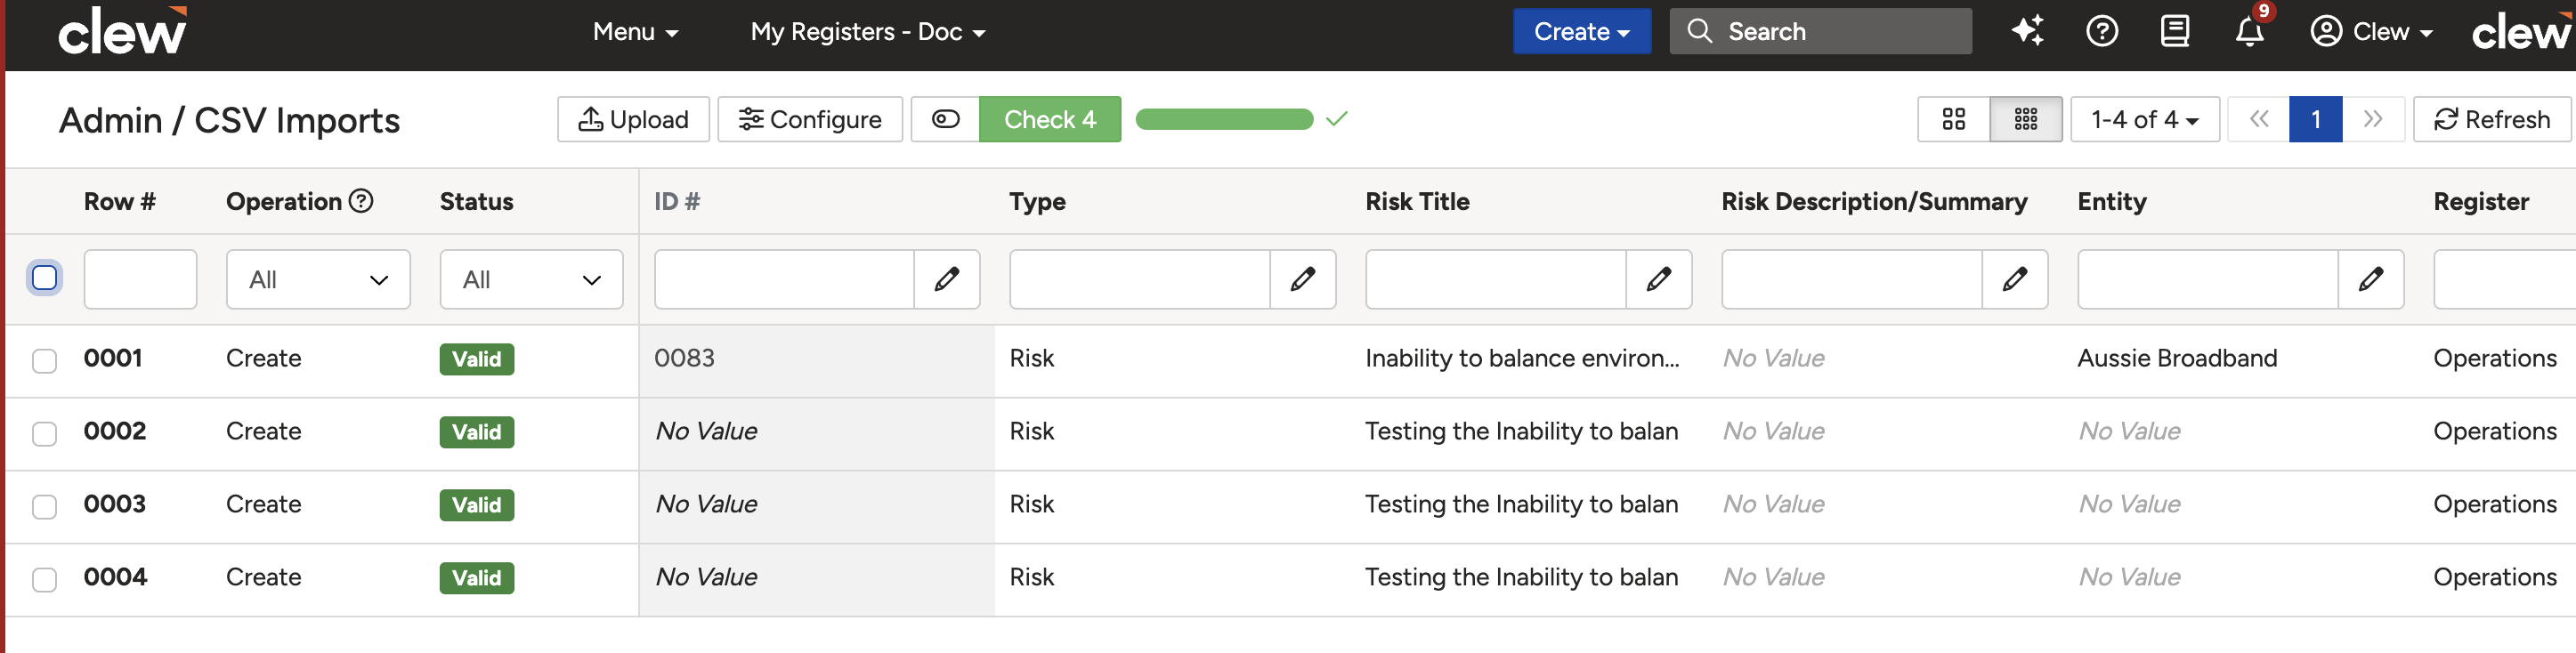
After correcting values, re-run the check to confirm rows are now valid.
Importing Records
- Once validation is complete, switch from Check Mode to Import Mode using the toggle.
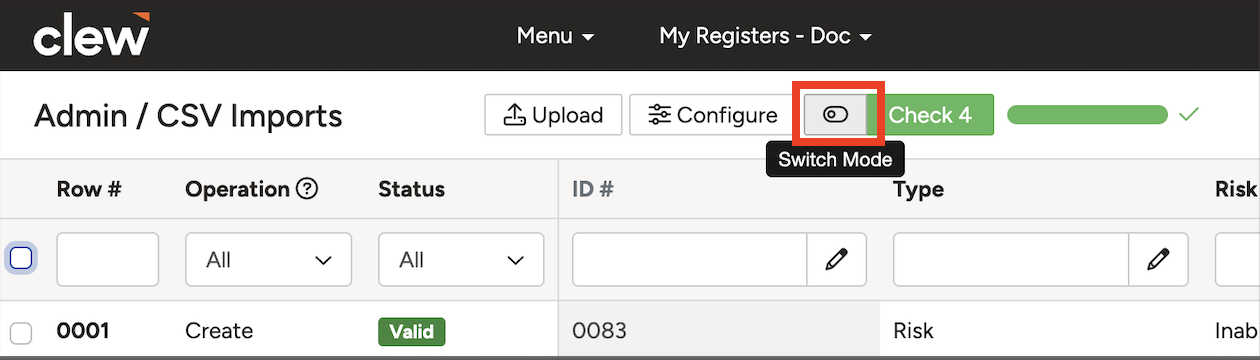
Switch to Import Mode before running the import.
- The button changes from green to blue and the label changes to Import. Click it to start the import.

The Import button appears in blue once Import Mode is active.
- Successfully imported records will appear as hyperlinks labelled Create in the Operation column. Click a link to open the newly created record in the platform.

Each imported row shows a Create link. Click it to open the record.
- Review the results. If clicking a link does not open the record, this usually means you do not have permission to view it. The import was still successful.
The results summary shows how many rows imported successfully and how many failed.
Updating Existing Records
Updating existing records follows the same process as creating new ones, with two key differences:
- Your CSV file must include a unique identifier for each record (typically the system ID or Title) so the platform can match each row to the right existing record.
- Mandatory fields are not required in the file. You only need the unique identifier and the specific fields you want to update. Make sure the identifier matches the existing record exactly to avoid update failures or unintended duplicates.
Steps to update existing records:
- Initiate a new import and upload the CSV file as described above.
- In the field mapping screen, confirm all columns are correctly mapped. The example below shows an update to the title, register, and review date of an existing risk.

Example update import with title, register, and review date columns mapped.
- Click the heading of the column you want to use as the unique identifier (e.g. ID or Title). Tick the Unique Identifier checkbox and click Save. A chain-link icon will appear on that column heading to confirm it has been set as the identifier.
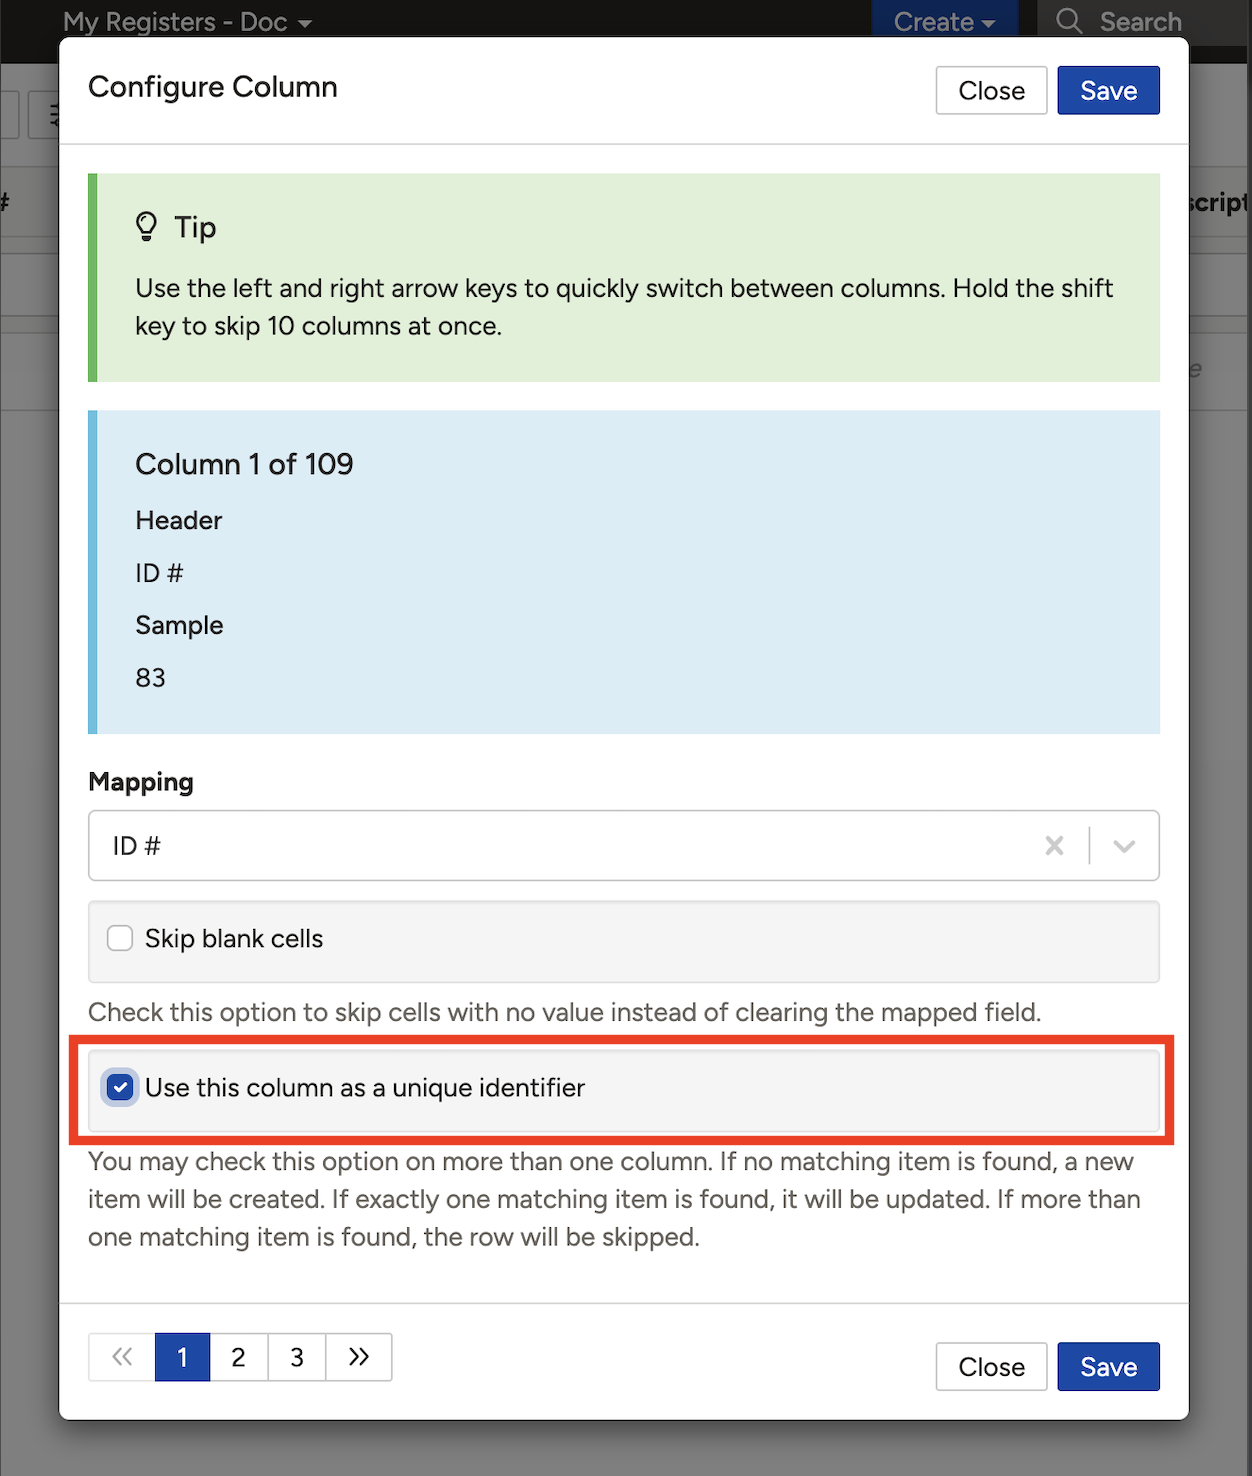
A chain-link icon on the column heading confirms it is set as the unique identifier.
- Click the green Check buttonto validate. Hover over each status tag to see the detail. The possible outcomes are:
- Valid: Ready to import.
- Warning: Will import, but the affected cell (highlighted yellow) will be skipped. Common causes include spelling errors or multiple values in a single-value field.
- Invalid: Cannot be imported. This usually occurs when more than one matching record exists, or the record cannot be found and must be created with additional required fields.

Validation results showing row statuses for an update import.
- Resolve all warnings and invalid rows, then re-run the check. Once all rows are valid, switch to Import Mode and click Import.

Switch to Import Mode and click Import once all rows are valid.
- Successfully updated records appear as Update links in the Operation column. Click a link to open the updated record and verify the changes.

Updated rows show an Update link in the Operation column. Click it to open the record and verify the changes.
5. Common Issues & Troubleshooting
| Issue | Likely Cause | Solution |
| CSV Imports not visible in Admin | The feature has not been enabled for your organisation | Contact Clew support to request the CSV Import feature be enabled. |
| Columns showing grey after upload | The importer could not auto-match those column headings to system fields | Click each grey column heading and manually select the correct system field from the dropdown. |
| Rows marked as Invalid | Missing required fields, typos, or unexpected characters in the data | Hover over the status tag for the specific error. Common issues include missing Type, Register, or Title fields; spelling errors in lookup values; and leading or trailing spaces. Fix in the importer using the mass update tool, or correct the source file and re-upload. |
| Free-text fields splitting into multiple values unexpectedly | The Cell Separator character appears inside the field content | Change the Cell Separator to a character that does not appear in your data, such as a pipe (|) or semicolon (;). |
| Update import row shows Invalid with no matching record found | The unique identifier value does not exactly match an existing record | Check for spelling differences, extra spaces, or case mismatches between the CSV value and the value stored in the platform. Correct the CSV file and re-upload. |
| Clicking a Create or Update link shows no record | The current user does not have permission to view that record | The import was still successful. Ask a user with the appropriate permissions to verify the record exists in the system. |
Best practices:
- Before importing, review your CSV file for completeness. Check that required fields are populated, values match the platform's expected format, and there are no extra spaces or special characters.
- Always run the check pass and resolve all errors before switching to Import Mode. Imports cannot be undone.
- For large imports, test with a small batch first to confirm the mapping and format are correct before importing the full file.
- When importing nested records (e.g. Audits and Findings), always import the parent records first and use the platform-assigned IDs to link the child records in the second import.
- Use descriptive import titles (e.g. Create - Strategic Risks - Q2 2025) so previous imports are easy to identify if you need to refer back to them.
Was this article helpful?
That’s Great!
Thank you for your feedback
Sorry! We couldn't be helpful
Thank you for your feedback
Feedback sent
We appreciate your effort and will try to fix the article