Add Registers
What registers are, why they matter, and how to create and configure them in the Clew Platform
Contents
- 1. Introduction & Context
- 2. Key Features & Functions
- 3. Requirements
- 4. Step-by-Step Guide
- 5. Common Issues & Troubleshooting
- 6. Related Articles
1. Introduction & Context
A register is a structured repository that organises and stores your data in the Clew Platform, much like a folder, so records can be categorised, retrieved efficiently, and protected with the right permissions.
The Registers section in Admin allows you to define the registers against which modules can be recorded. Registers work like folders and can be set up in a hierarchy, with child registers sitting under a parent. For example, an organisation might have a parent register for each division, with child registers for each department underneath, so risks and other records can be captured at the right level of the business.
Registers also provide robust permission management, ensuring sensitive information is accessible only to authorised individuals.
Who is it for? System Administrators who set up and manage the register structure for their organisation.
What does it impact? Registers determine how records are organised across modules and who can access them. Settings such as auto rollup and cascade policies affect how data is displayed on parent registers and how security group permissions are applied.
2. Key Features & Functions
- Structured data storage: registers act like folders, categorising records so they are easy to organise and retrieve.
- Hierarchy: registers can be nested under a parent register to mirror your organisational structure.
- Permission management: access to a register and its data is controlled through security groups, so sensitive information is only visible to authorised users.
- Auto rollup: optionally display all of a child register's information on its parent register page.
- Cascade policies: automatically apply the permission sets from the parent register's security groups to a new child register at creation.
- Library display: optionally show a register as a link under the Library menu on the top bar.
3. Requirements
- You must have admin access to reach the Registers section on the Admin page.
- To use the Sensitivity field, the sensitivity feature must be enabled for your organisation, and levels above the default must be assigned to users via Admin > User > Sensitivity.
- To use the Business Objective field, the Business Objective module must be in use and configured.
- The fields available on the register form depend on your organisation's configuration, so you may see additional fields not covered in this article.
4. Step-by-Step Guide
Creating a Register
- Click Registers in the left bar of the Admin page. This takes you to the list of registers already available in the application.
- Click Add.
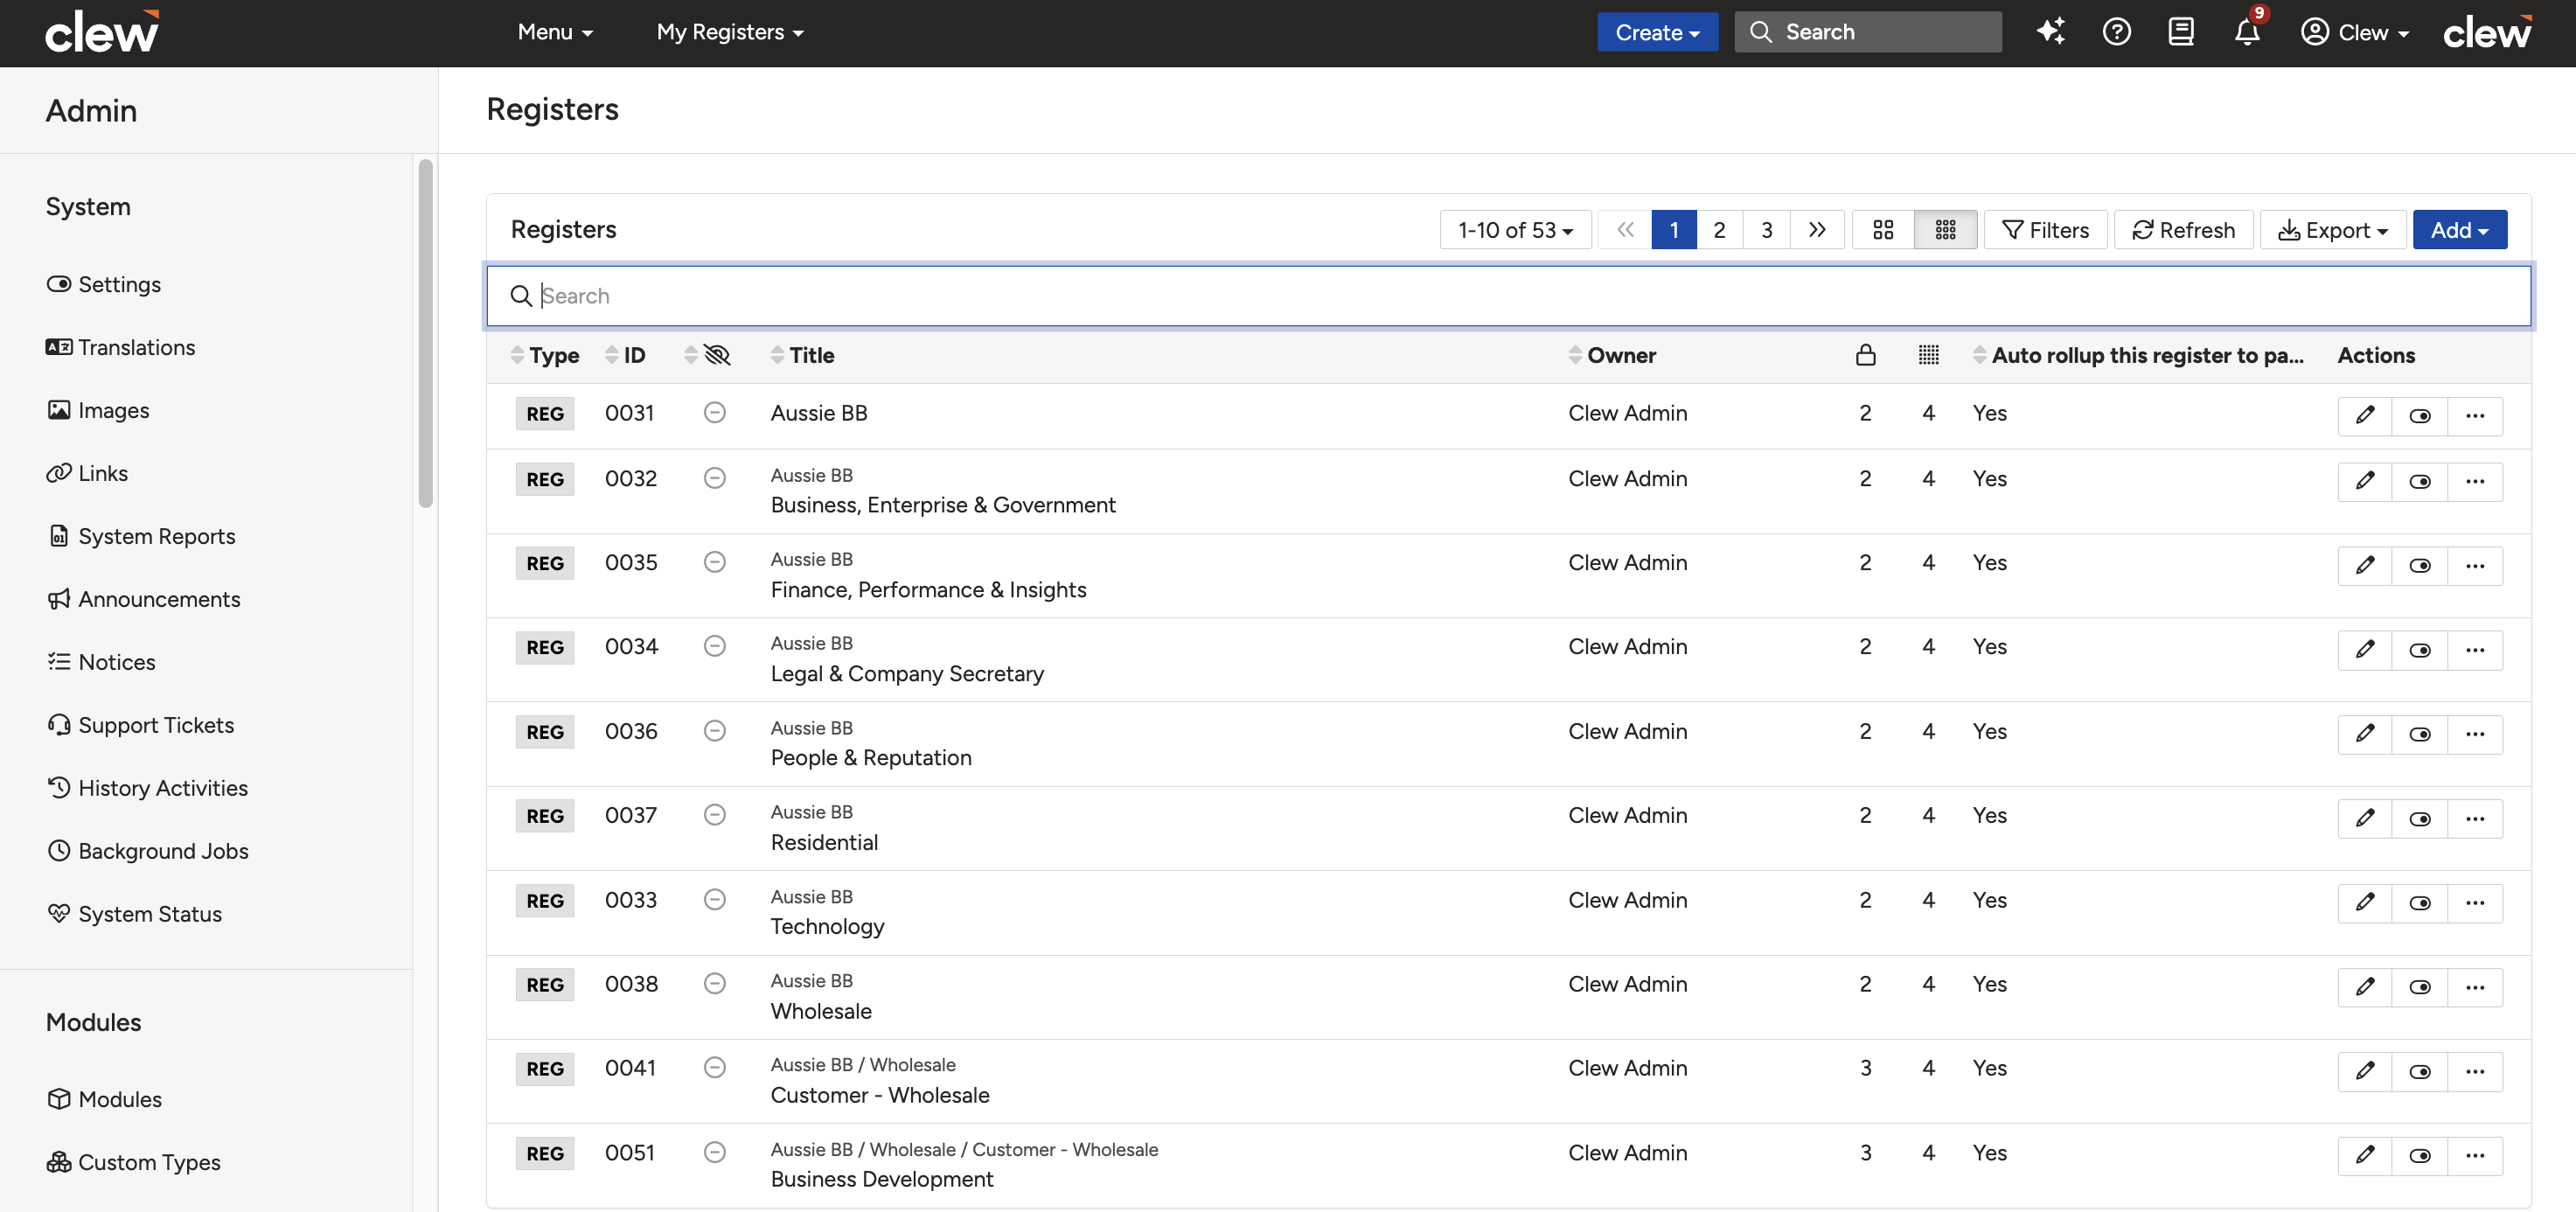
The Registers list in Admin. Click Add to create a new register.
- Complete the form using the field reference table below.
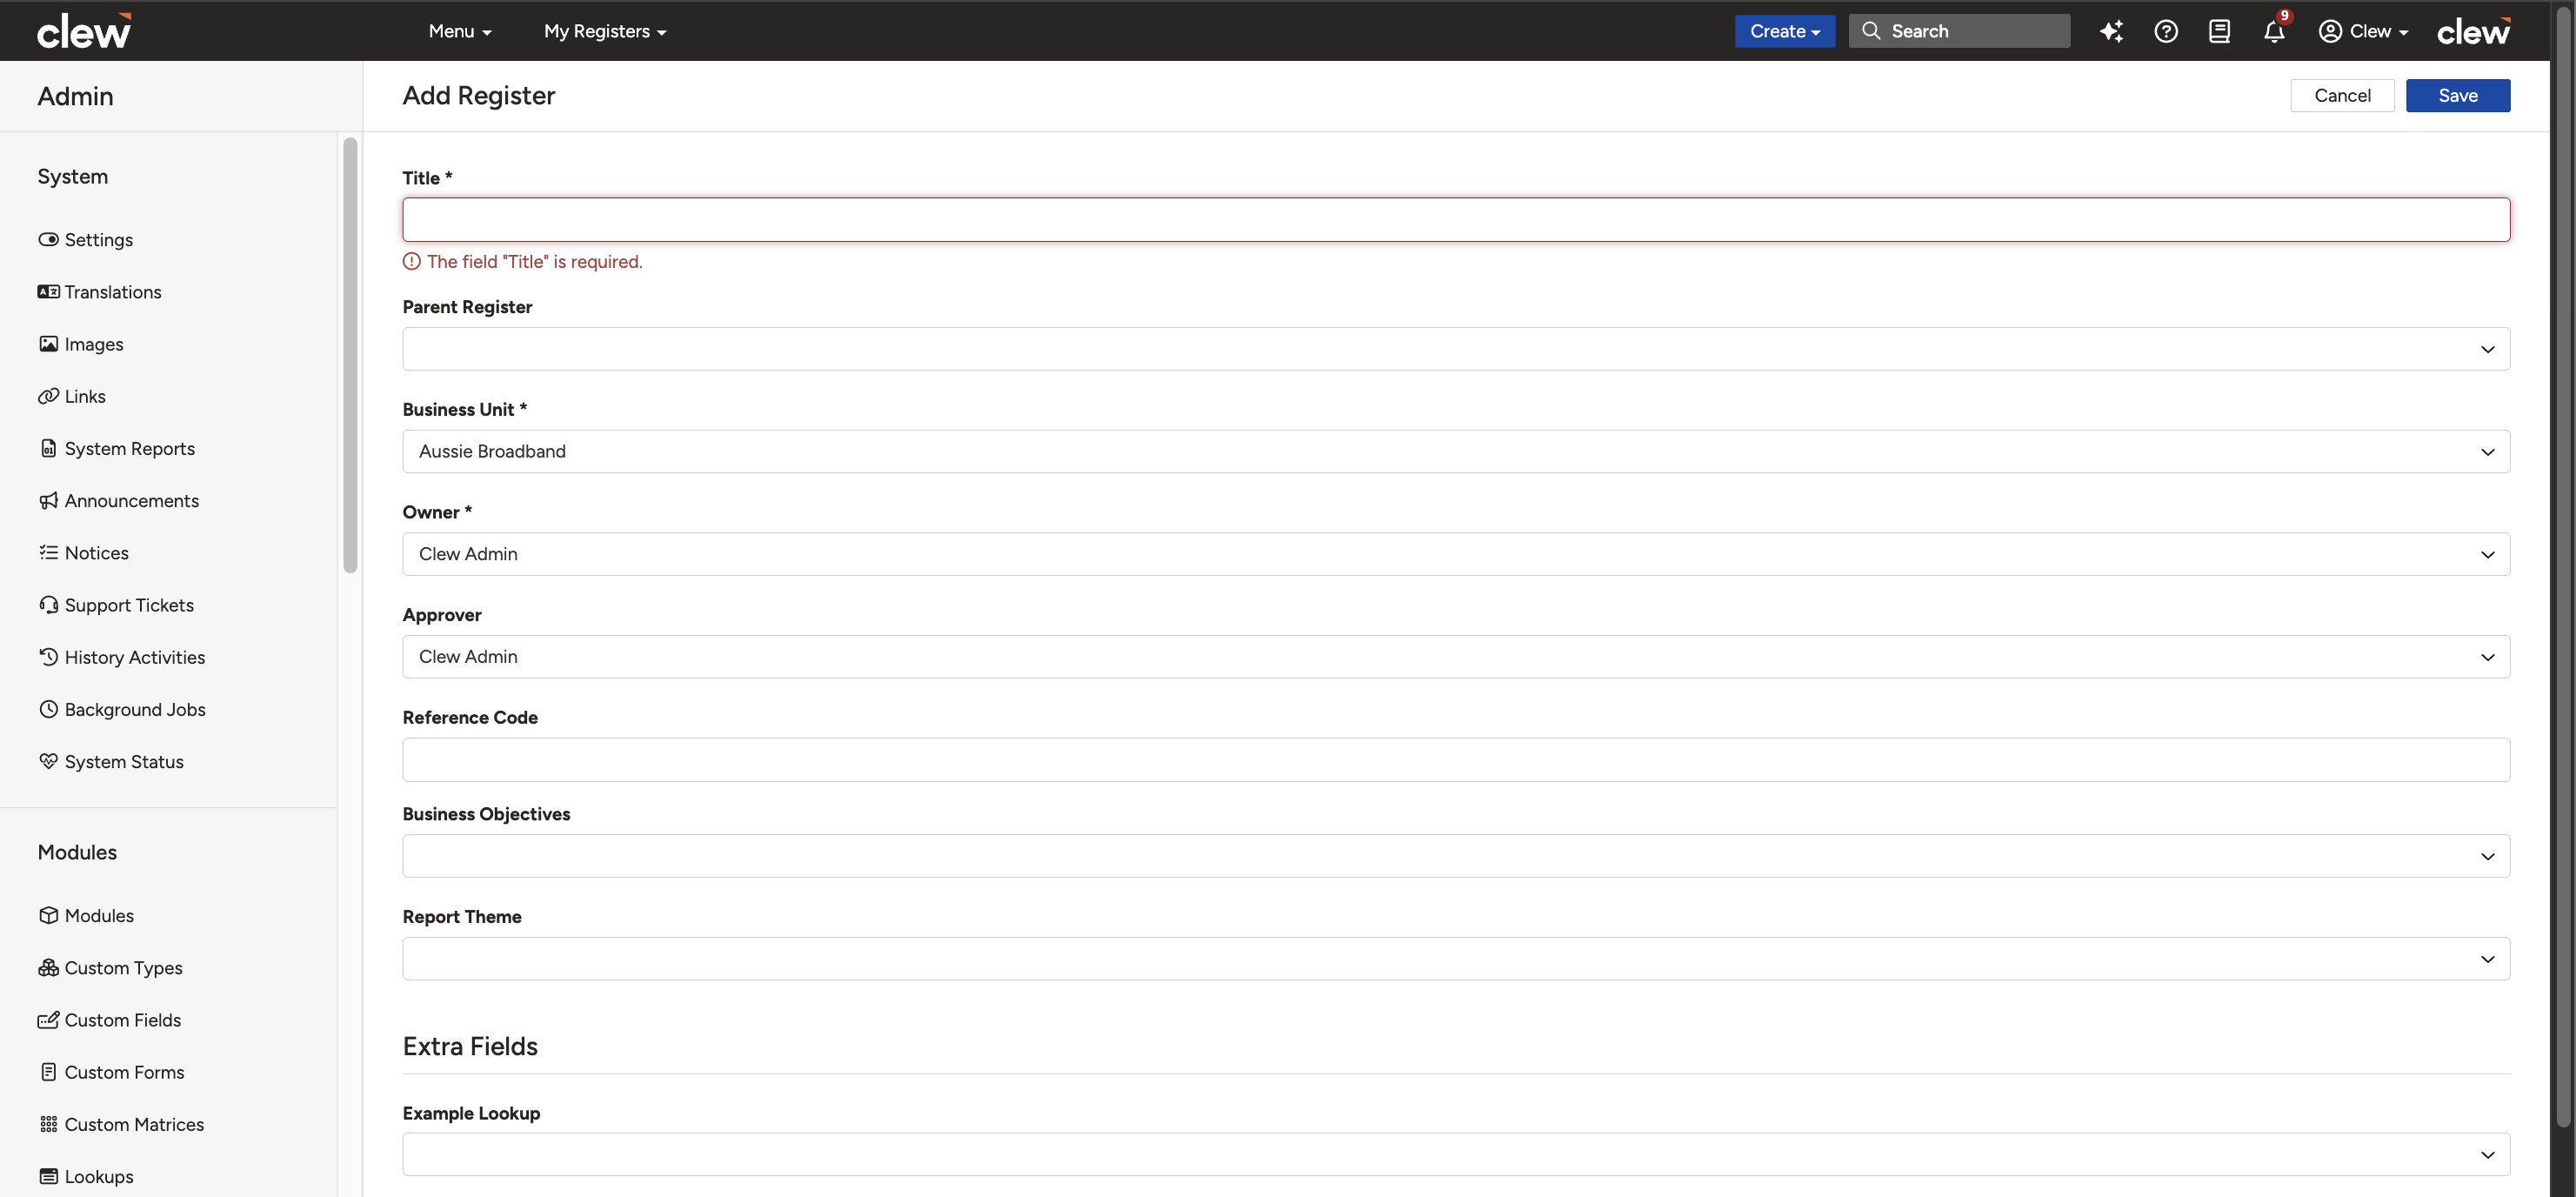
The new register form showing the fields described below.
| Field | Description |
| Title | Choose a suitable title for this register. |
| Parent Register (optional) | Select the parent register if this register belongs to another. |
| Sensitivity | If this feature has been enabled, select the relevant sensitivity level. Every level above the default needs to be assigned via Admin > User > Sensitivity. |
| Business Objective | If the Business Objective module has been used and configured, select the relevant business objective from the dropdown. |
| Auto rollup this register to parent? | When enabled, all the information of this register will be displayed on the parent register page. Regardless of this setting being enabled, users without permission to see the data will not have access to it. |
| Cascade policies | If this is kept enabled, the permission sets in the different security groups will automatically be applied to this new register according to its parent register. You can select this option when creating the register. After saving, the option will be automatically deselected. |
| Library | When enabled, the register displays as a link under the Library menu on the top bar. |
- Click Save.
5. Common Issues & Troubleshooting
| Issue | Likely Cause | Solution |
| The Sensitivity field is not visible on the form | The sensitivity feature has not been enabled for your organisation | Contact the Clew team if your organisation needs the sensitivity feature enabled |
| Users cannot see records with a higher sensitivity level | Sensitivity levels above the default must be assigned per user | Assign the relevant level to each user via Admin > User > Sensitivity |
| Cascade policies appears deselected after saving | The option is only applied at creation and is automatically deselected after saving | This is expected behaviour. The parent register's permission sets were applied when the register was created |
| Child register data is not showing on the parent register page | Auto rollup is not enabled, or the user does not have permission to see the data | Enable Auto rollup this register to parent? on the child register, and check the user's permissions for the underlying data |
| A register does not appear under the Library menu | The Library option is not enabled on the register | Open the register in Admin > Registers and enable the Library option |
Best practices:
- Plan your register hierarchy before creating registers, so it mirrors your organisational structure and does not need reworking later.
- Use clear, consistent titles so users can easily identify which register a record belongs to.
- Keep Cascade policies enabled when creating child registers, so permissions stay consistent with the parent register without manual setup.
- Use sensitivity levels sparingly and review user assignments regularly, as records in a higher sensitivity register are hidden from users without the matching level.
Click a title to preview it here. Use the Open full article button to read the full version in a new tab.
▾User: Managing User Settings and Sensitivity Levels Open full article »
Related article
How to manage user settings, including assigning the sensitivity levels that control which registers each user can see.
Was this article helpful?
That’s Great!
Thank you for your feedback
Sorry! We couldn't be helpful
Thank you for your feedback
Feedback sent
We appreciate your effort and will try to fix the article