Clone Templates
How to create and configure clone templates so users can replicate records consistently across modules in the Clew Platform
Contents
- 1. Introduction & Context
- 2. Key Features & Functions
- 3. Requirements
- 4. Step-by-Step Guide
- 5. Common Issues & Troubleshooting
- 6. Related Articles
1. Introduction & Context
Clone Templates let system administrators define how records are duplicated so that end users can replicate existing records quickly and consistently across modules in the Clew Platform.
Rather than asking users to manually recreate records from scratch, a Clone Template controls exactly which fields and relationships are copied, which are excluded, and how the cloned record relates back to the original. This is particularly useful for standardised records in modules such as Risk, Action, and Obligations.
Who is it for? System Administrators configure clone templates. End users with the required RBAC access can then clone records using those templates.
What does it impact? Clone Templates control the clone buttons that appear in record detail and list views. Once a template is enabled, any user with the appropriate security group access can use it to clone records.
2. Key Features & Functions
- Customisable cloning options per module: Each module can have one or more clone templates, each with different field and relationship settings.
- Ignored fields: Exclude specific fields from the clone so they are left blank on the new record, preventing stale or irrelevant data from carrying over.
- Link to Original: Maintain a reference between the cloned record and its source. Records with copies show a Copies sub-panel, making it easy to track how many records were created from a single original.
- Clone Relations: Define how related module items (such as Causes, Actions, or Attachments) are handled during cloning. Each relation can be set to copy the linked item or link to the original.
- Visibility controls: Choose whether the clone option appears in the record detail view, the list view (for mass cloning), or both.
- Custom Type scoping: Restrict a template to a specific custom type within a module (for example Project Risk only) or leave it unscoped to apply across all custom types.
- Templating purpose: Some modules support a Templating purpose in addition to Cloning, allowing the template to be used for creating new records from a predefined structure rather than duplicating an existing one.
3. Requirements
- System Administrator access is required to create and manage clone templates.
- End users must have the appropriate RBAC access via security groups to clone records.
- The module you are creating a template for must already be configured in the system.
- Clone Relations can only reference modules that are already linked to the source module.
4. Step-by-Step Guide
Creating a Clone Template
- Go to Admin > Clone Templates.
- Scroll to the module you want to create the template for (for example Risk).
- Click Addto open the new template form. Complete the following fields:
Field Description Title A descriptive name for the template. This is the label end users see on the clone button. Purpose Set to Cloning. Select Templating if this option is available for the module and you want to use the template to create new records from a predefined structure. Custom Type Restrict the template to a specific custom type (for example Project Risk but not Operational Risk). Leave blank to apply the template to all custom types in the module. Enabled Select Yes to activate the template. Disabled templates will not appear to users. Visible on Show Enables the clone option in the record detail view, allowing users to clone a single record. Visible on Lists Enables the clone option in the module list view, allowing users with the required access to perform mass cloning. Note Optional instructions or guidelines for using the template, visible to administrators. - Configure the clone options:
Field Description Title Prefix Text added to the start of the cloned record title to distinguish it from the original (for example Copy of). Ignored Fields Fields you do not want carried over to the cloned record. Ignored fields will be left blank on the new record. Clone into Registers [Projects] Allows cloned items to be added to multiple registers or projects in one action. Default Registers [Projects] Works with the setting above to pre-populate the registers or projects field with a default value when cloning. Link to Original Creates a reference between the cloned record and its source. When enabled, any record with copies shows a Copies sub-panel at the bottom, making it easy to see how many records were created from a single original. Progress Activities [Activity Stream] Enabled When enabled, the activity stream history from the original record is included in the clone. - Click Save to create the template.
- Return to the module. The clone option should now appear in the list view. If it does not appear, check the team restrictions applied to the template and confirm you are a member of that team.
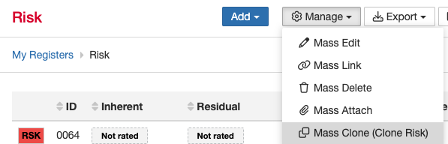
The Clone option appearing in the module list view once a template is enabled.
Managing Clone Relations (Optional)
Clone Relations let you control how related module items are handled when a record is cloned. For example, you can specify that linked Actions should be copied as new records, or that linked Attachments should remain linked to the original. You can add multiple Clone Relations to a single template.
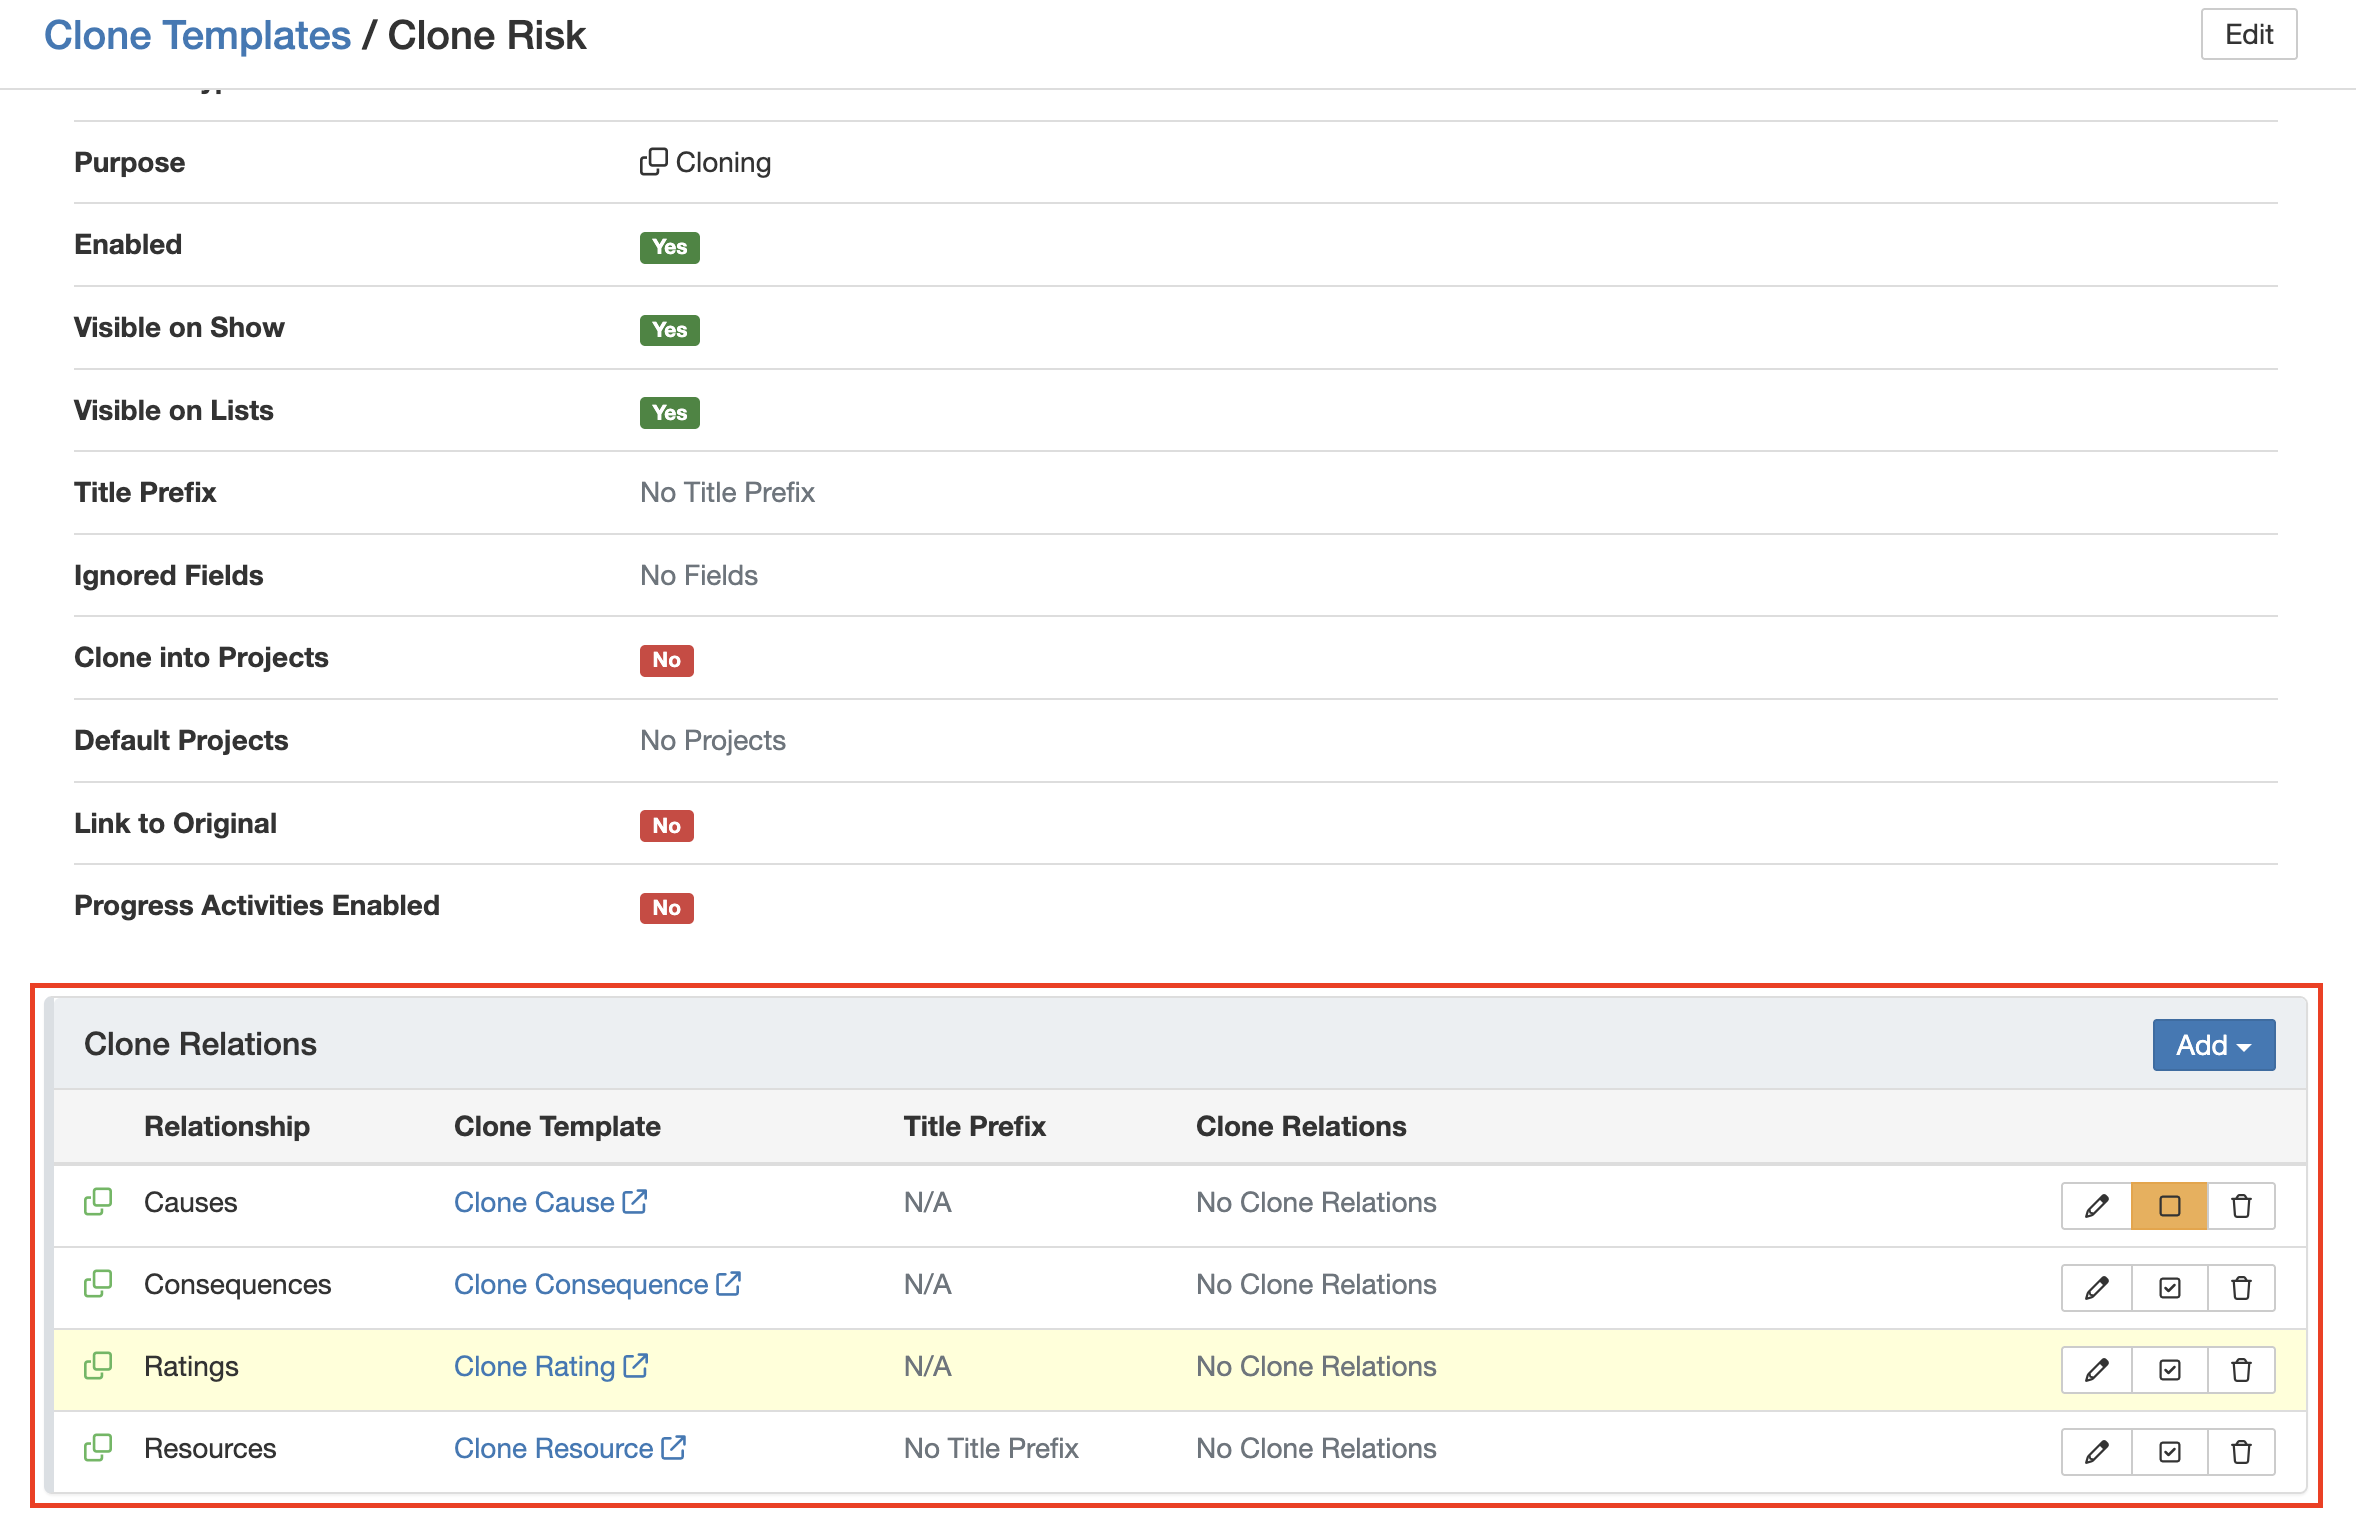
The Clone Relations sub-panel showing configured relations. An orange icon indicates a relation is unselected by default.
To add a Clone Relation:
- Open the clone template you created.
- In the Clone Relations sub-panel, click Add.
- Select the related module to include (for example Cause, Actions, or Attachments).
- Choose whether each relation should create a new copy or link to the original record.
- Click Save.
5. Common Issues & Troubleshooting
| Issue | Likely Cause | Solution |
| Clone button not appearing in the list or detail view | Template is disabled, Visible on Show or Visible on Lists is not enabled, or the user does not have the required security group access | Confirm the template is enabled and the relevant visibility settings are turned on. Check team restrictions and verify the user is a member of the required team. |
| Cloned record contains stale or unwanted field values | The relevant fields have not been added to the Ignored Fields list | Edit the template and add the unwanted fields to Ignored Fields. Those fields will be left blank on future cloned records. |
| Clone Relations are not being applied | The relation is set to unselected by default, or the user did not enable the optional relation during cloning | Check whether the orange icon is present on the relation. If it is unselected by default, the user must manually select it when cloning. Update the relation setting if it should always be included. |
| Template is applying to the wrong custom type | Custom Type field is left blank, meaning the template applies to all custom types in the module | Edit the template and set the Custom Type field to restrict it to the intended type only. |
Best practices:
- Keep templates aligned with current business processes. For minor changes, edit the existing template. For significant changes, create a new template and deactivate the old one.
- Use clear naming conventions, especially when multiple templates exist for the same module, for example Risk: Project Clone and Risk: Operational Clone.
- Enable Link to Original whenever traceability between source and cloned records matters. The Copies sub-panel makes auditing straightforward.
- Review Ignored Fields periodically. If new fields are added to a module, confirm whether they should be included or excluded from cloning.
- Verify visibility and permission settings before enabling a template for end users to avoid unexpected access.
Click a title to preview it here. Use the Open full article button to read the full version in a new tab.
▾Workflows & Automations Open full article »
Related section
Browse the Workflows & Automations articles, covering workflows, statuses, transitions, triggers, and the other admin tools that work alongside clone templates.
Was this article helpful?
That’s Great!
Thank you for your feedback
Sorry! We couldn't be helpful
Thank you for your feedback
Feedback sent
We appreciate your effort and will try to fix the article