Teams
How to create a team, enable its advanced features, and manage users and access through team-level administration
Contents
- 1. Introduction & Context
- 2. Key Features & Functions
- 3. Requirements
- 4. Step-by-Step Guide
- 5. Common Issues & Troubleshooting
- 6. Related Articles
1. Introduction & Context
A Team is a structured group of users with shared access to security groups and designated administrative features, letting you manage access and capabilities for a whole group of people at once.
When a team is created, users are assigned specific team roles and security groups are linked. Advanced capabilities such as cloning, workflow transitions, receiving notifications, workflows, business objectives, automated indicators, and custom fields can also be enabled.
Teams support hierarchical access, allowing certain members such as Team Administrators or Team Managers to manage team-level features, such as adding users and giving them permissions to access data via pre-approved security groups added to the team, without needing full system-wide admin rights.
Who is it for? System Administrators who create and configure teams, and Team Administrators or Team Managers who manage their teams day to day.
What does it impact? Team configuration determines what team members can access and do, including their security groups, the advanced functions available to them, and whether they receive team notifications.
2. Key Features & Functions
- User grouping: groups users to assign shared access and admin capabilities.
- Streamlined user onboarding: new users can be automatically added to designated teams upon creation, ensuring appropriate access and reduced manual setup.
- Simplified user management: Team Administrators can manage users without requiring system admin privileges.
- Granular access: teams can be assigned relevant security groups, which can then be further customised and assigned to team members for more granular access management.
- Advanced functions: teams can be granted privileges such as cloning records, performing workflow transitions, receiving notifications, and configuring custom fields for the team.
- Managing business objectives: teams can be enabled for Business Objectives, allowing team members to add and manage business objectives efficiently.
- Record sharing: records, filters, and dashboard templates can be shared with entire teams at once.
3. Requirements
- Administrator access is required to add and configure a team.
- Team Administrators and Managers do not need system admin access to access their teams and perform team-related functions.
4. Step-by-Step Guide
Adding a Team
- Navigate to Admin > Teams and click the blue Add button at the top-right.

The Teams list in Admin. Click Add to create a new team.
- A form will appear. Complete the form fields as described in the table below.
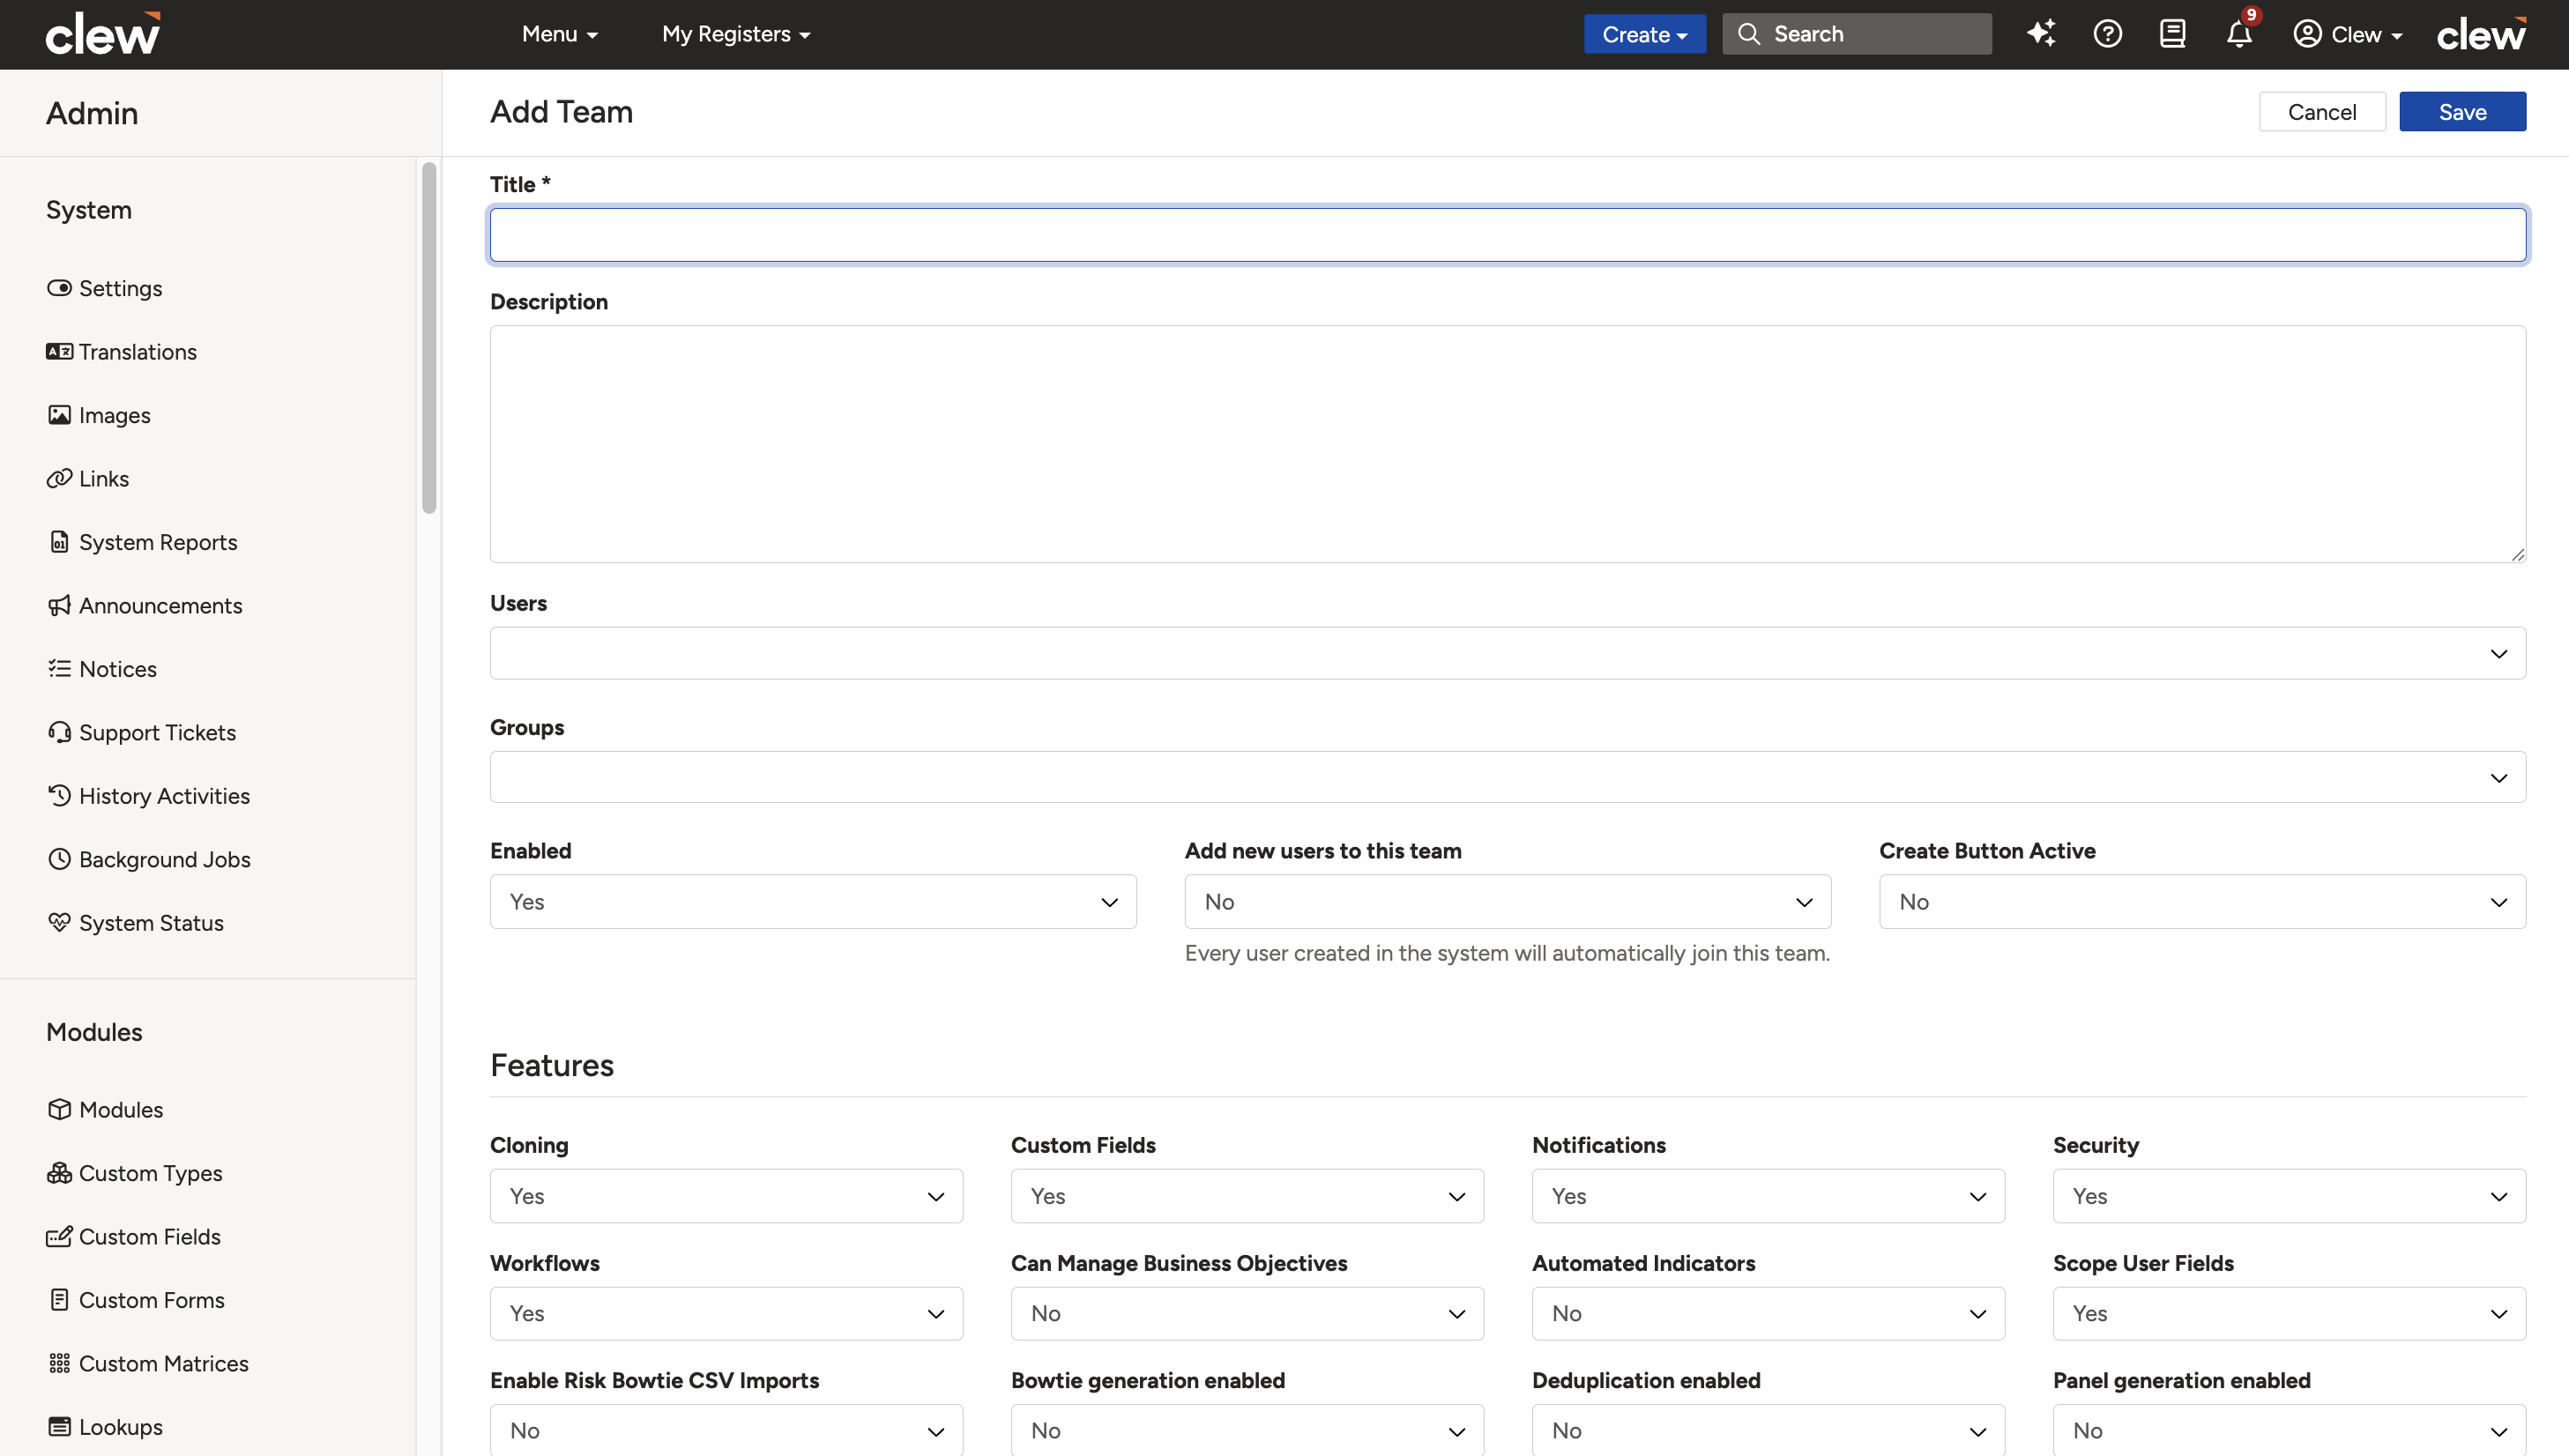
The new team form showing the fields described below.
| Field | Description |
| Title | Specify an appropriate title for the team. |
| Description | Add a brief description for the team. |
| Users | Add members to the team by selecting them from the Users dropdown list. |
| Groups | Select the Security Groups that the team should have access to. Once these groups are assigned, Team Administrators can further assign them to individual team members or create subsets of these groups for more granular access control. |
| Enabled | Select Yes to enable the team and make it available within the system. |
| Add new users to this team | Select Yes to automatically assign all newly created users to this team. This ensures that new users are included in the team upon creation, streamlining onboarding and ensuring consistent access to team-based security groups. |
| Create Button Active | Specifying Yes will list the blue Create button on the navigation bar for the team members. Configuring this button allows users to quickly create records directly from their current page, without having to navigate to the corresponding module's list view. |
Enabling Team Features
- In the Features section, select the advanced features you wish to enable for the team, using the walk-through below.

The Features section of the team form.
| Feature | What enabling it does |
| Cloning | Select Yes to include this team in the Teams dropdown field listed on module clone templates. When a team is selected on a clone template, only the members of the team will be able to view the button to clone records, both from the list view and the individual record's show view. See the Clone Templates article for further information. |
| Custom Fields | Select Yes to display the Lookup Options tab on the Team Show view when accessed through My Teams. Team Administrators can scope the lookup values that are applicable to their team by ticking the related checkbox options, so team members only see the designated lookup options in the relevant dropdowns. See the Scoped Lookups article for further information. |
| Notifications | Select Yes to list this team in the Teams dropdown within the Recipients section of email notifications. When a team is selected as a recipient, all members receive the scheduled email notifications for the associated module, provided the user is allowed to read the records that meet the notification condition and has the notification enabled in their settings. See the Email Notifications article for further information. |
| Security Groups | Select Yes to display the Security Groups tab on the Team Show view when accessed through My Teams. This tab enables Team Administrators to assign security groups or create subgroups and assign them to team members, allowing for more granular access control. It also provides options to mark a security group as Default or set it as Inactive. See the Security Groups article for further information. |
| Workflows | Select Yes to include this team in the Team Restrictions field of workflow transitions. When a team is selected for Team Restrictions, only members of that team will be allowed to perform the workflow transitions such as approvals or archiving. Users who are not allowed to edit a record, or who are not part of the designated team, will not see the transition on the relevant record(s). See the Workflow Transitions article for further information. |
| Can manage Business Objectives | Select Yes to grant team members the ability to create, edit, and delete business objectives. By default, all users have view-only access to the business objectives in the application. See the Business Objectives article for further information. |
| Automated Indicators | Select Yes to allow team members to configure metrics for automated indicators. By default, users can create automated indicators but cannot define their metrics. Enabling this setting grants team members access to a Configure Metric option, allowing them to define and save the indicator metrics as needed. |
| Scope User Fields | Select No to exclude team members from user dropdowns when user scoping is enabled. When Scope User Fields Enabled is on in Team settings, user fields are limited to members of the current user's teams. Disabling this feature for a team ensures its members are not included in these scoped user dropdowns. |
- Click Save to create the team.
Team Record Detailed View
After saving a team, you will be routed to the Teams List View in the Admin section. Click the title of the team to navigate to the Team's Detailed View, which lists the following sections:
- Users: lists the users added during team creation.
- Security Groups: lists the security groups assigned to the team.
- Feature-related sub-panels: these sub-panels list the team features that are enabled for the team. The sub-panels remain empty until the team is assigned related configurations.

The Team's Detailed View with its Users, Security Groups, and feature sub-panels.
Accessing Your Teams
All team members can see their assigned teams via the My Teams option listed within the Username dropdown menu.

The My Teams option in the Username dropdown menu.
5. Common Issues & Troubleshooting
| Issue | Likely Cause | Solution |
| Concern that disabling the Workflows feature will remove teams already assigned to transitions | The feature toggle only controls whether the team appears for new assignments | No action needed. Previously assigned teams will remain on existing transitions; the change only applies going forward |
| The Users field is missing from the Edit form | After a team is created, users are managed elsewhere | Manage users via the Users sub-panel in the Team Show View |
| Team members cannot see the clone button | The Cloning feature is not enabled for the team, or the team is not selected on the clone template | Enable the Cloning feature on the team and check that the team is selected in the Teams field of the clone template |
| A team member is not receiving team email notifications | The user cannot read the records that meet the notification condition, or the notification is disabled in their settings | Check the user's read access to the relevant records and confirm the notification is enabled in their notification settings |
Best practices:
- Enable only the features the team actually needs. Each feature grants capabilities to every team member.
- Use Add new users to this team for a general staff team so onboarding grants baseline access automatically, but avoid it on teams with elevated permissions.
- Delegate day-to-day user management to Team Administrators via pre-approved security groups, rather than granting more people system admin rights.
- Use security group subsets within teams to give members only the access their role requires.
Was this article helpful?
That’s Great!
Thank you for your feedback
Sorry! We couldn't be helpful
Thank you for your feedback
Feedback sent
We appreciate your effort and will try to fix the article