My Teams
How to view your teams and manage team members, security groups, and reports based on your membership type
Contents
- 1. Introduction & Context
- 2. Key Features & Functions
- 3. Requirements
- 4. Step-by-Step Guide
- 5. Common Issues & Troubleshooting
- 6. Related Articles
1. Introduction & Context
The My Teams page gives you an overview of the teams you belong to, whether as a Team Administrator, Team Manager, or Team Member, and serves as a central hub for managing team memberships, user access, and a few administrative functions without requiring administrator privileges.
You can navigate to this page via the Username dropdown > My Teams.
Who is it for? All team members. What you can do on the page depends on your membership type, with Team Managers and Team Administrators able to perform extended functions within their assigned teams.
What does it impact? Actions taken here affect team membership and member access. Onboarding, offboarding, security group changes, and account deactivation all change what the affected users can see and do in the platform.
2. Key Features & Functions
- Teams overview: the My Teams page lists all teams that a user belongs to along with the user's membership type.
- User management: Team Administrators and Managers can onboard, offboard, and modify members belonging to a team.
- Granular access control: provides just the needed access to team members.
- Managing security groups: Team Administrators can create and assign security groups to users and deactivate them when they are no longer required.
- Centralised sharing and reporting: enables Team Administrators to run, clone, and schedule filtered reports for other users.
- User invitations and account management: Administrators and Managers can invite new users, manage team user access, and unlock locked team member accounts.
3. Requirements
- You must belong to a team to access it via My Teams.
- Team Administrators and Team Managers can perform extended functions within their assigned teams (see the guide below).
- The Invite User feature must be enabled by Clew personnel in Settings.
- Lookups can be configured only if Scope Lookups is enabled in Settings.
4. Step-by-Step Guide
Team Memberships and Their Permissions
Each membership type comes with a different level of access, organised from least to most privileged. This setup helps ensure that each role has the right level of access based on what they are responsible for.
| Membership Type | Permissions |
| Team Member | The most basic permissions. Can only view other team members and see their membership types. Cannot change any settings or user roles. |
| Team Manager | More access than team members. Can add or remove users, upgrade user memberships, edit member details, export team data to a CSV, unlock locked user accounts, and manage team roles. |
| Team Administrator | The highest level of access. Along with all the Team Manager's permissions, can manage Default security groups, create new security groups for more granularity, and clone reports for users. |
Team Members
A Team Member can view a complete list of all team members and their membership type when they view a team that they belong to.
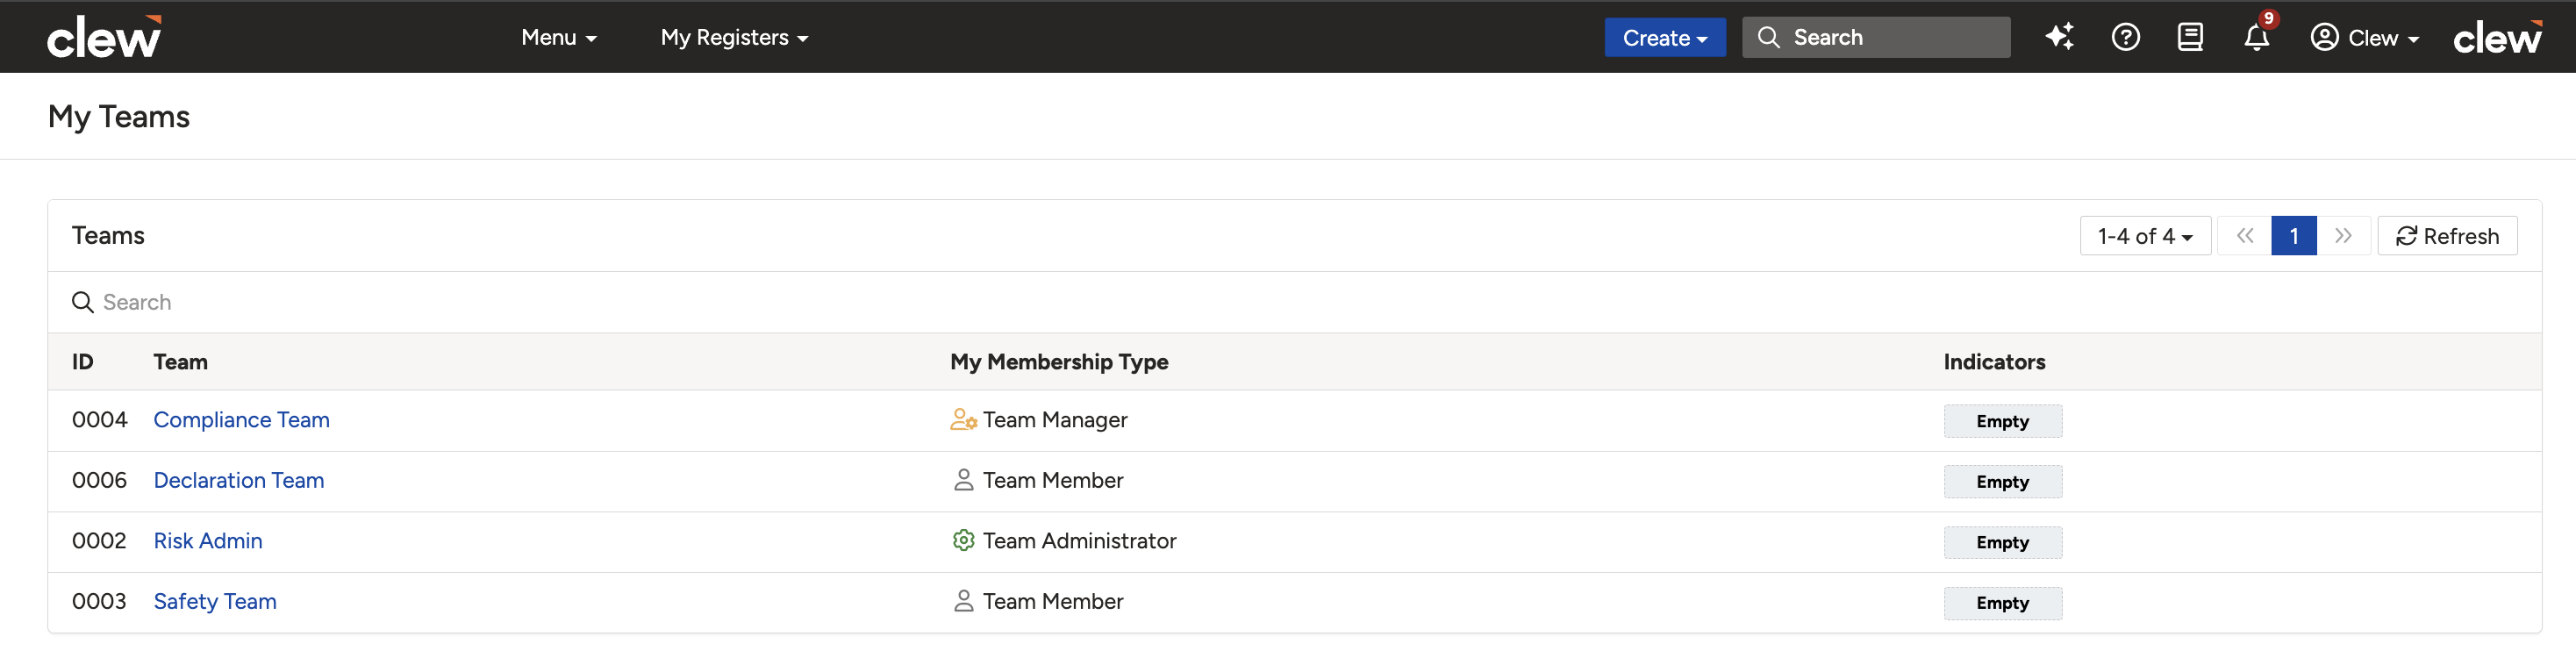
The My Teams page listing the user's teams and membership types.
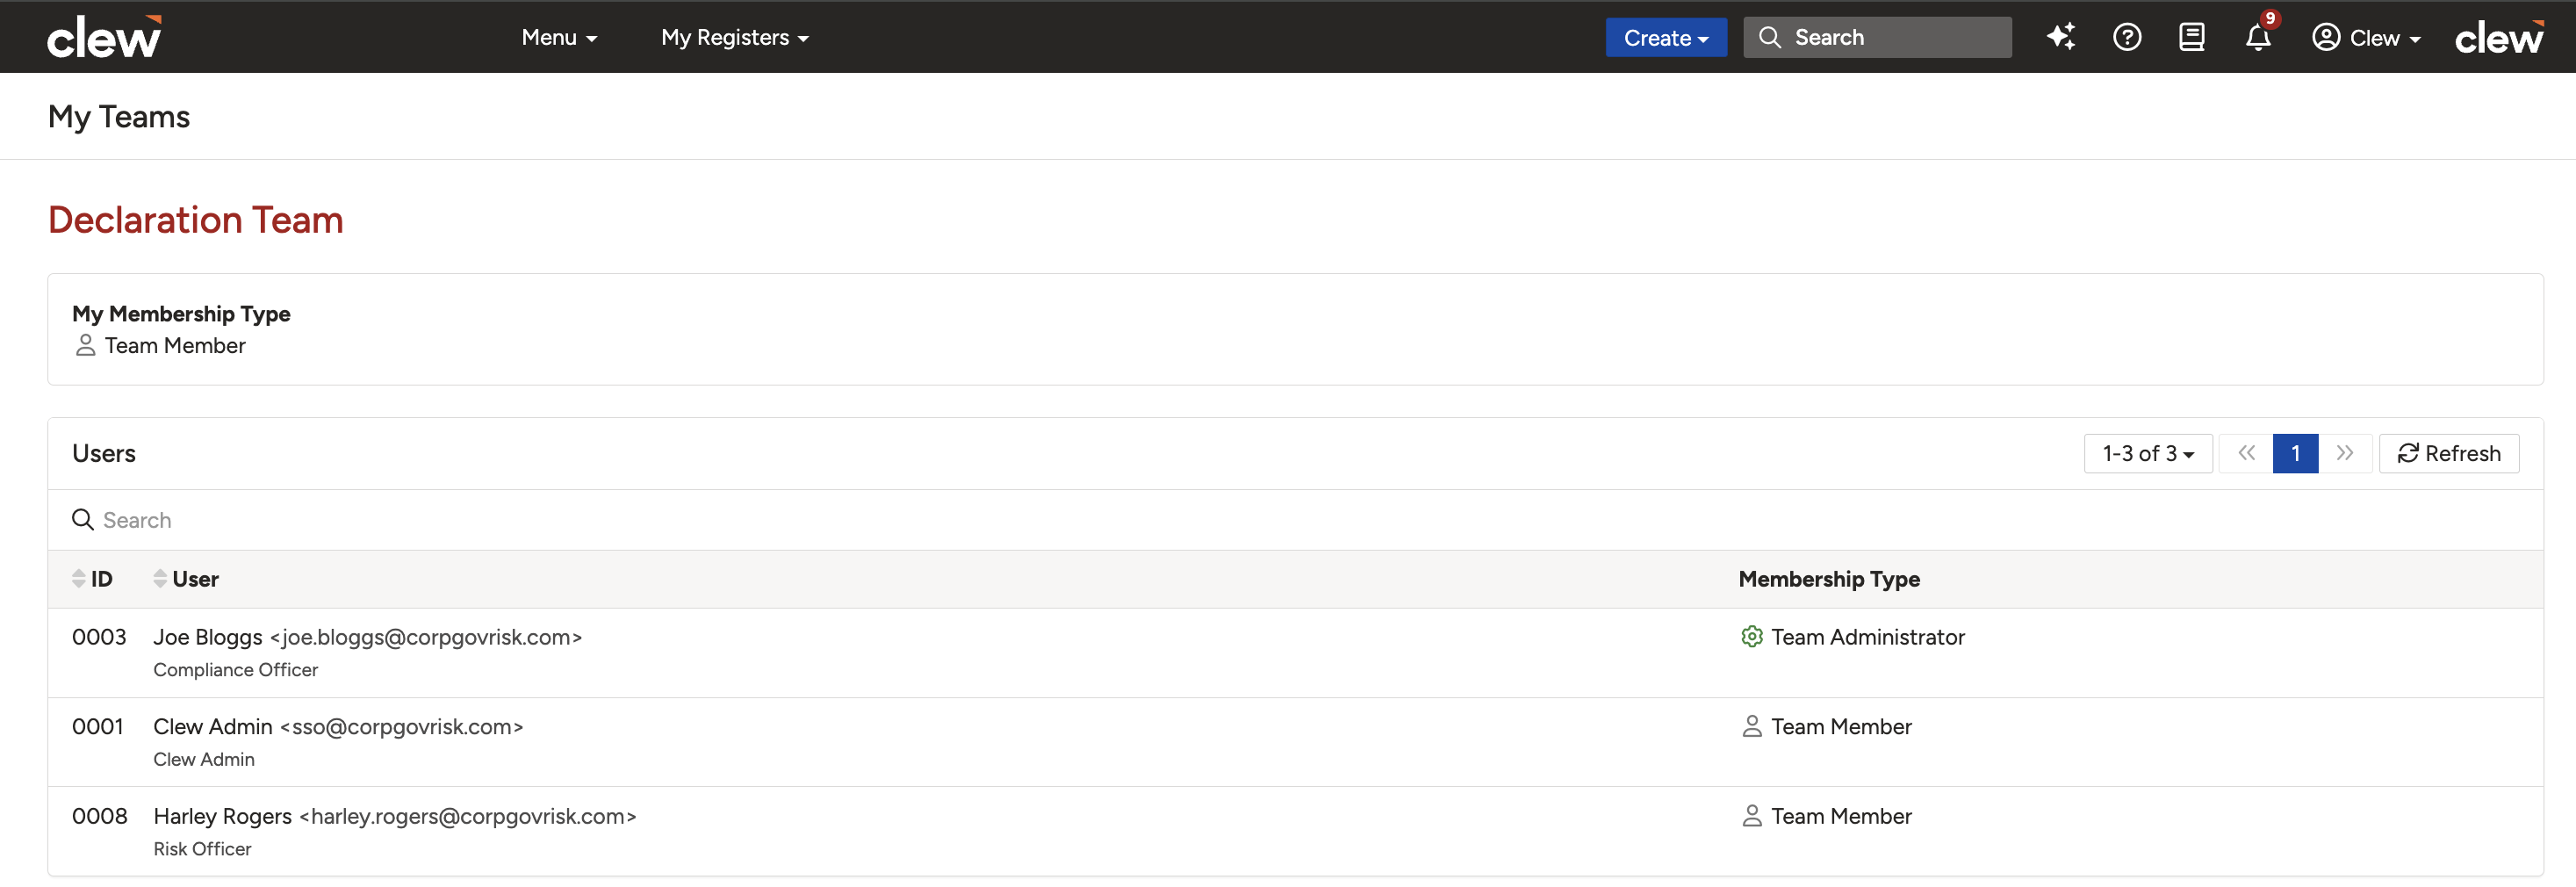
A team record showing all team members and their membership types.
Team Managers
Team Managers (and Team Administrators) can perform the following functions when they access a team record page.
1. Onboarding users to the team
- Click Onboard.
- Select users from the dropdown and assign appropriate Security Groups/Roles.
- Choose a membership type and save the user to the team.
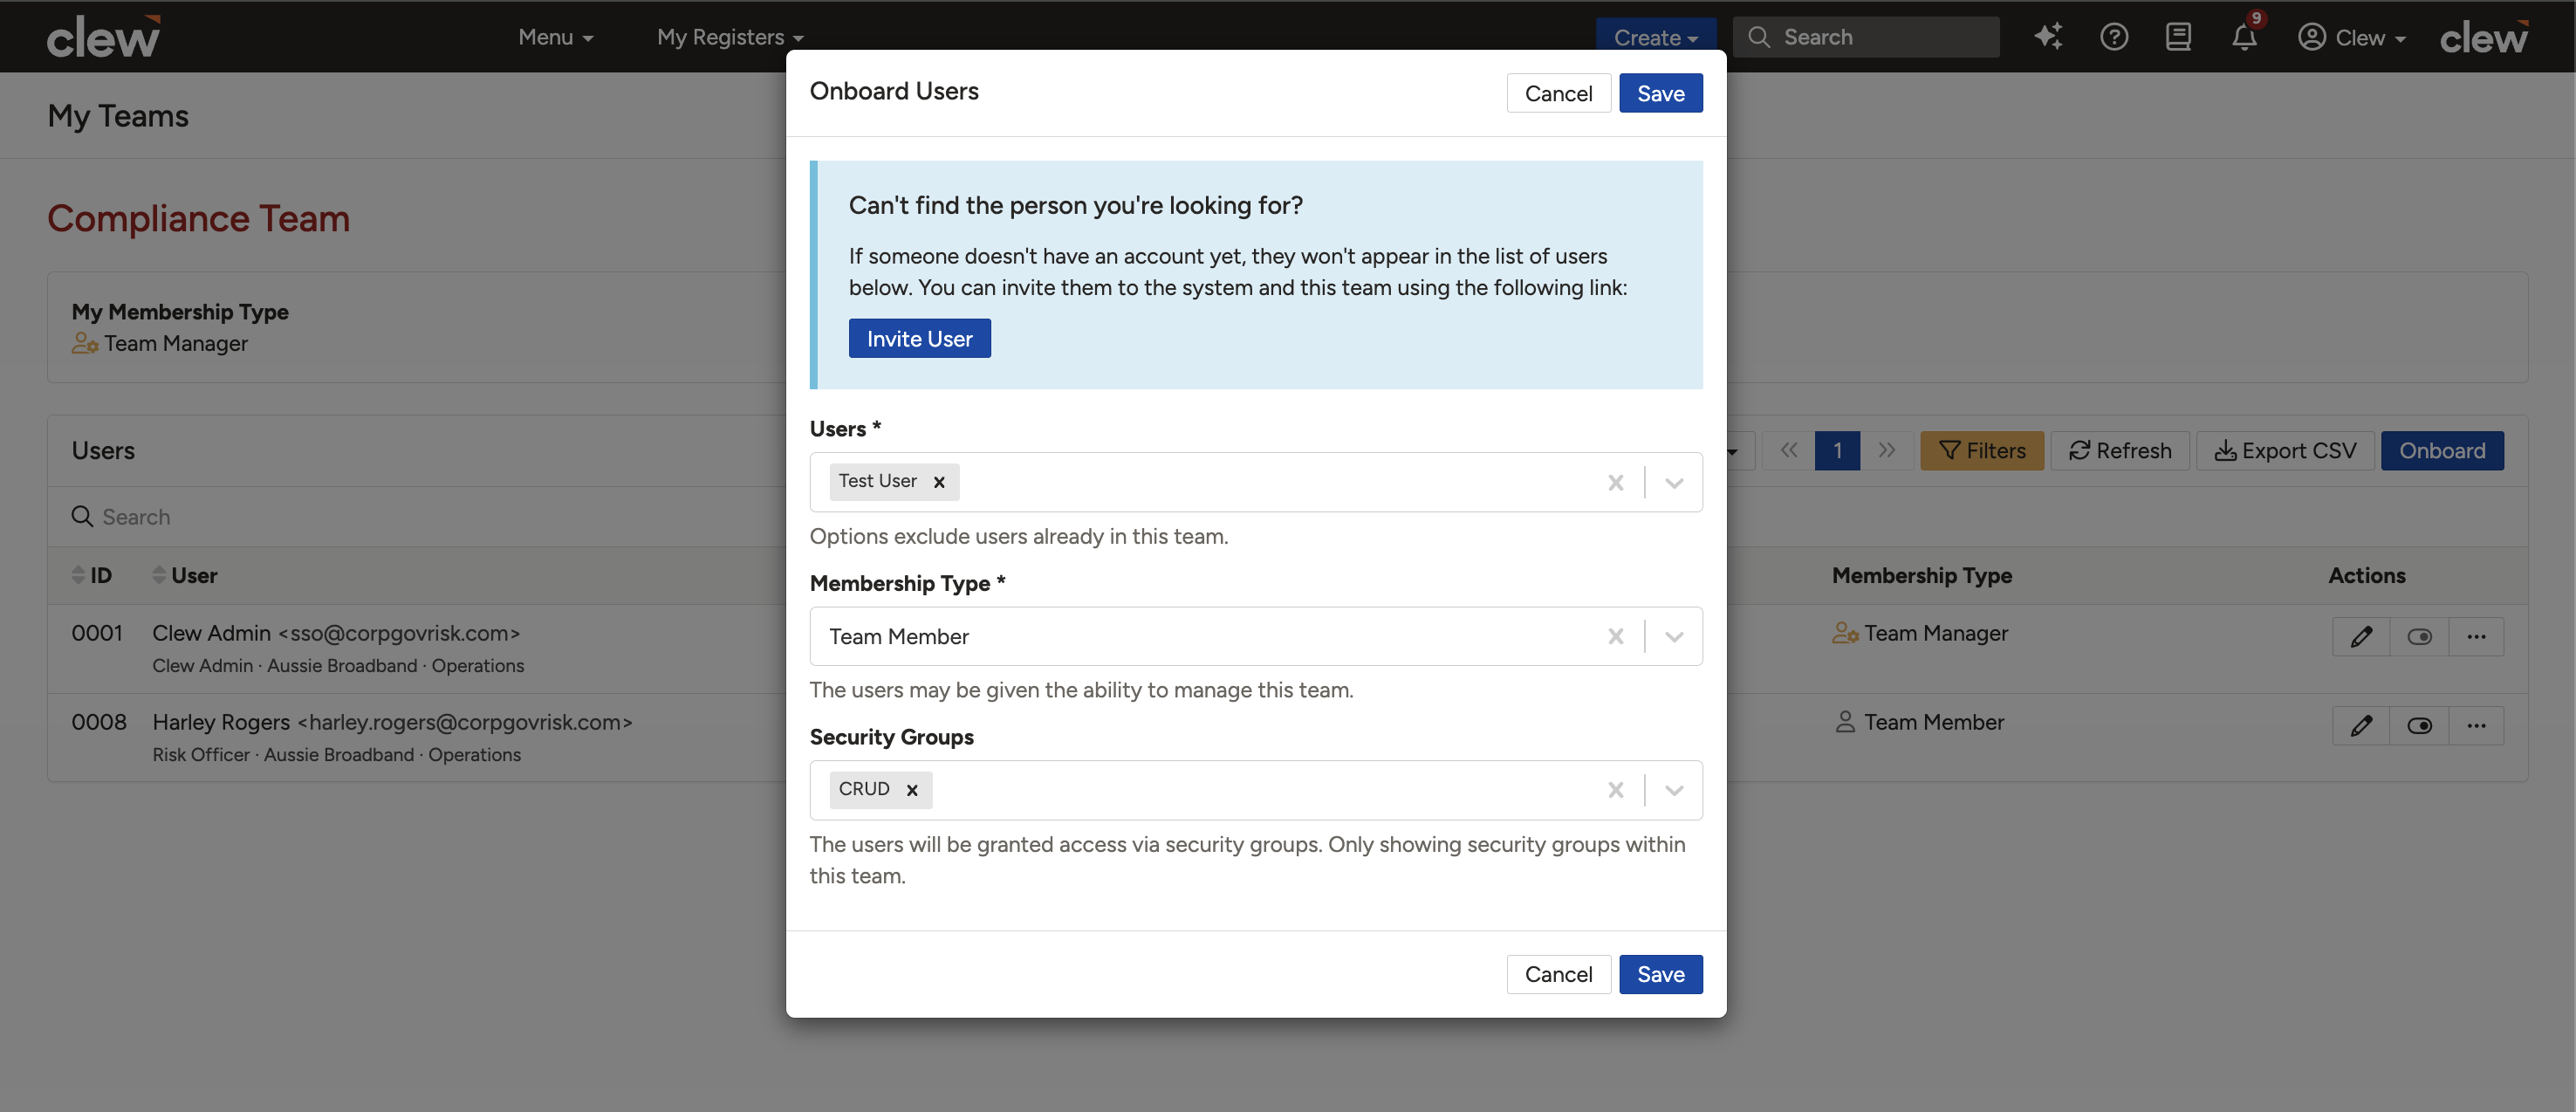
The Onboard form for adding existing users to the team.
2. Inviting new users to the team and system
- Click Onboard > Invite User.
- Fill in the required fields (for example, First and Last names).
- Tick the Send Invitation box and save.
- The user will receive an email prompting them to log in to the system. Until they do, their status will appear as Pending, indicated by an orange clock icon.
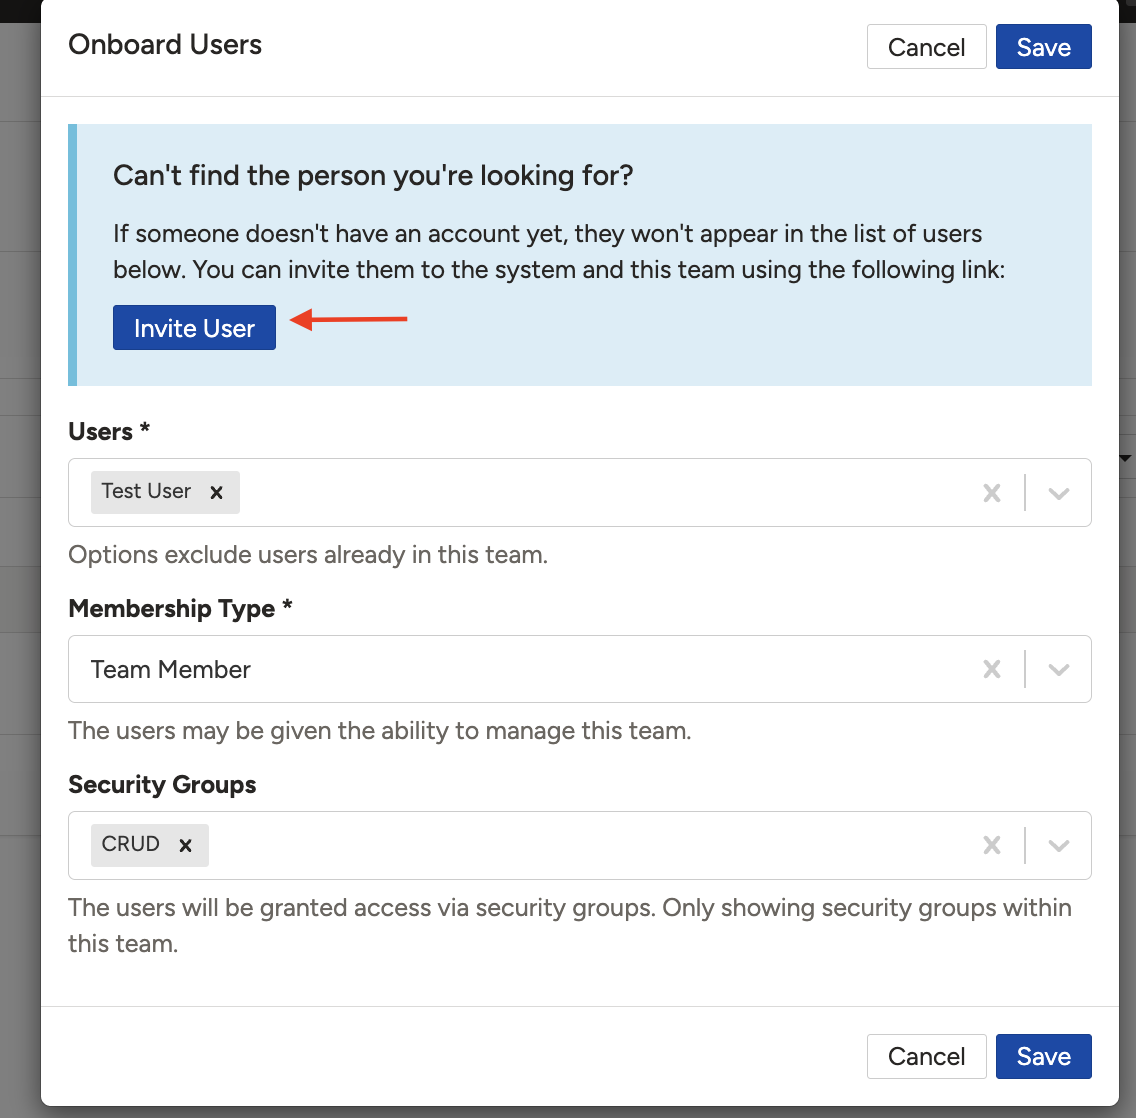
Inviting a new user. Pending users display an orange clock icon until they log in.
3. Offboarding team members
- Click the three dots next to the team member.
- Select Offboard, then click the Offboard button.
- Additional actions available during offboarding:
- Deactivate the user system-wide if they no longer need access to the system.
- Delink any existing Security Groups before offboarding to ensure security and prevent unauthorised access.
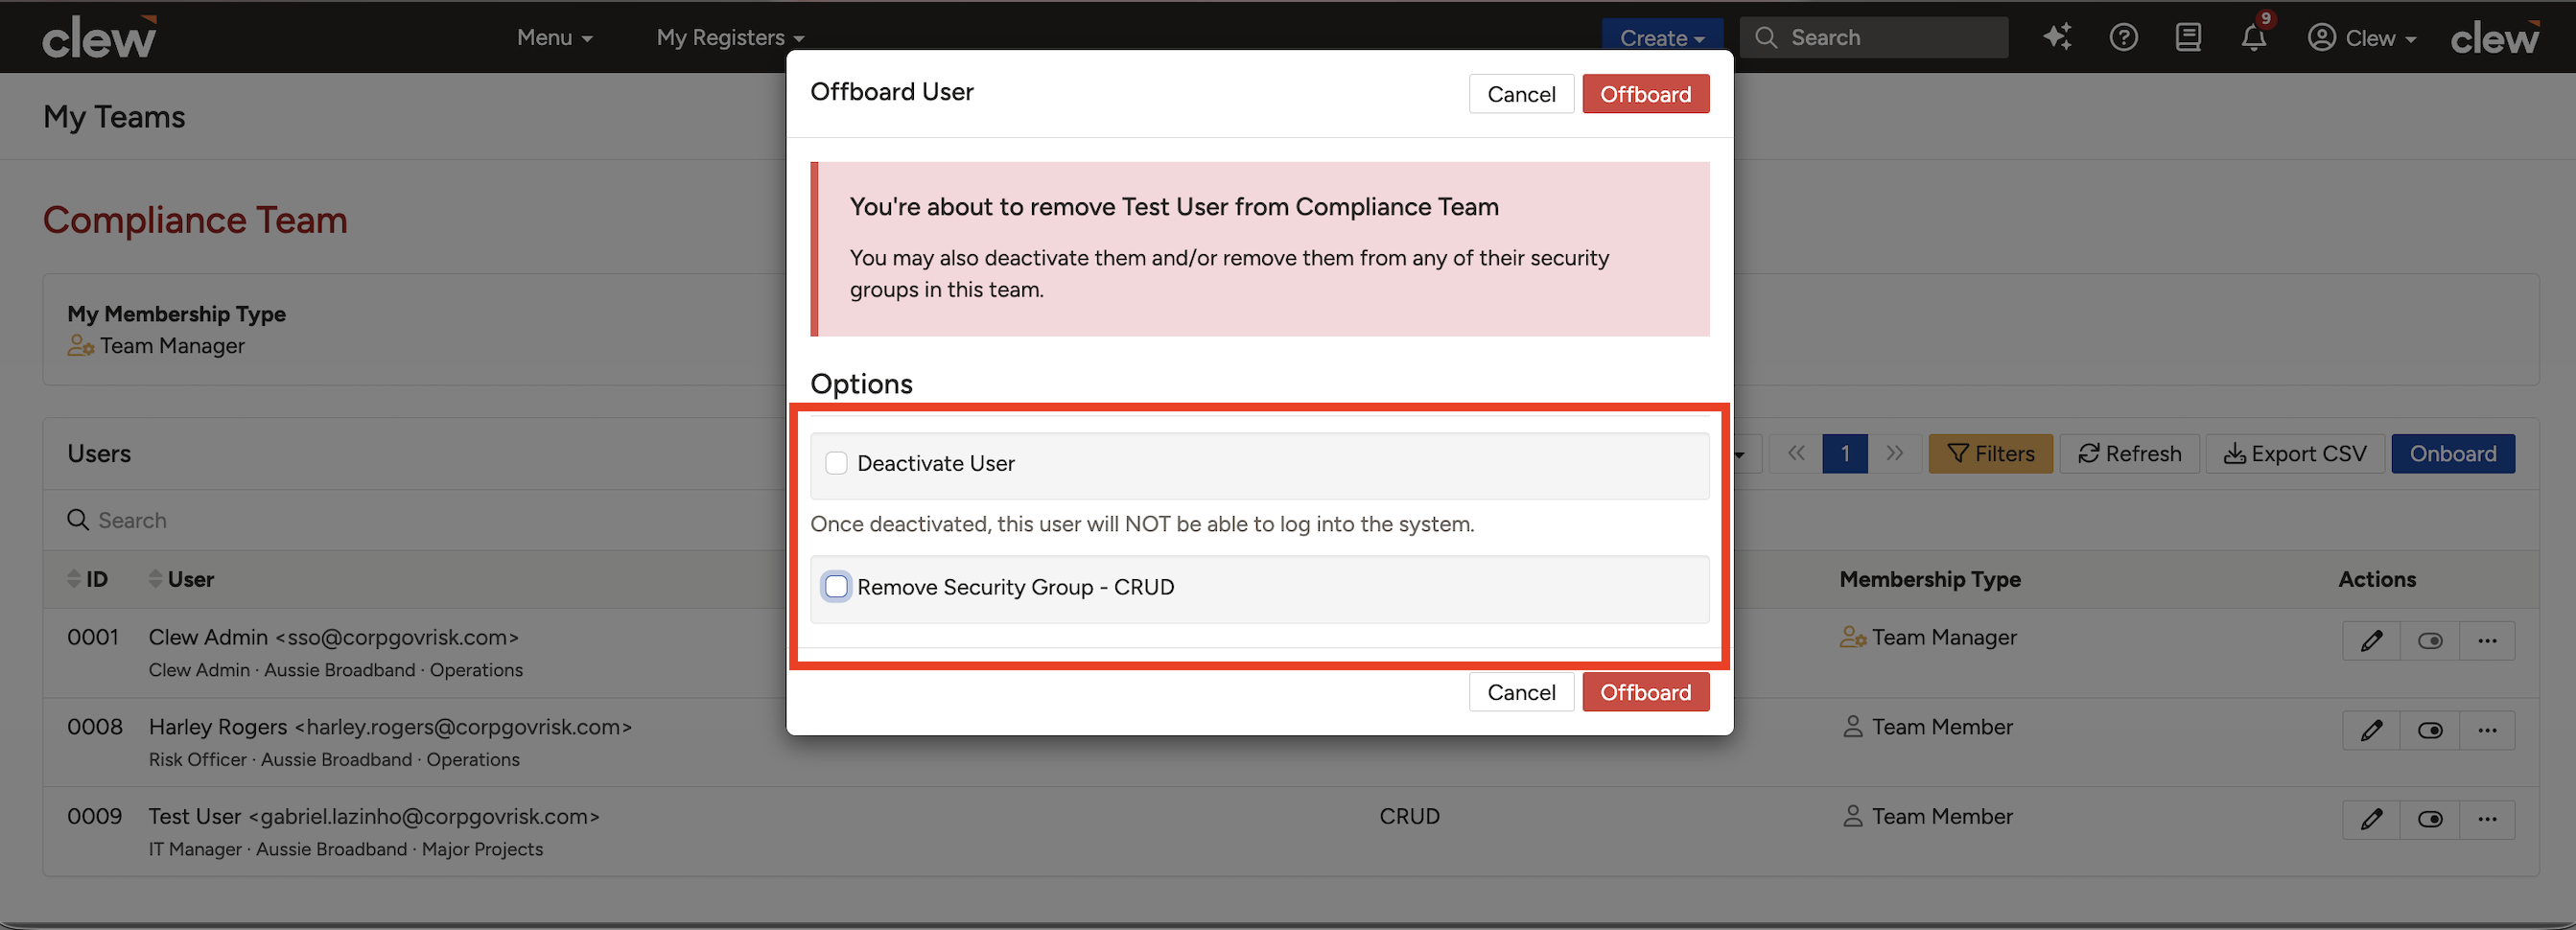
The Offboard dialog with its additional actions.
4. Upgrading or downgrading team membership
- Click the Edit user icon.
- On the Edit Member form, select a Membership Type that is currently suitable for their role.
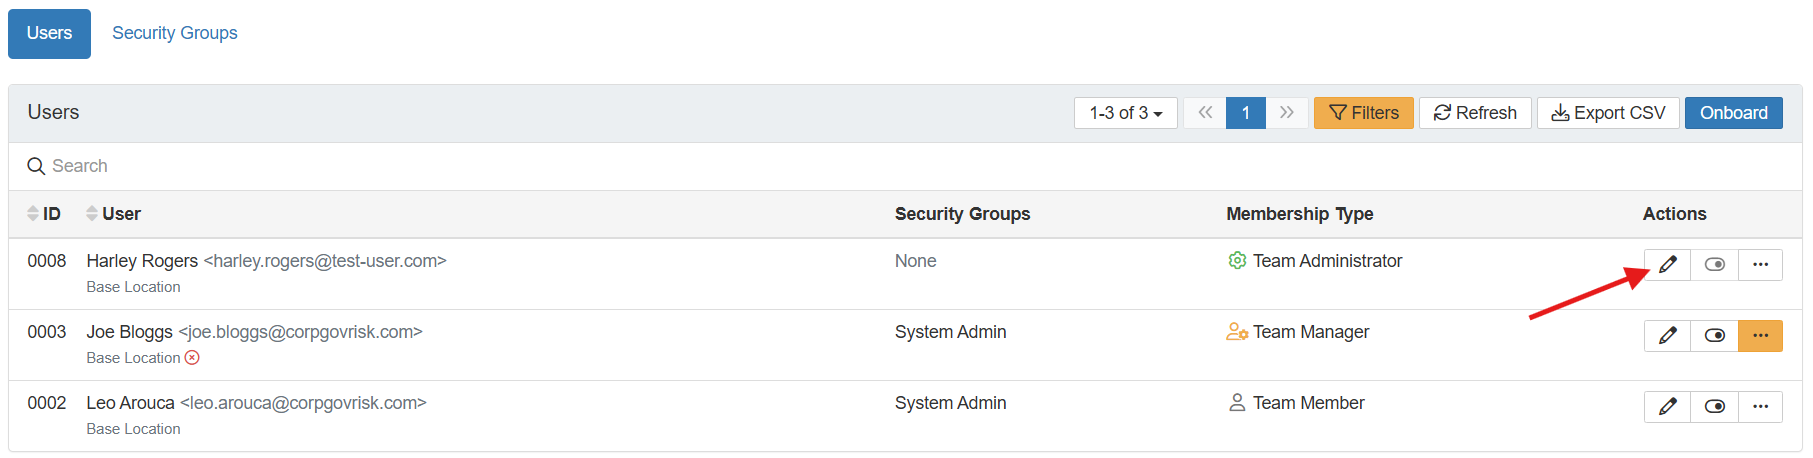
The Edit Member form with the Membership Type field.
5. Editing team member information
- Click the Edit icon to the right of the user (as pointed out in the screenshot above).
- On the Edit form, update the fields that require a change and save.
6. Exporting a CSV of team members
- Click Export CSV on the Team Show View.
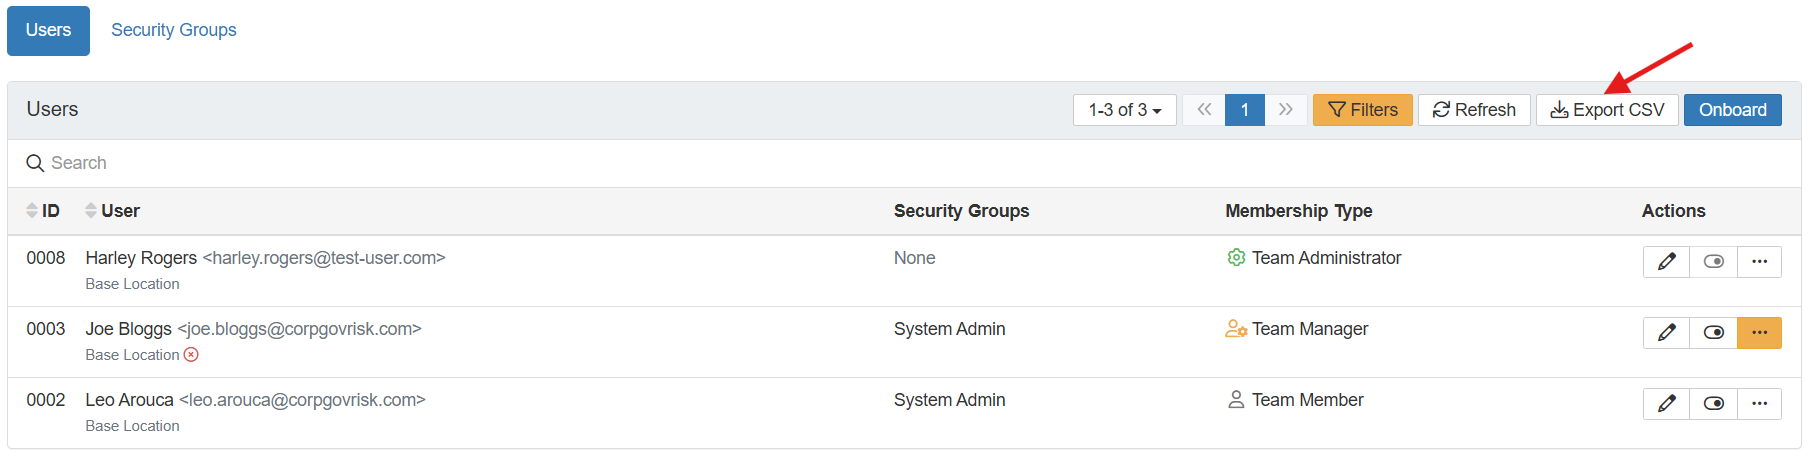
The Export CSV option on the Team Show View.
7. Unlocking user accounts (for users who belong to the team)
Locked team member accounts are listed on the Team Show View with an orange lock icon below their names.
- Edit the user form and click the Unlock Account option listed at the bottom.
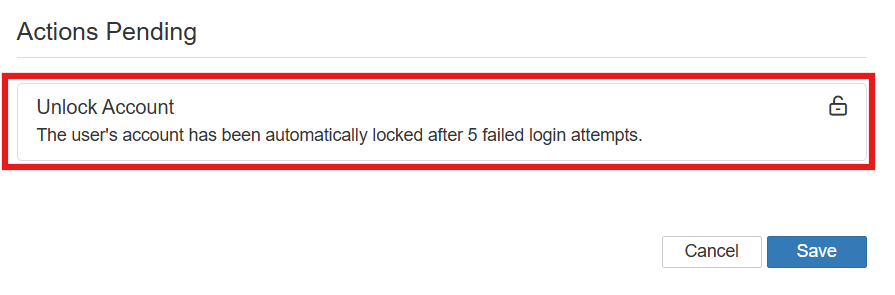
The Unlock Account option on the user edit form.
8. Updating security groups for team members
- Click the Edit icon to the right of the user.
- On the Edit User form, update the Security Groups to provide new access or remove existing permissions, then save.
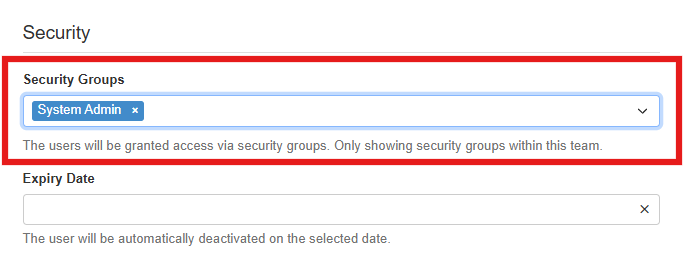
Updating a team member's security groups.
Capabilities of Team Administrators
Apart from all the functions above, Team Administrators can perform the following additional functions.
1. Define Security Groups that should be Default
- Navigate to the Security Groups tab.
- Click the Edit icon to the right of a security group.
- Tick the Default checkbox. These groups will be pre-selected when adding new roles to the team. If the user-centric setting is enabled, the default security groups will be listed on the user onboard popup by default.
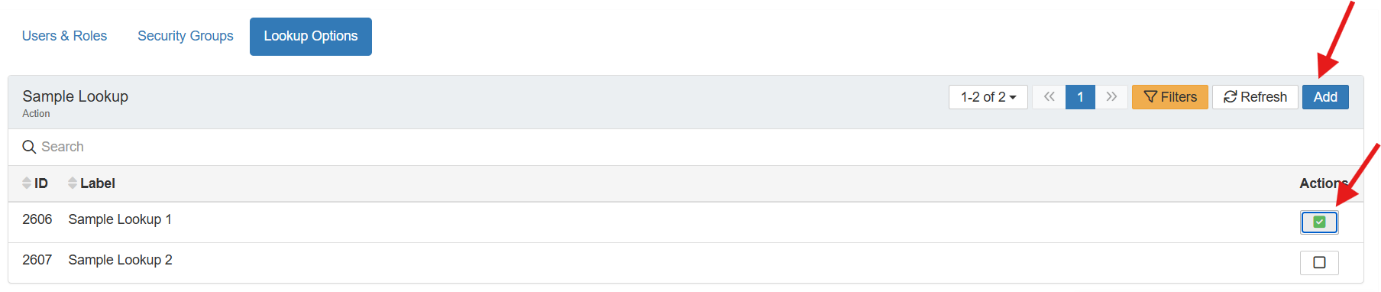
Marking a security group as Default.
2. Configure lookups for the team
- Navigate to the Lookups tab.
- Tick the lookup options that apply to the team.
- Click Add to create new lookup options tailored for the team.
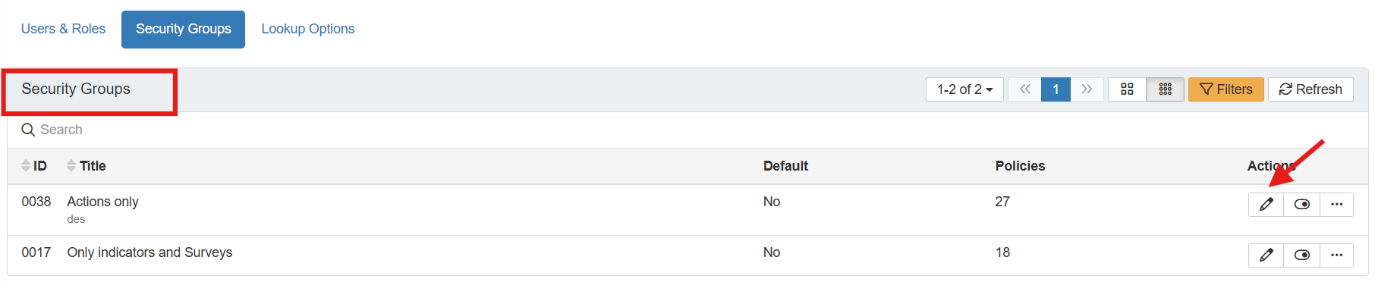
Configuring lookup options for the team.
3. Clone and schedule report templates for other users
- On a saved report template form, click Manage > Edit.
- Specify users in the Clone and Schedule field to clone the template for them.
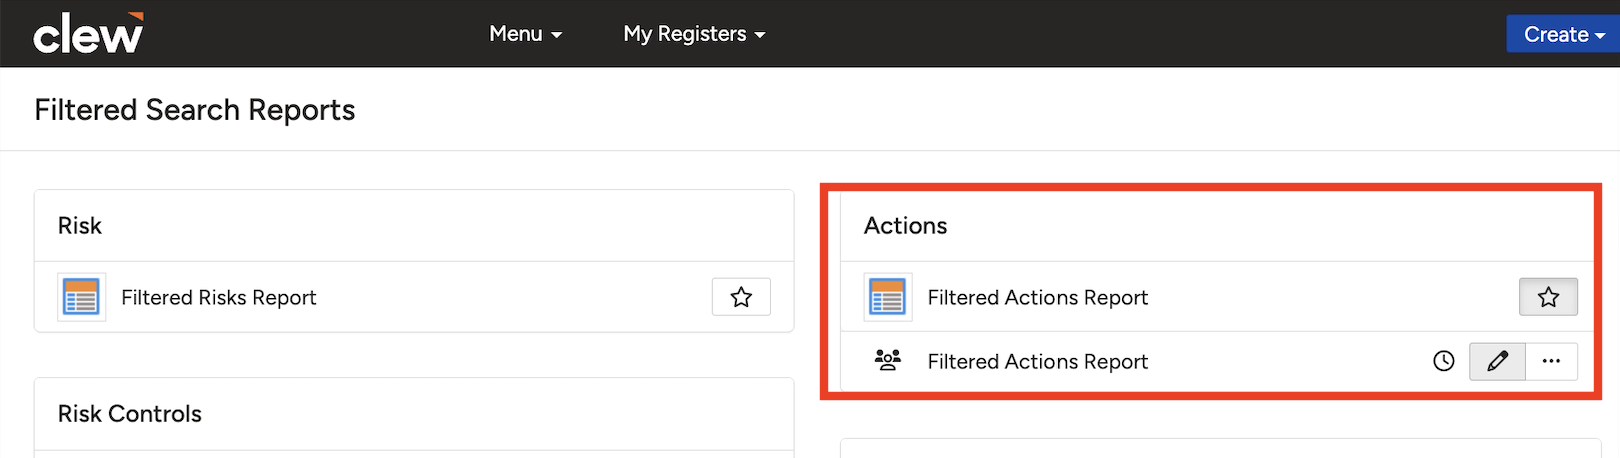
Opening a saved report template via Manage > Edit.
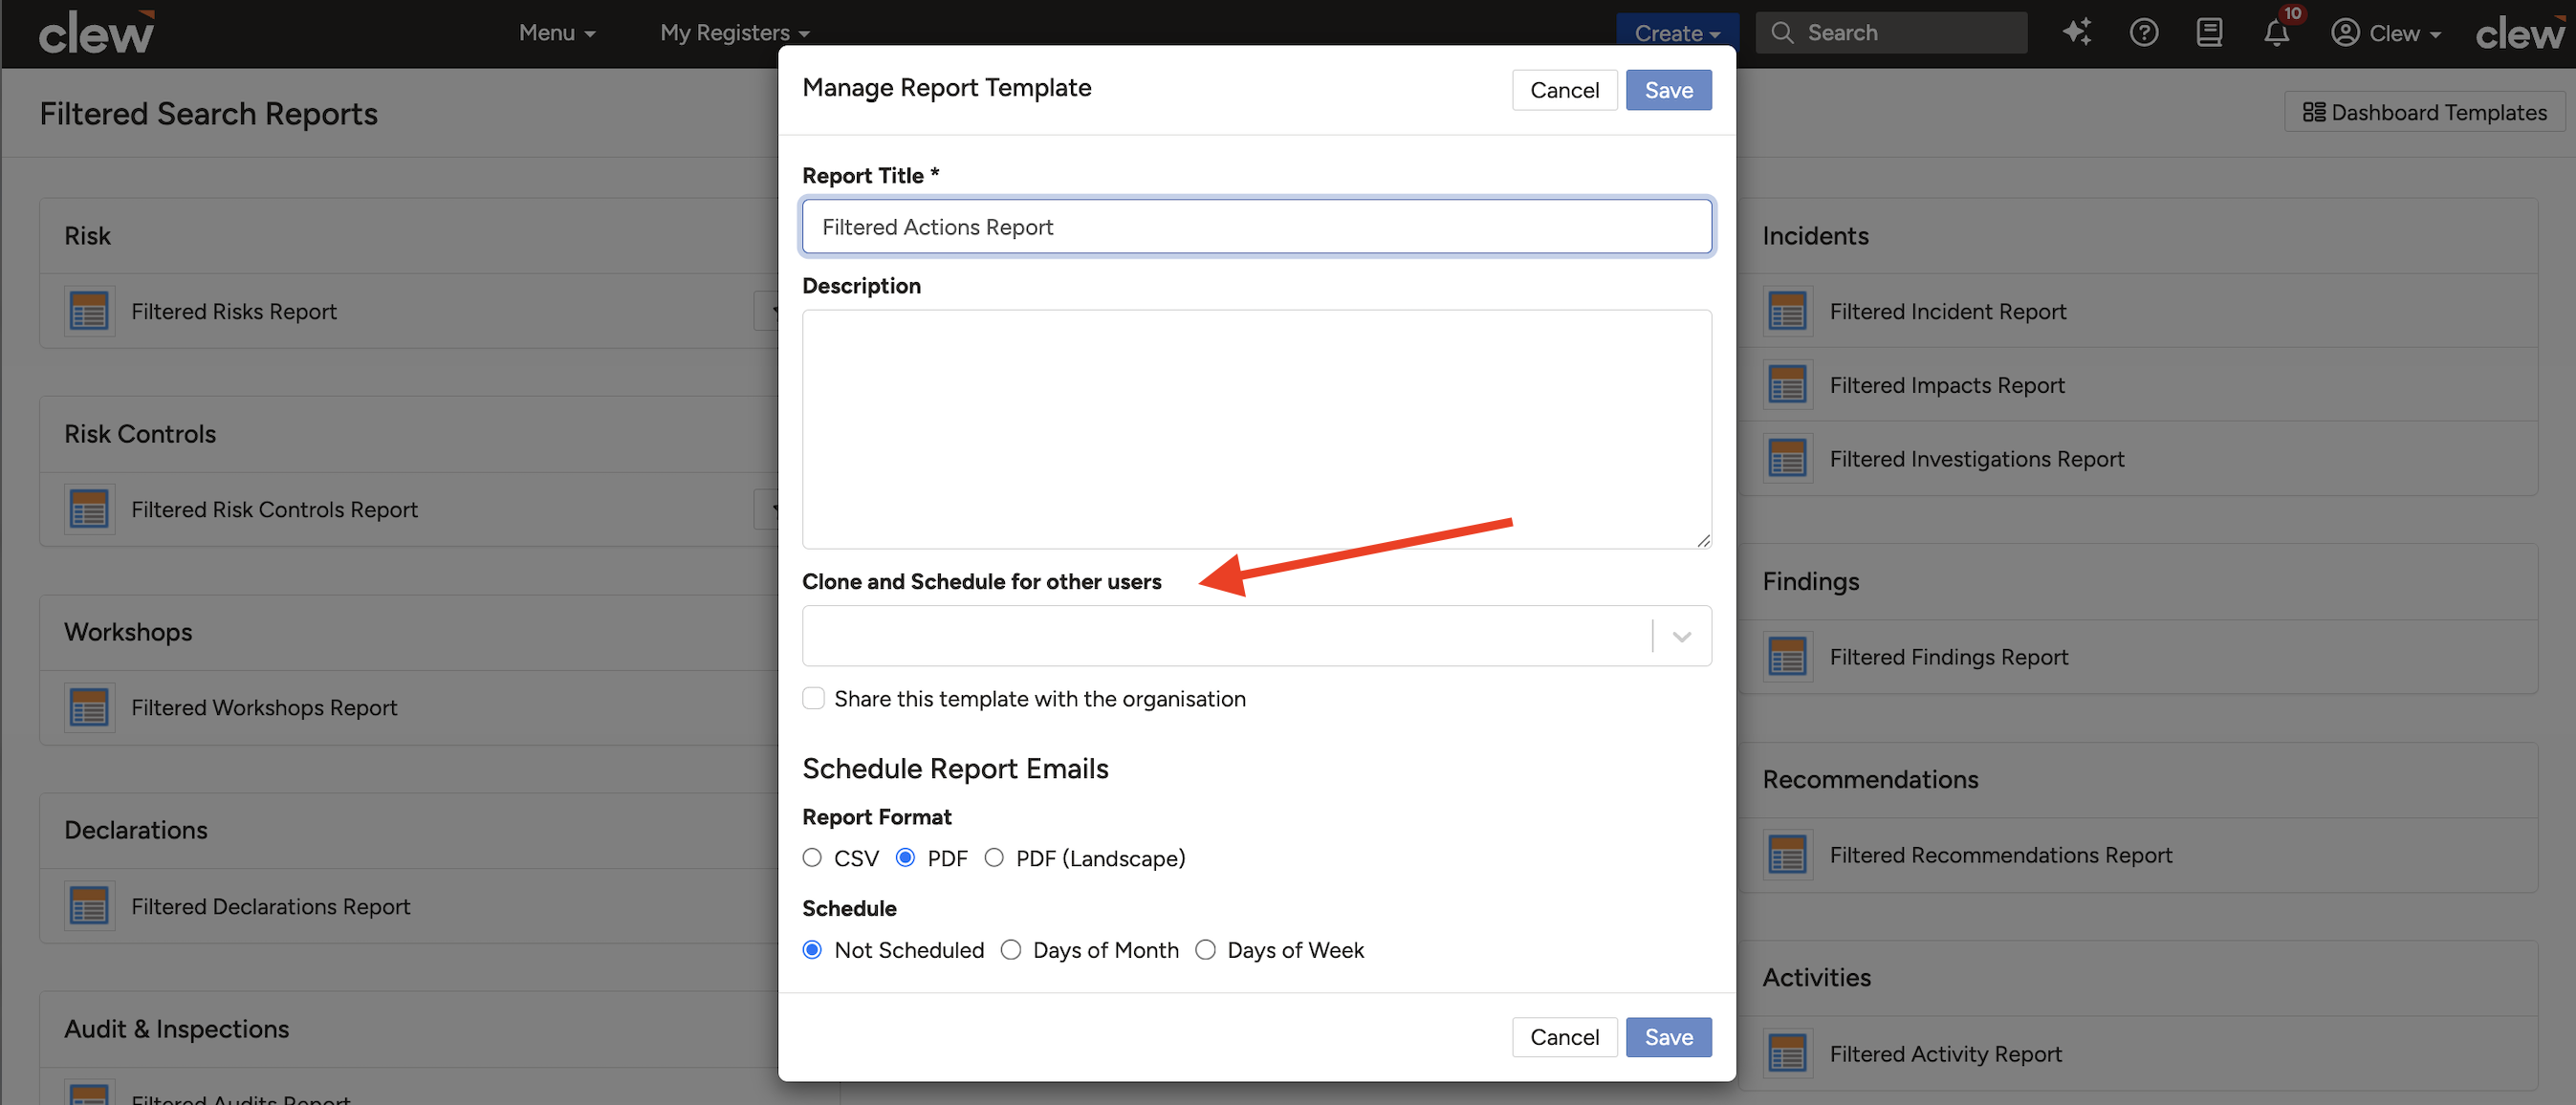
The Clone and Schedule field for cloning the template to other users.
4. Create new security groups to provide granular access
- Navigate to the Security Groups tab and click the three dots to the right of a security group that is assigned to the team.
- Select Add Security Group from the menu.
- Specify a title and choose only the necessary policies to define the new security group.
Creating a custom security group this way allows for more granular access compared to the original group it was based on.

The Add Security Group option on the Security Groups tab.
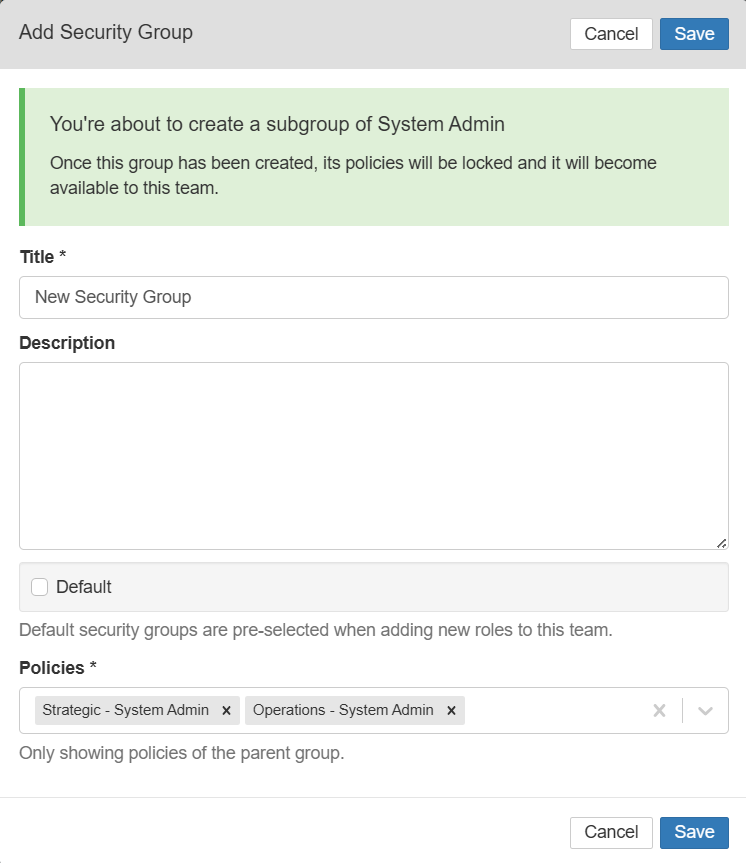
Defining the new security group with only the necessary policies.
5. Common Issues & Troubleshooting
| Issue | Likely Cause | Solution |
| I cannot access any registers even though I belong to a team | Team membership alone does not grant register access | You must be explicitly assigned to a security group linked to the team. Ask your Team Administrator to assign one |
| I cannot see all users while onboarding | User scoping is enabled in the settings | This is expected. When user scoping is enabled, you can only view users assigned to your teams for onboarding |
| I cannot see any teams under My Teams | You may not have been added to any team | Check with your team or system administrator to verify your team membership status |
| I need to remove a user's access from the system entirely | Offboarding alone only removes the user from the team | When offboarding, select the Deactivate option. This offboards the user from the team and removes their access entirely from the system. Use this only if the person no longer requires access |
| Unsure where Default security groups apply | The Default flag affects onboarding behaviour | Security groups marked as Default are pre-selected while onboarding a user into the team |
Best practices:
- Delink a member's security groups before offboarding them, to ensure security and prevent unauthorised access.
- Use the Deactivate option only when the person genuinely no longer needs any access to the system, as it removes their access entirely.
- Mark your team's commonly used security groups as Default so onboarding is quicker and more consistent.
- Create custom security group subsets rather than assigning broad groups, so each member gets only the access their role requires.
- Review membership types periodically and downgrade members whose responsibilities have changed.
Click a title to preview it here. Use the Open full article button to read the full version in a new tab.
▾Security Groups Open full article »
Related article
How Security Groups define register access and are assigned to team members. Team membership alone does not grant access; a security group must be assigned.
Was this article helpful?
That’s Great!
Thank you for your feedback
Sorry! We couldn't be helpful
Thank you for your feedback
Feedback sent
We appreciate your effort and will try to fix the article