Mass Functionality
How to edit, delete, link, attach, and unlink several records at once
Contents
- 1. Introduction & Context
- 2. The Mass Functions Explained
- 3. Requirements
- 4. Step-by-Step Guide
- 5. Common Issues & Troubleshooting
- 6. Related Articles
1. Introduction & Context
Mass functionality lets you act on more than one record at once. Instead of opening each record in turn, you select several records together and apply a single action to all of them, whether that is editing, deleting, linking, attaching, or unlinking.
Example: if you need to delete several risks, rather than opening each risk and deleting it one by one, mass delete lets you remove them all in a single action.
Who is it for? Any user who has been given mass permission for a module and needs to make the same change to many records quickly and efficiently.
What does it impact? Mass functionality is enabled per module, so it can be switched on for just Risk, or just Action, depending on your needs. It is available in list views and in sub-panels, but it is not available in datagrid.
2. The Mass Functions Explained
Once you have selected the records you want to work with, the following actions are available.
- Mass Edit: apply the same field change to all of the selected records in one step, for example setting the same status or owner across many records at once.
- Mass Delete: delete all of the selected records together. You are asked to provide a reason before the deletion is confirmed.
- Mass Link: link all of the selected records to another record in one action, rather than linking each one individually.
- Mass Attach: add the same attachment to all of the selected records at once.
- Mass Unlink: remove a link from all of the selected records at once, the reverse of mass link.
3. Requirements
- Mass permission must be granted to you through a permission set. This can be set up by your company's system administrators or by Clew administrators.
- Mass permission on its own is not enough. You also need the standard permission for the action you are performing. For example, to mass delete in the Action module you need both mass permission and the standard delete permission for that module.
- Mass functionality is enabled per module, so it may be available for some modules and not others.
- Mass functionality is not available in datagrid.
4. Step-by-Step Guide
The steps below use mass delete on risks in the Marine register as the example. A register is like a folder for your records and can be named to suit your organisation, for example by project, business unit, or department. The same selection steps apply to the other mass actions.
Using mass functionality in a list view
- Navigate to My Registers at the top of the screen, then select Marine.
- In the Marine register, open the Menu and click Risk & Opportunity. You will see a list view of all the risks saved under the Marine register.
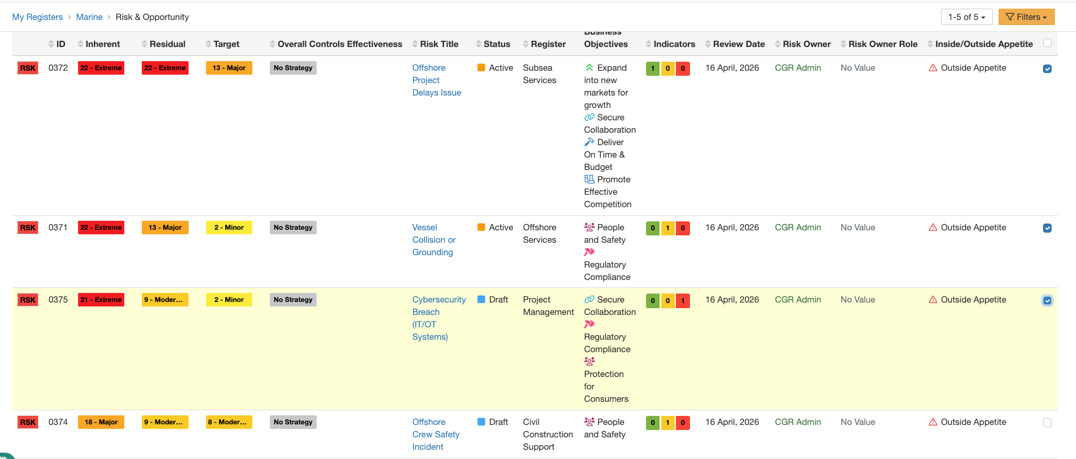
The risk list view, with a checkbox on each row for selection.
- Select the records you want to act on. To select every record on the current page, tick the checkbox at the top of the list. To select specific records, tick the individual checkboxes next to each one.
- Be aware of pagination. By default the list shows 10 records per page, so a list of 100 records is split across 10 pages, and the top checkbox selects only the current page. You can change how many records are shown per page using the pagination control.
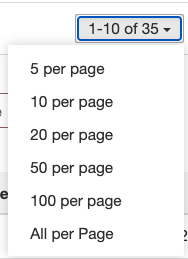
Changing the number of records shown per page.
- Once your records are selected, use the mass action icons at the top of the list. In this example, click the delete (bin) icon.

The mass action icons available once records are selected.
- In the prompt that appears, review the list of items to be deleted, provide a Reason for the deletion, then click Deleteto confirm.
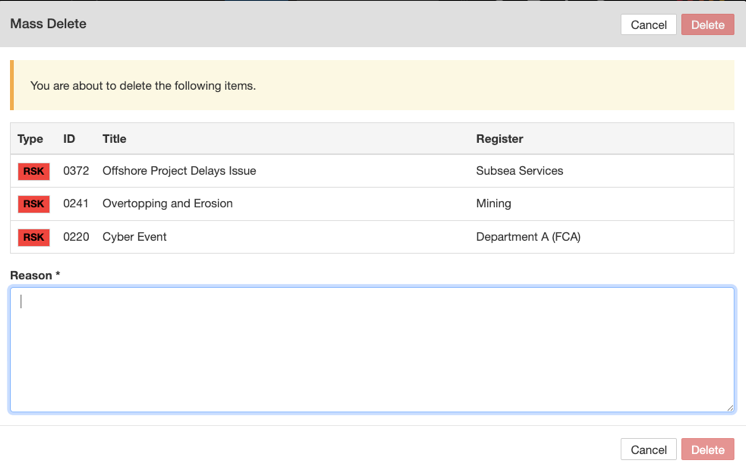
The Mass Delete confirmation, with the required reason field.
Using mass functionality in a sub-panel
You can also use mass functionality inside the sub-panels of a record. For example, a risk may have several related actions shown in the Action sub-panel on the risk's show view.
- Navigate to My Registers at the top of the screen, then select Marine.
- In the Marine register, open the Menu and click Risk to show the list view of risks.
- Click the title of a specific risk to open its show view (detail page).
- Scroll down to the Actionsub-panel, which shows all actions linked to that risk.
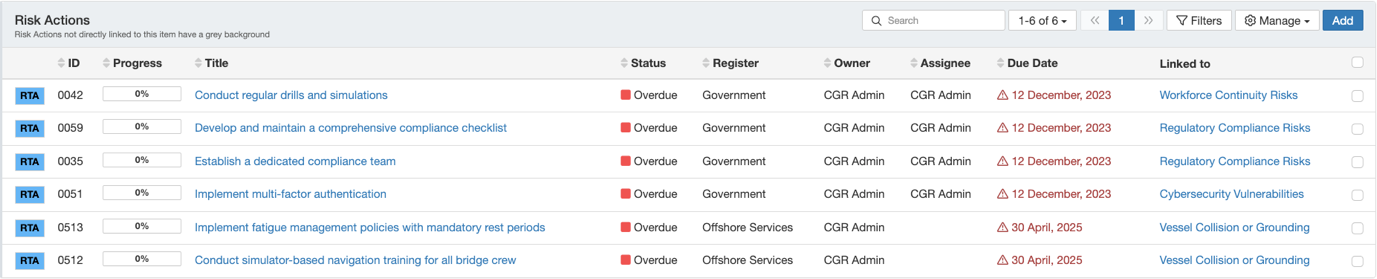
The Action sub-panel, with a Manage button for mass actions.
- In the sub-panel, select all actions using the checkbox at the top, or tick individual actions.
- Click Manage within the sub-panel and select Mass Delete.
- Provide the required reason and confirm to complete the action.
5. Common Issues & Troubleshooting
| Issue | Likely Cause | Solution |
| You cannot see the checkboxes or mass action icons | Mass functionality is not enabled for that module, or you do not have mass permission | Ask your system administrator or a Clew administrator to enable mass functionality for the module and add mass permission to your permission set. |
| The mass action is visible but does not work, or the option is greyed out | You have mass permission but not the underlying standard permission for that action | Make sure you also have the standard permission, such as delete or edit, for that module. Both are needed together. |
| Only some of your records were acted on | The top checkbox selects only the records on the current page | Increase the number of records shown per page using the pagination control, then re-select, or repeat the action on each page. |
| Mass functionality is missing in a datagrid | Mass functionality is not supported in datagrid | Use a list view or sub-panel to run the mass action instead. |
Best practices:
- Check your selection before confirming, especially with mass delete, since the action applies to every selected record.
- When working with long lists, increase the records shown per page so you can select everything you need in one pass.
- Give a clear reason when deleting, so the change is easy to understand later.
Click a title to preview it here. Use the Open full article button to read the full version in a new tab.
▾Changing what can be Mass Edited Open full article »
Related article
For administrators: how to control which fields are available on the mass edit form.
▾Why can't I see the status field on the mass edit form? Open full article »
Related article
A short FAQ on why a field such as status may not appear on the mass edit form, and how to enable it.
Was this article helpful?
That’s Great!
Thank you for your feedback
Sorry! We couldn't be helpful
Thank you for your feedback
Feedback sent
We appreciate your effort and will try to fix the article