Clone a Record
How to duplicate an existing record, choose what carries over, and clone several records at once in the Clew Platform
Contents
- 1. Introduction & Context
- 2. Key Features & Functions
- 3. Requirements
- 4. Step-by-Step Guide
- 5. Common Issues & Troubleshooting
- 6. Related Articles
1. Introduction & Context
Cloning lets you create a new record from an existing one so you do not have to fill everything in from scratch. When you clone a record, Clew copies its details into a new record, and you can choose which linked items come across before you save.
A worked example: you have logged a risk called Supplier outage: Region A and need almost the same risk for Region B. Instead of building it again, you clone the first risk, change the title and location, and save. The new risk keeps the shared detail and can stay linked back to the original.
Who is it for? Any end user with access to clone records in a module. What appears on the clone form is controlled by a clone template that a System Administrator sets up. If you need to change what is copied, see Clone Templates.
What does it impact? Cloning creates a brand new record. It does not change the original. If the template has Link to Original enabled, the new record is linked back to the source, and the original shows a Copies sub-panel listing everything cloned from it.
2. Key Features & Functions
- Clone a single record: Duplicate one record from its detail view when you need a near-identical copy.
- Clone several at once (mass clone): Select multiple records in a list view and clone them all in one action, where your administrator has enabled it.
- Choose what comes across: The clone form lets you include or exclude related items such as causes, actions, or attachments. Some are pre-selected and some are optional.
- Title prefix: Cloned records can carry a prefix such as Copy of so they are easy to tell apart from the original.
- Link back to the original: When enabled, the original record shows a Copies sub-panel so you can see how many records were created from it.
- Blank-by-design fields: Some fields are deliberately left empty on the clone (for example dates or references that should not carry over). This is set on the clone template.
3. Requirements
- A clone template must be set up and enabled for the module by a System Administrator. See Clone Templates.
- You need the appropriate access through your security group to clone records in that module.
- To clone a single record, the template must be set to show in the record detail view. To mass clone, it must be set to show in the list view.
4. Step-by-Step Guide
Cloning a single record
- Open the record you want to copy.
- Click the Clone option. It is usually labelled with the clone template name (for example Clone Risk).

The Clone option in a record's detail view, labelled with the clone template name.
- The clone form opens, pre-filled with the details copied from the original. Review and edit the fields as needed. Any field the template is set to ignore will be blank, ready for you to complete.
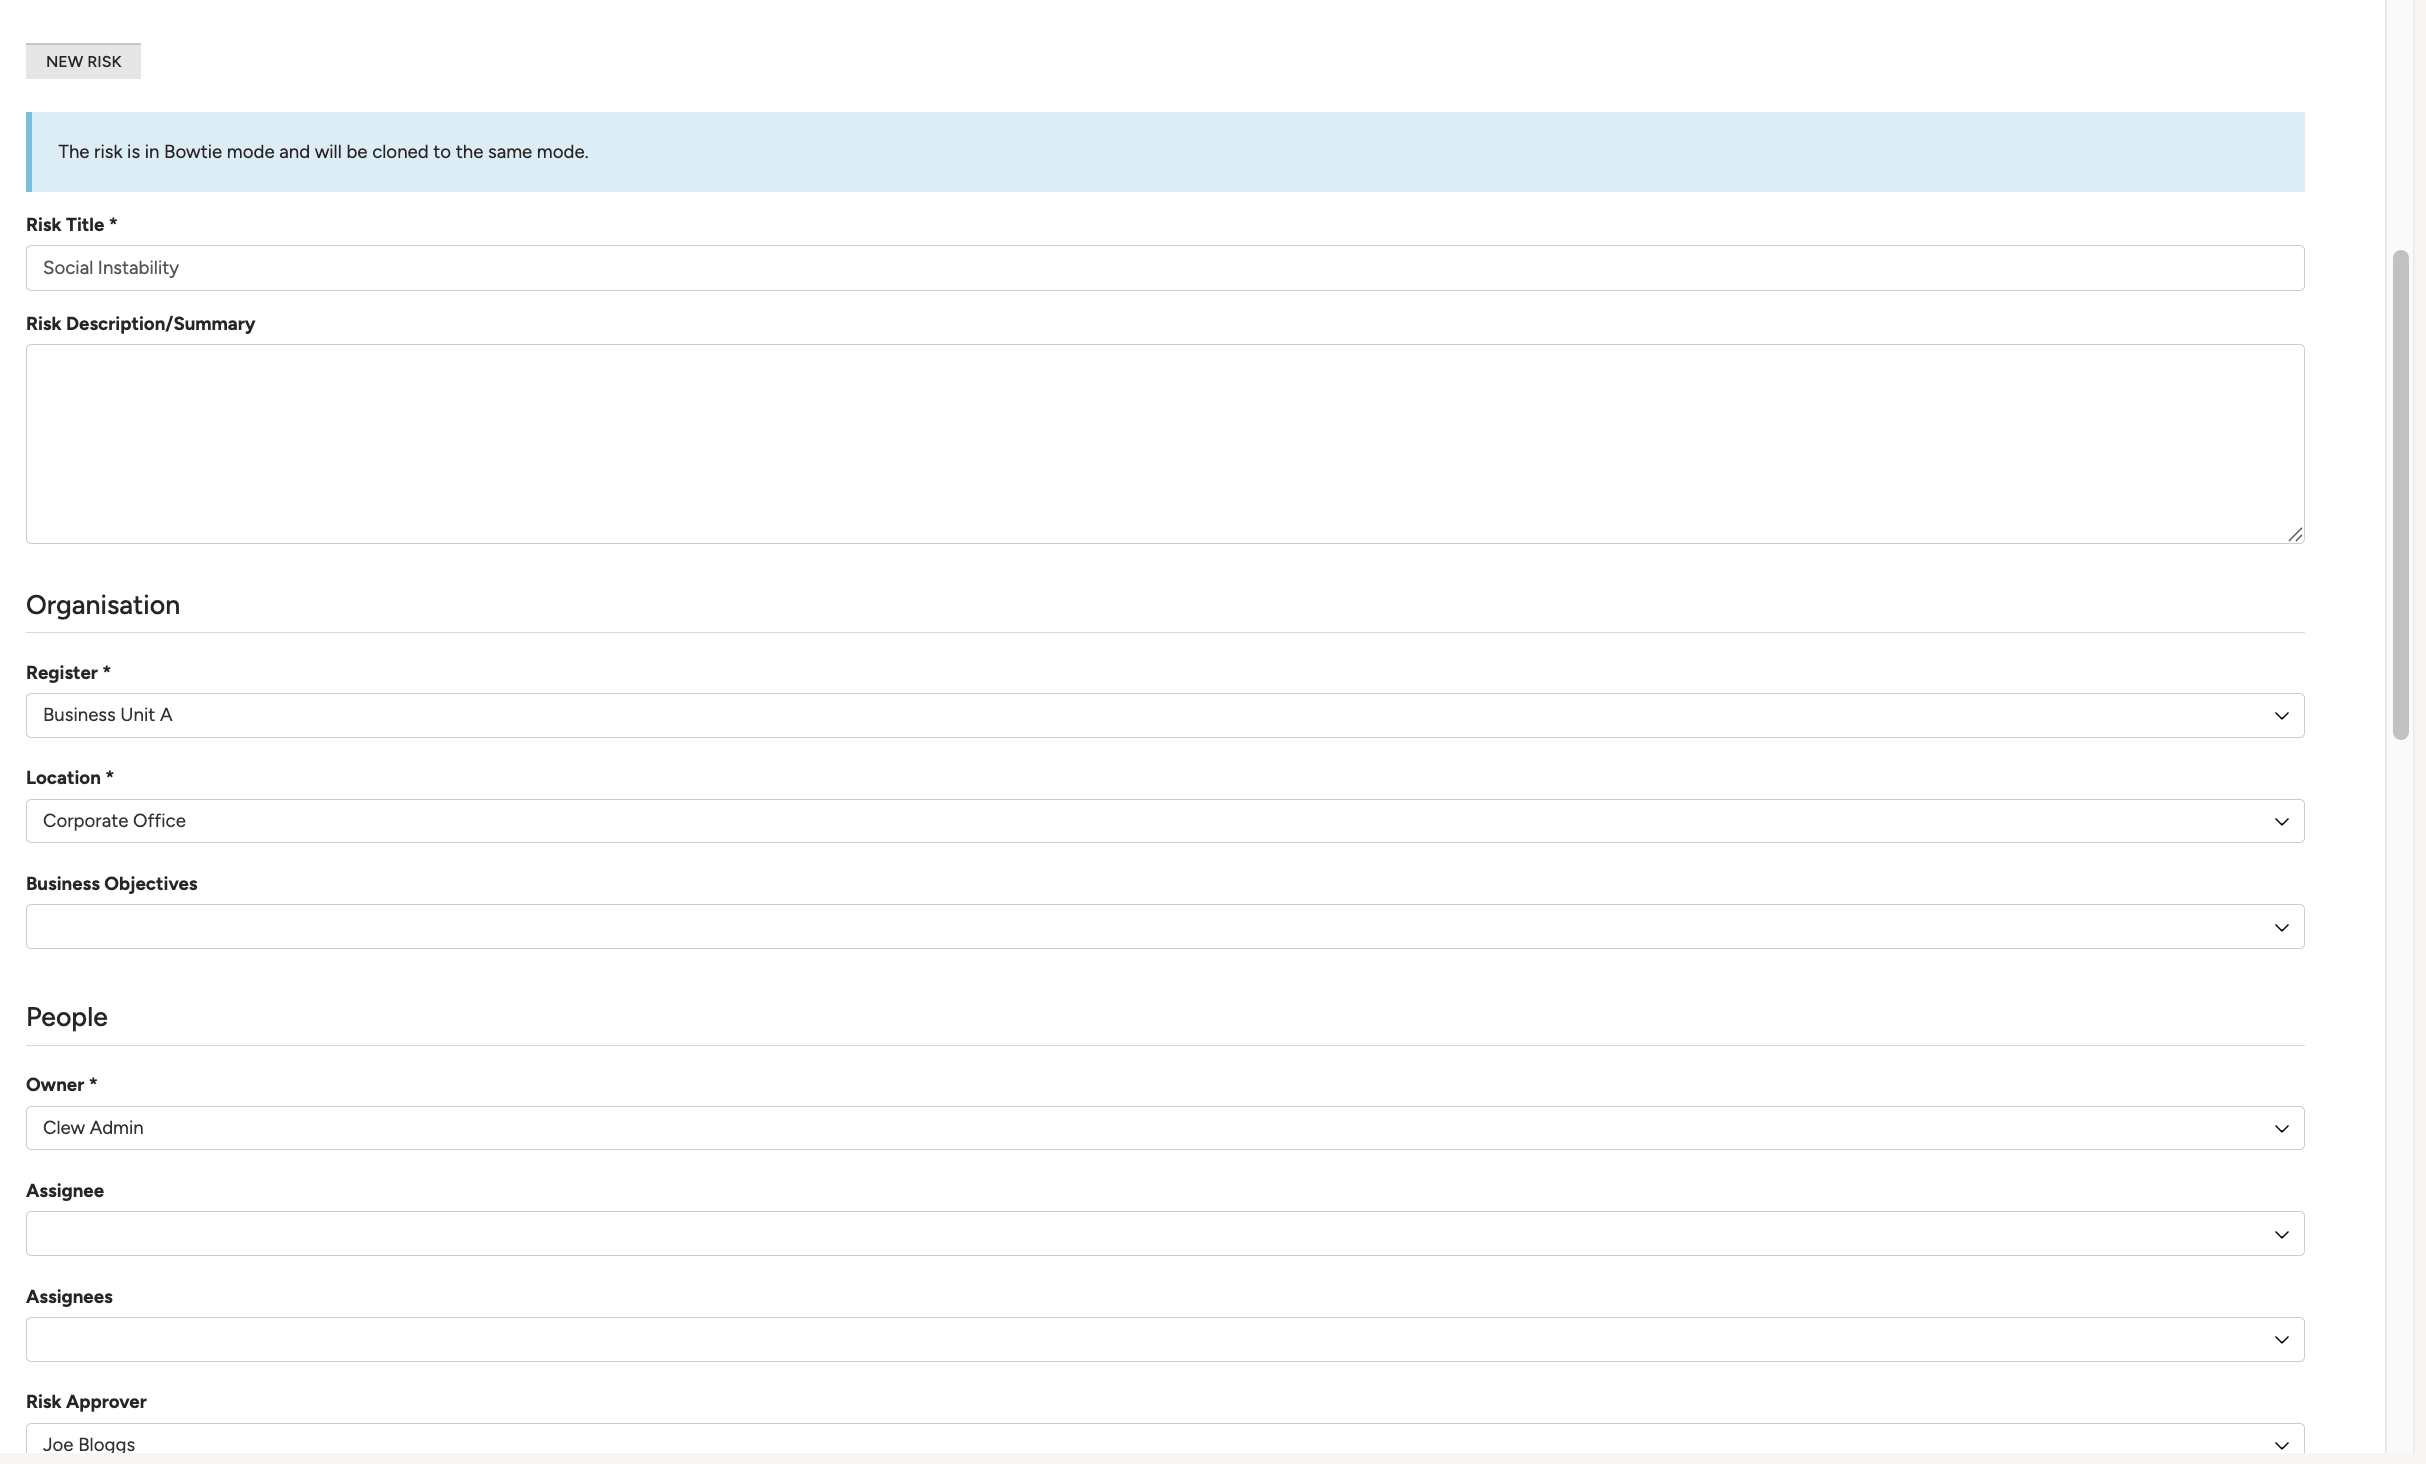
The clone form, pre-filled with the details copied from the original record.
- Choose which related items to bring across. Pre-selected items will be copied automatically, so tick or untick the ones you want or don't want to include.
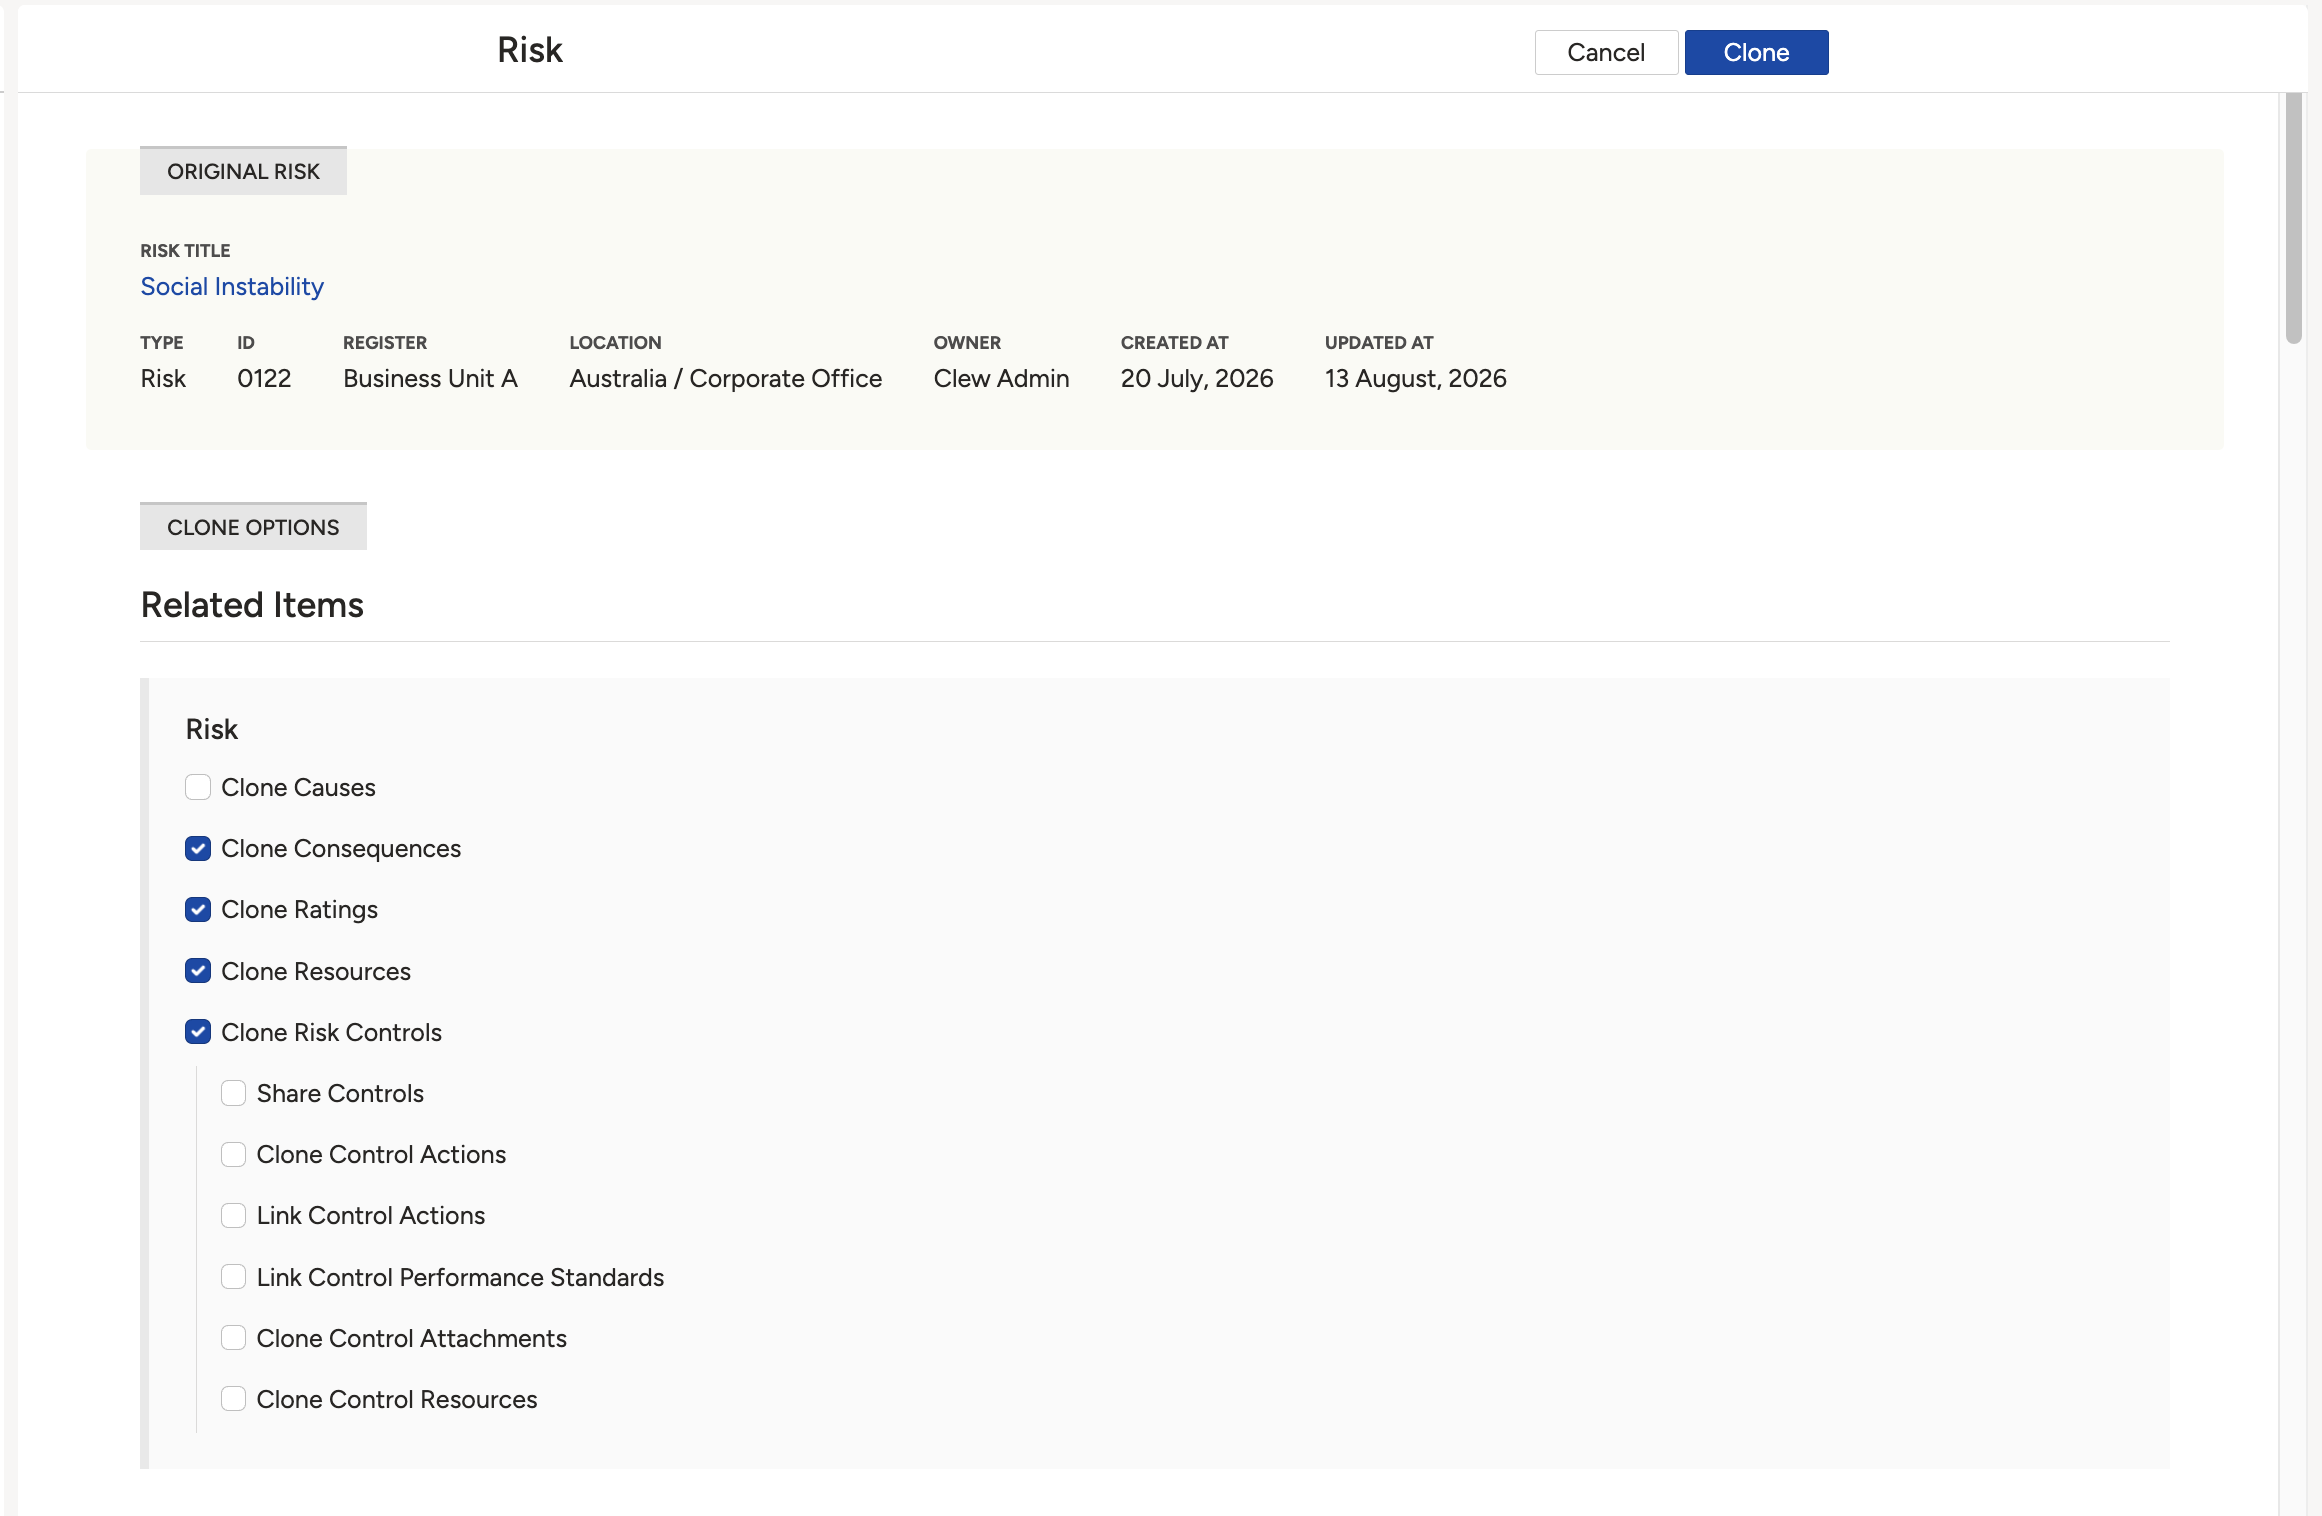
Related items available when cloning. Items unselected by default (orange icon) must be ticked to include them.
- Click Save. The new record is created and opens so you can check it.
Cloning several records at once
- Go to the module list view.
- Select the records you want to clone using the checkboxes.
- Click the Cloneoption in the list action menu.
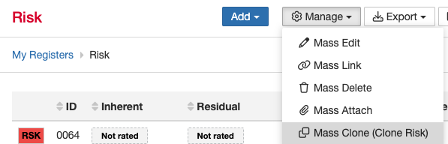
The Clone option in the module list view, available once a clone template is enabled for lists.
- Confirm the clone. Each selected record is duplicated using the template settings.
Finding cloned records
- Open the original record.
- Scroll to the Copies sub-panel at the bottom. It lists every record created from this original. If the template does not have Link to Original enabled, no Copies sub-panel appears.
5. Common Issues & Troubleshooting
| Issue | Likely Cause | Solution |
| No Clone option on the record or list | No clone template is enabled for the module, it is not set to show in that view, or you do not have the required access | Ask your System Administrator to confirm the template is enabled and visible, and that your security group can clone. See Clone Templates. |
| Only a few of the linked items appear on the clone form | The clone template only includes certain relations, and some are set to unselected by default (shown with an orange icon) | Tick the optional relations you want before saving. If an item you expect is missing entirely, the template does not include that relation, so ask your administrator to add it. See this FAQ. |
| Some fields are blank on the cloned record | Those fields are set as ignored on the clone template, so they are intentionally left empty | Fill in the blank fields on the new record. If a field should always copy across, ask your administrator to remove it from the template's ignored fields. |
| The original record has no Copies sub-panel | Link to Original is not enabled on the clone template | This is expected. Ask your administrator to enable Link to Original if you need copies traced back to the source. |
Best practices:
- Always review the clone form before saving. Cloning copies the source values, so update anything that should differ, such as titles, dates, and owners.
- Rename the clone straight away so it is easy to tell apart from the original.
- Check the optional relations (orange icons) each time. They are off by default, so linked items you expect will not come across unless you tick them.
- Use mass clone for setting up several similar records quickly, then edit each one afterwards.
Click a title to preview it here. Use the Open full article button to read the full version in a new tab.
▾Clone Templates Open full article »
Related article
For administrators: how to create and configure the clone templates that control what the clone form copies, which relations are included, and where the Clone option appears.
▾Only a few of the selected items appear on the clone form, why? Open full article »
Related article
A short FAQ explaining why only some linked items show on the clone form, and what to do about it.
Was this article helpful?
That’s Great!
Thank you for your feedback
Sorry! We couldn't be helpful
Thank you for your feedback
Feedback sent
We appreciate your effort and will try to fix the article