Sub-Panels
How to add and configure sub-panels to display related records within a module
Contents
- 1. Introduction & Context
- 2. Key Features & Functions
- 3. Requirements
- 4. Step-by-Step Guide
- 5. Common Issues & Troubleshooting
- 6. Related Articles
1. Introduction & Context
Sub-panels let you display related records directly under a parent record in the Clew Platform, so your team can see all associated data in one place without navigating away.
For example, an Action sub-panel can appear under a Risk record to show all actions linked to that risk. Sub-panels can also surface attachments, comments, obligations, or any other record type that has a relationship with the parent module.
Who is it for? Administrators configuring module layouts in the Clew Platform.
What does it impact? Enabling a sub-panel changes the record view for all users of that module. It does not create or delete records; it controls visibility and the actions available on linked records.
2. Key Features & Functions
- Related record display: Shows associated records (e.g., Actions, Obligations, Attachments) directly within the parent record view, eliminating the need to switch between modules.
- Configurable actions: Control exactly which operations users can perform on sub-panel records. Add, Link, Unlink, Delete, and Export can each be enabled or disabled independently.
- Toggle control: Sub-panels are enabled per custom type, so you can show different related data depending on the type of record being viewed.
- Structured workflow: Bringing related records into one view improves traceability and speeds up decision-making by keeping all relevant information accessible at a glance.
3. Requirements
- Administrator access to the Clew Platform.
- The module you want to display as a sub-panel (e.g., Actions) must already exist as a custom type in the system.
- Access to Admin > Custom Types in the Modules section.
4. Step-by-Step Guide
Adding a Sub-Panel to a Module
The following example shows how to add the Action sub-panel to the Risk module. The same steps apply for any module and sub-panel combination.
- Navigate to Admin > Custom Typesin the Modules section. This opens a page listing all custom types across your modules.
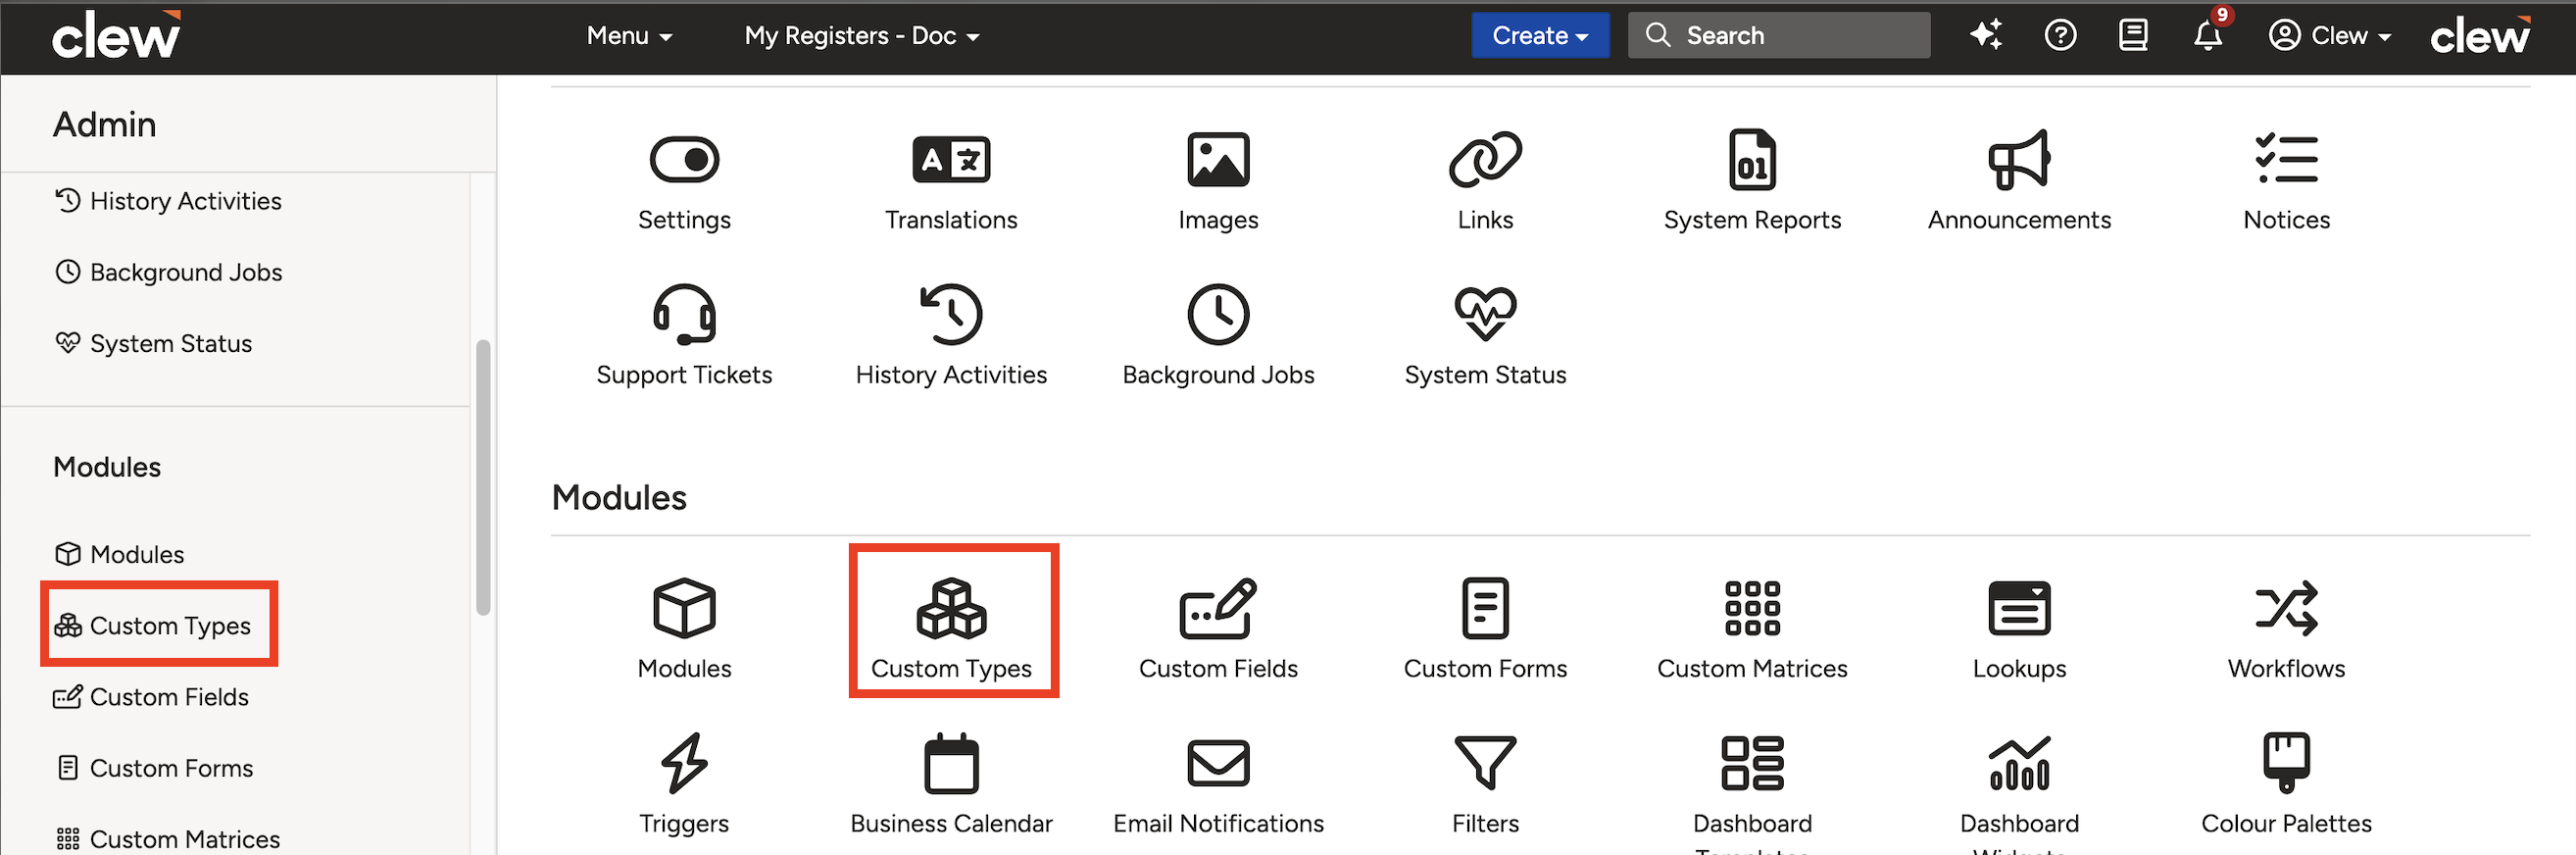
The Custom Types page lists all module types available in your Clew instance.
- Find the module you want to configure (e.g., Risk). Click Edit and then select the custom type where you want to add the sub-panel.
- In the Custom Types field, add the record type you want to display as a sub-panel (e.g., Action). This creates the relationship between the two types.
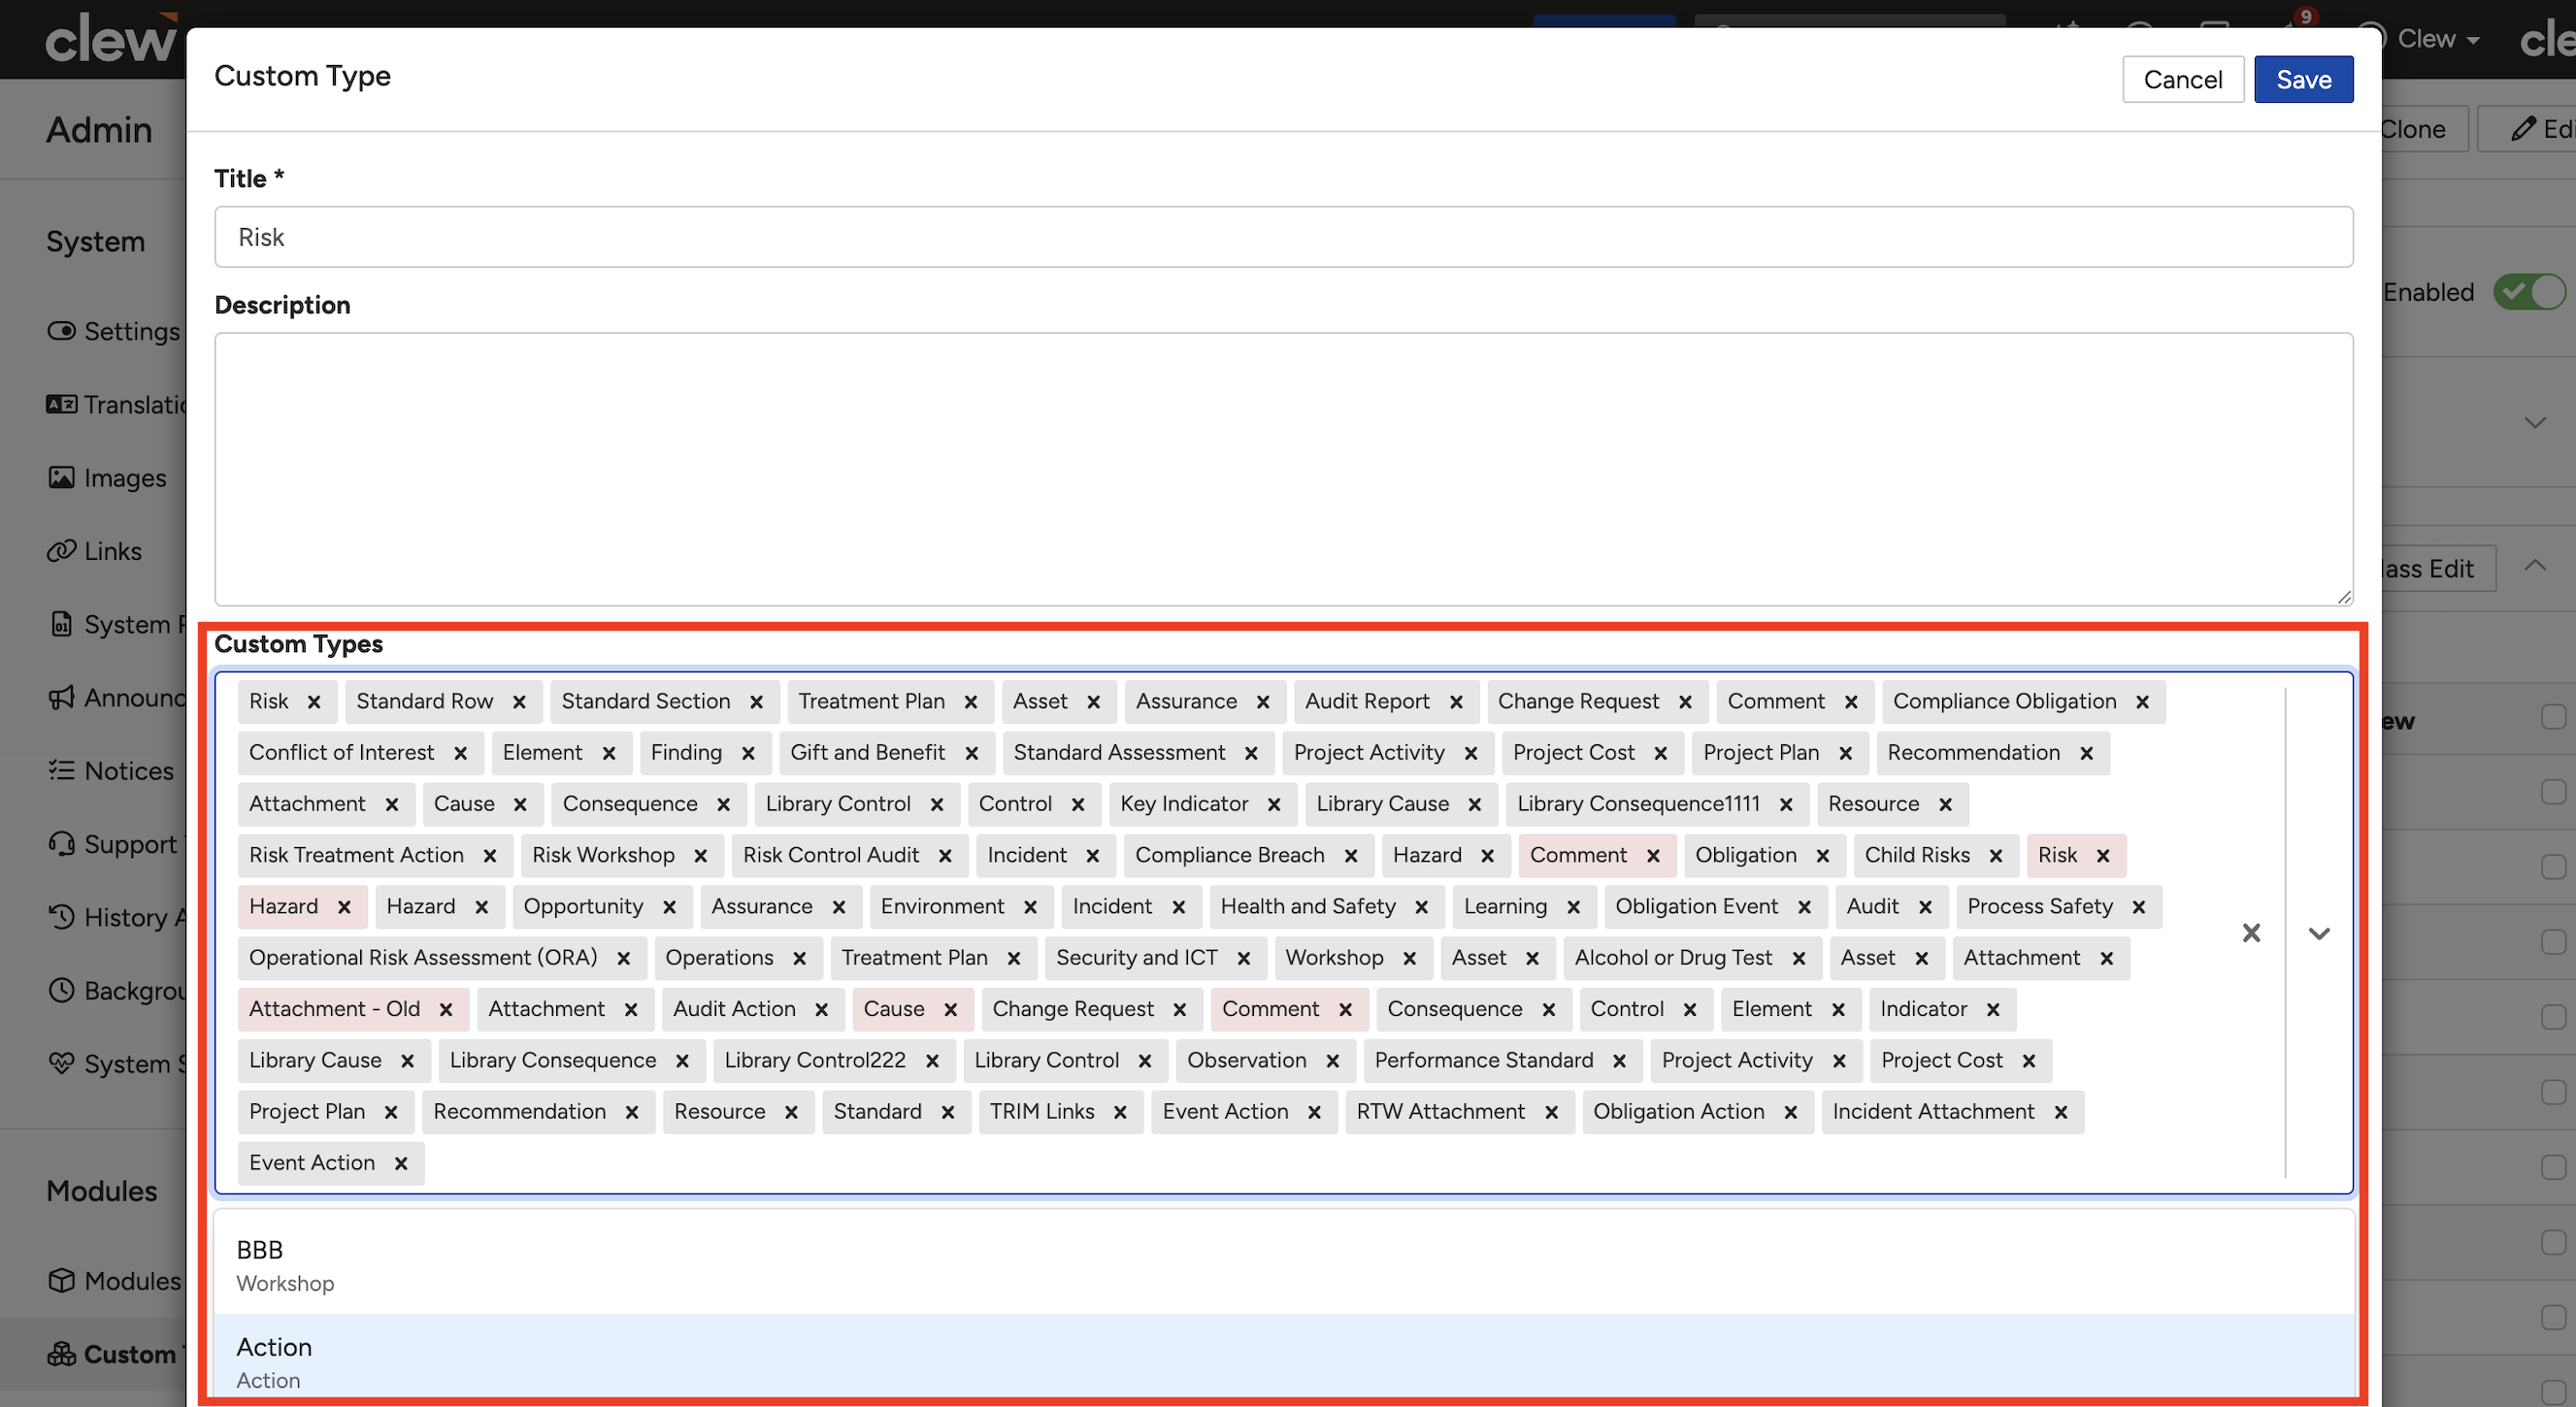
Add the related type (e.g., Action) to the Custom Types field to link it to the module.
- Scroll down to the Task (Action)section and click the toggle to enable the sub-panel in your module.
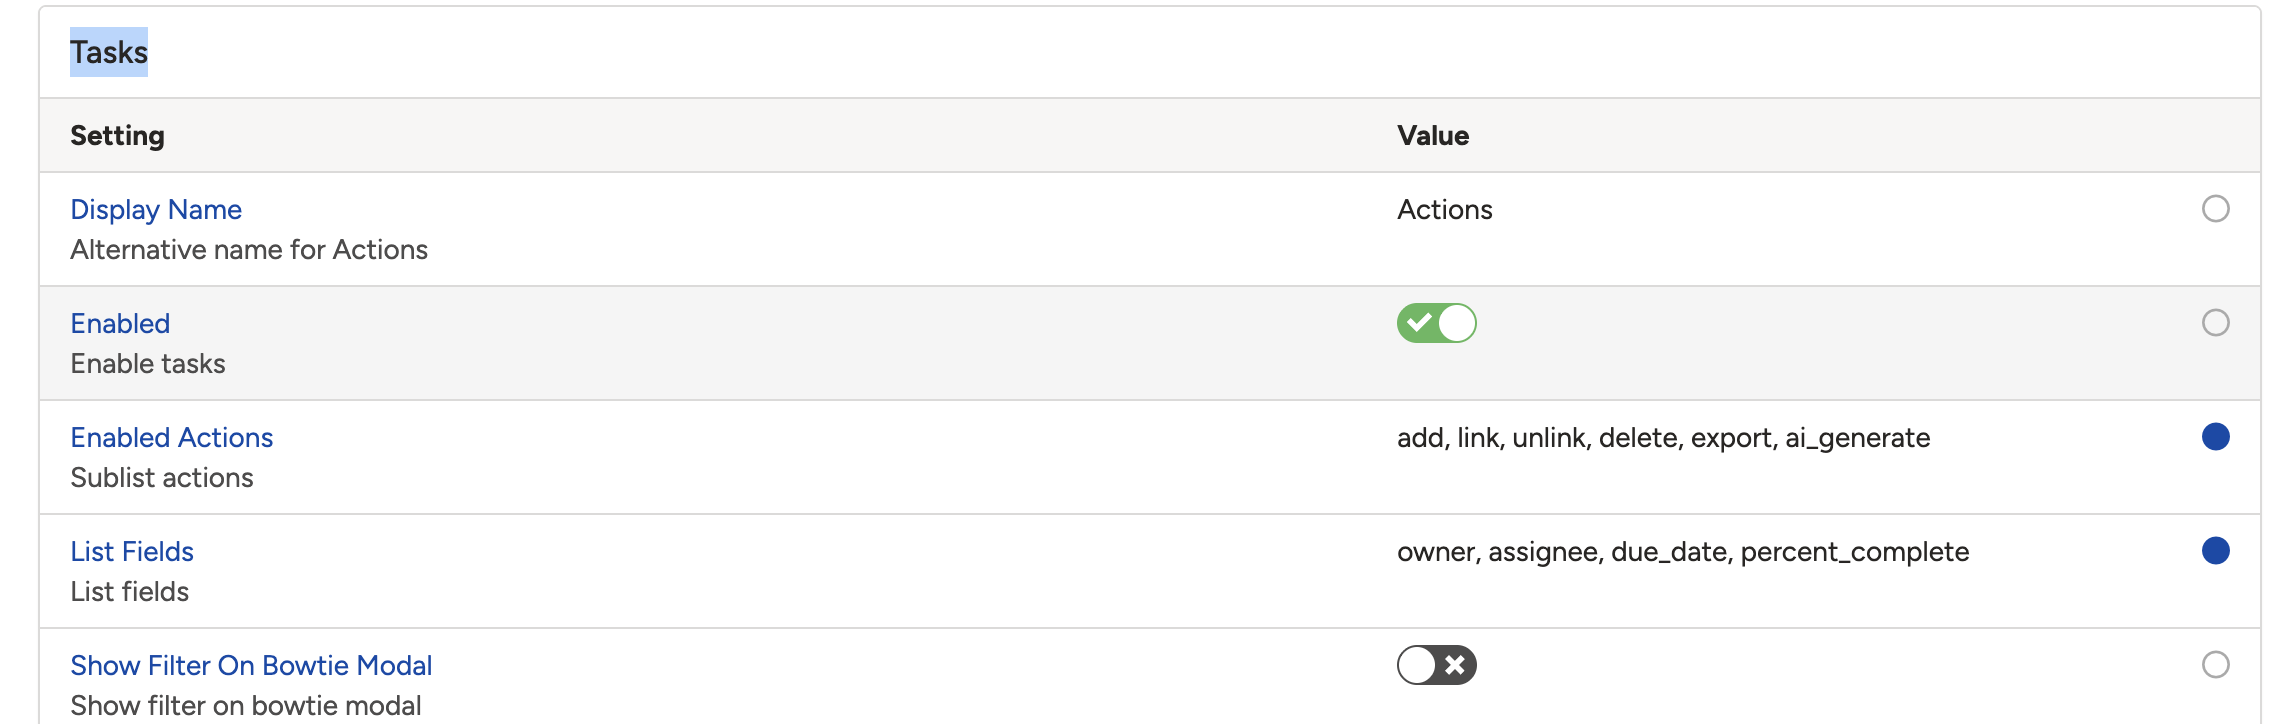
Use the toggle in the Task (Action) section to activate the sub-panel for the selected module.
- Configure which actions are available in the sub-panel by enabling the options you need:
- Add: Allows users to create new linked records directly from the sub-panel.
- Link: Allows users to link existing records to the parent.
- Unlink: Allows users to remove a link between records without deleting either.
- Delete: Allows users to permanently delete a linked record from the sub-panel.
- Export: Allows users to export the sub-panel records as a CSV file.
- Note: To enable more than one action, separate the values with commas. For example:
add, link, unlink - Click Save to apply your changes. The sub-panel will now appear on records of that type.
5. Common Issues & Troubleshooting
| Issue | Likely Cause | Solution |
| Sub-panel does not appear on records after saving | The toggle in the Task (Action) section was not enabled before saving | Return to Admin > Custom Types, open the custom type, scroll to the Task (Action) section and confirm the toggle is on, then click Save again. |
| The related type (e.g., Action) does not appear in the Custom Types field | The Action type has not been added to the Custom Types field for the selected custom type | Follow Step 3 and add the related type to the Custom Types field before scrolling to the toggle in Step 4. |
| Certain actions (e.g., Add or Export) are not visible in the sub-panel | Those actions were not enabled during configuration | Return to the custom type configuration, scroll to the Task (Action) section, and enable the required actions. Separate multiple values with commas (e.g., add, link, export), then click Save. |
| Changes are not reflected after saving | Browser cache is serving an older version of the page | Perform a hard refresh (Ctrl+Shift+R on Windows, Cmd+Shift+R on Mac) or clear your browser cache, then check the record again. |
Best practices:
- Only enable the actions that users genuinely need. Showing Delete when it is not required increases the risk of accidental data loss.
- Test sub-panel configuration in a non-production environment before applying it to live data.
- When linking multiple action types, review each custom type separately to ensure the correct sub-panels are enabled per record type.
- After enabling a sub-panel, open a record in that module to confirm the sub-panel appears and behaves as expected before communicating the change to users.
Click a title to preview it here. Use the Open full article button to read the full version in a new tab.
▾Custom Types Open full article »
Related article
Create and configure custom types within a module, which is where sub-panels are enabled and the related record types are linked.
Was this article helpful?
That’s Great!
Thank you for your feedback
Sorry! We couldn't be helpful
Thank you for your feedback
Feedback sent
We appreciate your effort and will try to fix the article