Schemas
How to create and configure schemas to customise the pop-up forms users see when creating or editing records in the Clew Platform
Contents
- 1. Introduction & Context
- 2. Key Features & Functions
- 3. Requirements
- 4. Step-by-Step Guide
- 5. Common Issues & Troubleshooting
- 6. Related Articles
1. Introduction & Context
Schemas are customisable pop-up forms that control what fields users see and interact with when creating or editing records in any module of the Clew Platform.
The Clew Platform uses dynamic forms for configuration, referred to as schemas. A create schema controls the form users see when adding a new record; an edit schema controls the form when they open an existing record to update it. The two can be configured independently, so each form shows only what is relevant to that action.
Who is it for? System Administrators who configure how modules look and behave for end users.
What does it impact? Schemas affect what users see when they click Add or open a record to edit it. Changes take effect once the schema is saved and synchronised.
2. Key Features & Functions
- Separate create and edit schemas: Each form action is configured independently, allowing different fields to be shown at each stage of the record lifecycle.
- Sections and items: The form is organised into sections (groups of related fields) and items (individual fields within each section). You can add, move, and rename sections to match your workflow.
- Rules: Conditional logic that controls when fields appear or become required. For example, if a field equals a specific value, another field can be hidden or made mandatory.
- Builder view: A visual editor for arranging fields, sections, and rules. Displays all core and custom fields available for the selected module and custom type.
- Sync: After changes to custom fields, schemas must be synchronised to reflect the updates. A Sync button is available on the Schemas admin page.
- Prepared Schema: A read-only sub-panel showing the underlying code the schema generates, useful for reference and troubleshooting.
3. Requirements
- System Administrator access is required to create and edit schemas.
- The module and custom type the schema applies to must already be configured in the system.
- Any changes to a custom field will impact the schema. After updating a custom field, the schema must be synchronised for the changes to appear on the form.
- Title Translations are only applicable if more than one language is enabled on your Clew Platform instance.
4. Step-by-Step Guide
Creating a Schema
- Go to Admin > Schemas. The page lists any existing schemas.
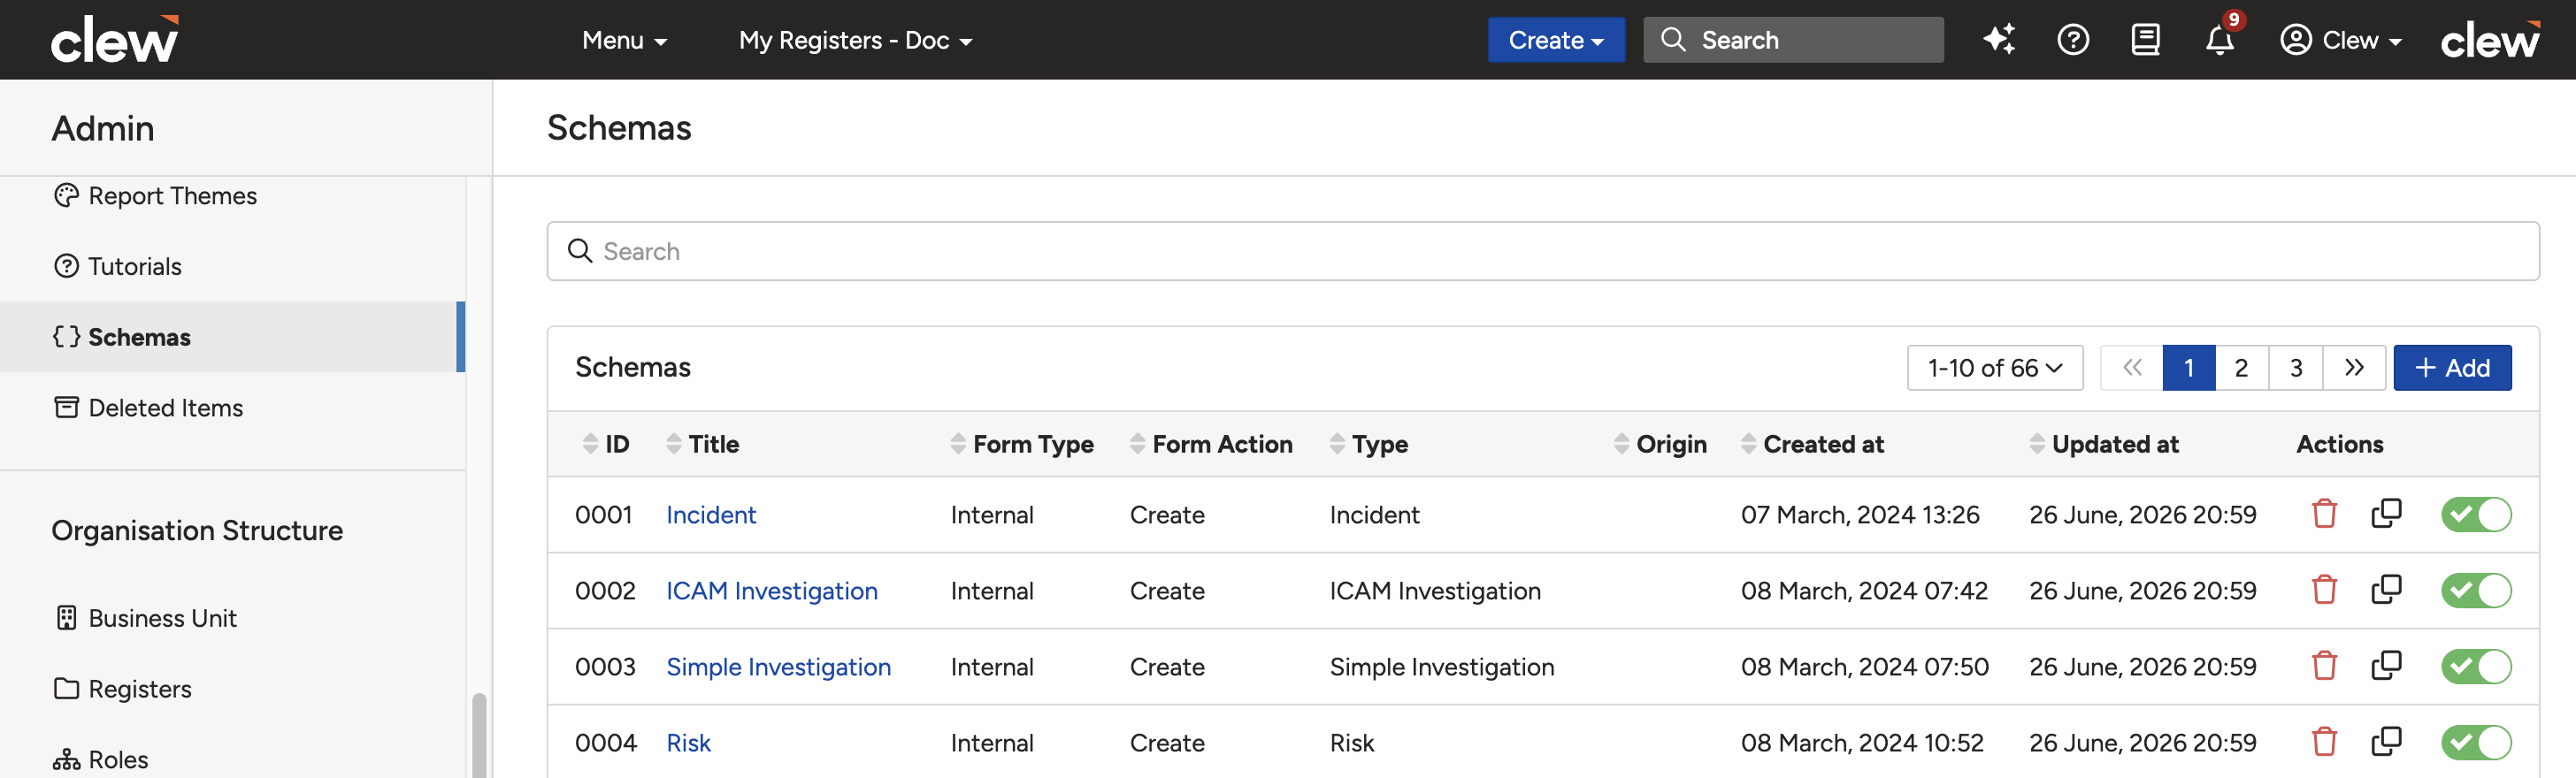
The Admin Schemas page listing all configured schemas.
- Click Add to open the new schema form. Complete the following fields, then click Create:
Field Description Title (required) The name for this schema. Use a name that makes the module, custom type, and form action clear, for example Risk: Project Risk: Create. Title Translations Only applicable if more than one language is enabled on your Clew Platform instance. Module The module this form applies to (for example Risk or Action). Selecting a module activates the Type field. Type The custom type within the module this schema applies to (for example Risk or Opportunity). Form Action Select Create to configure the form shown when a user adds a new record, or Edit to configure the form shown when a user updates an existing record. 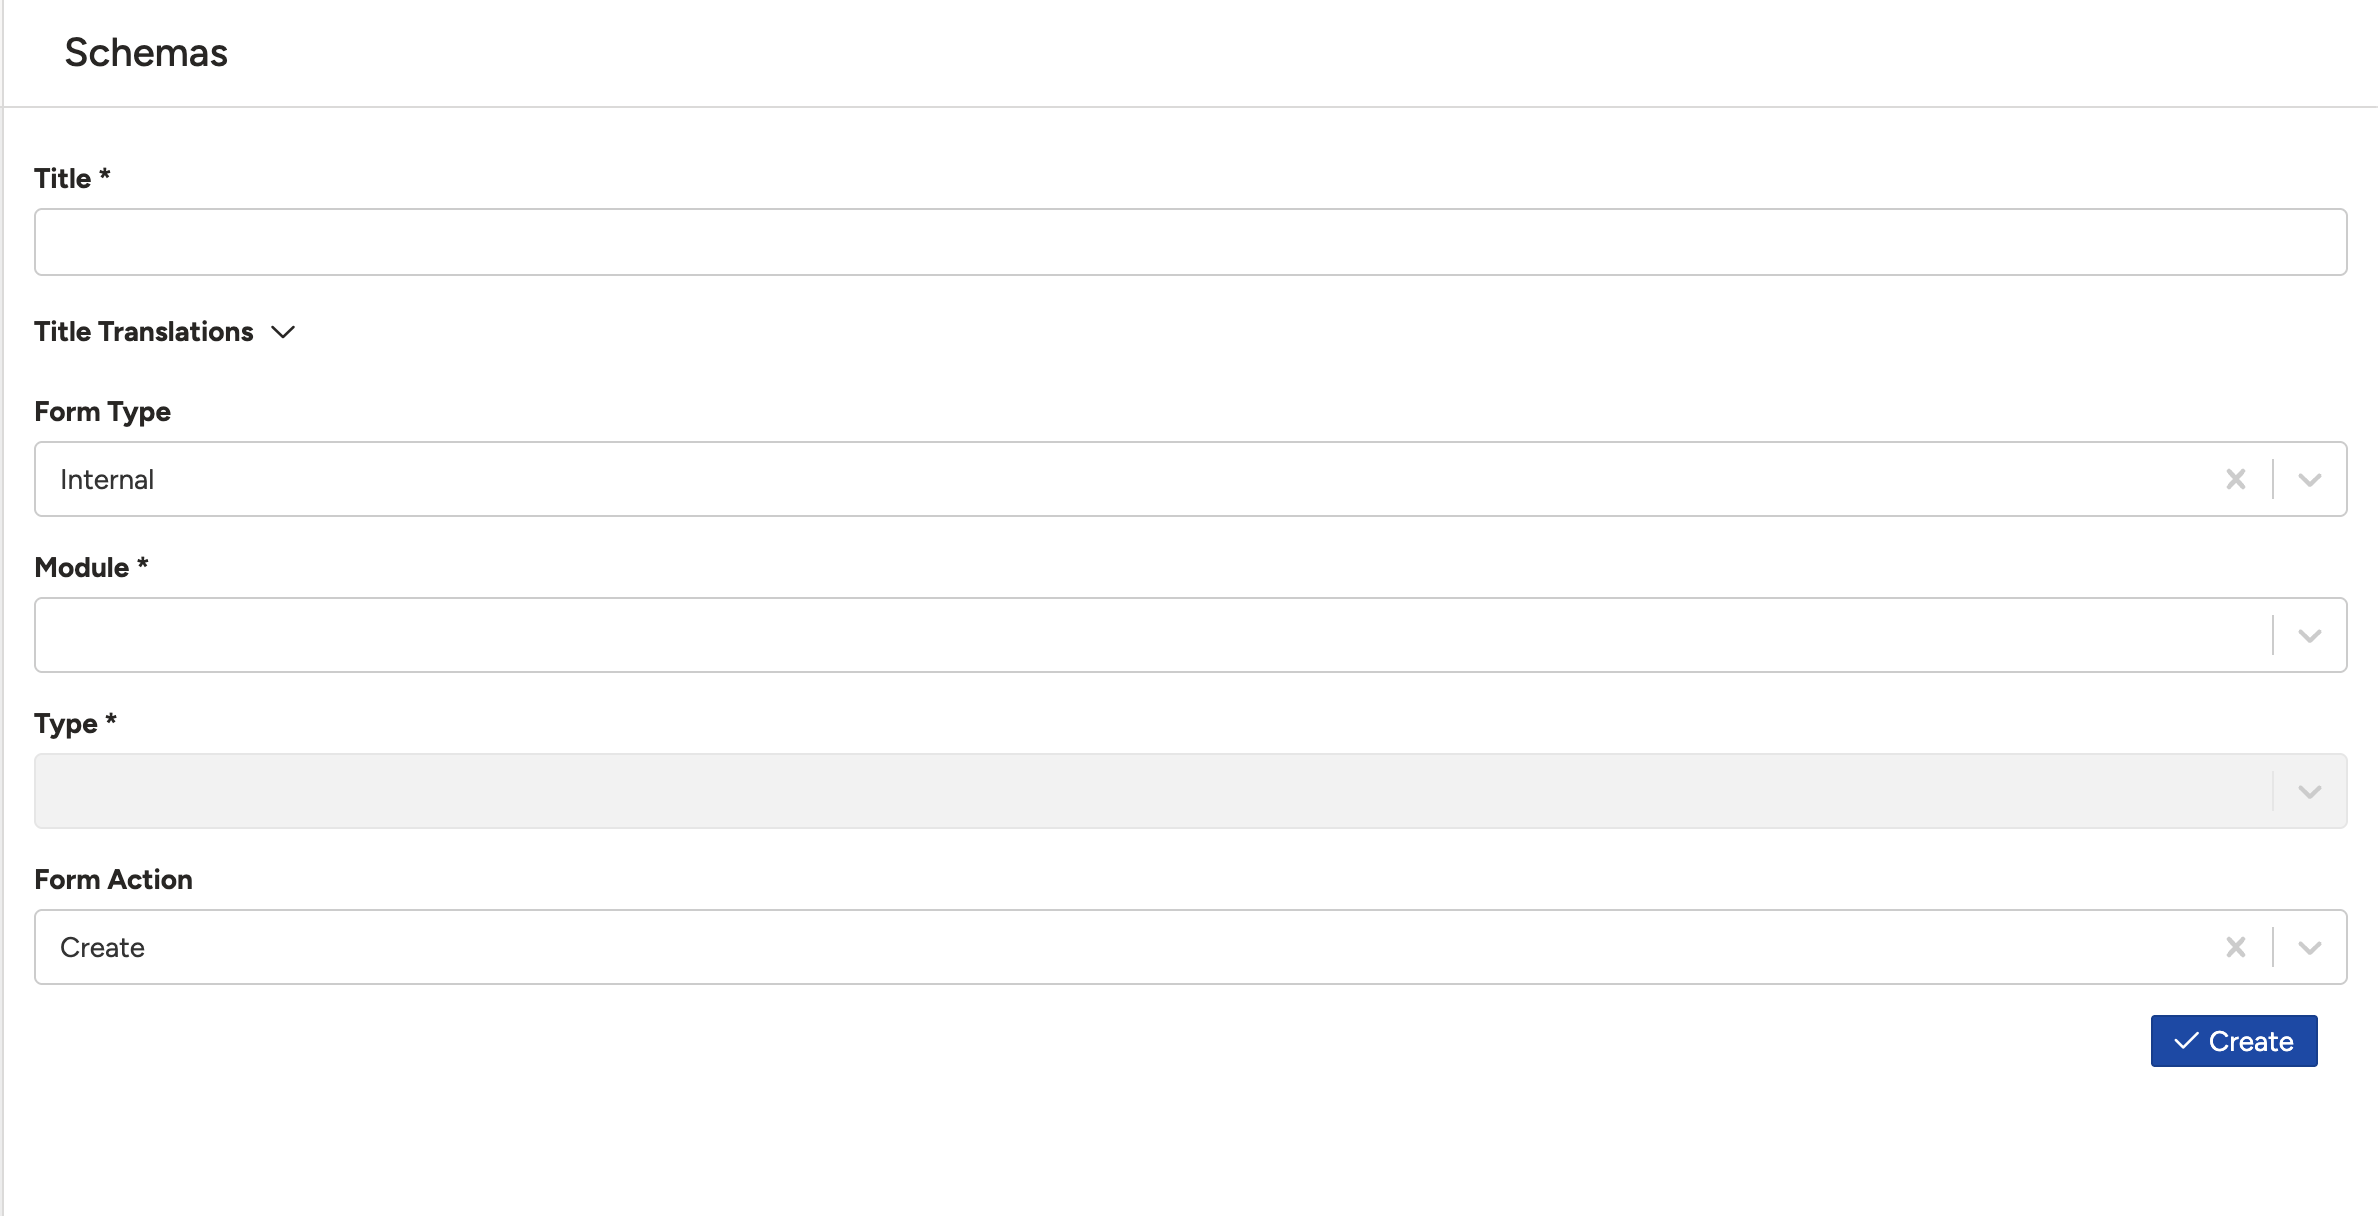
The new schema form. Complete all fields and click Create to continue.
- After clicking Create, the page reloads showing the Builder section where you configure the form. A Prepared Schema sub-panel also appears below, showing the underlying code the schema generates.
Using the Builder
Click Builder to open the form editor. The builder shows all core and custom fields available for the selected module and custom type. You can also find all fields for a custom type on the relevant Custom Type page in Admin.
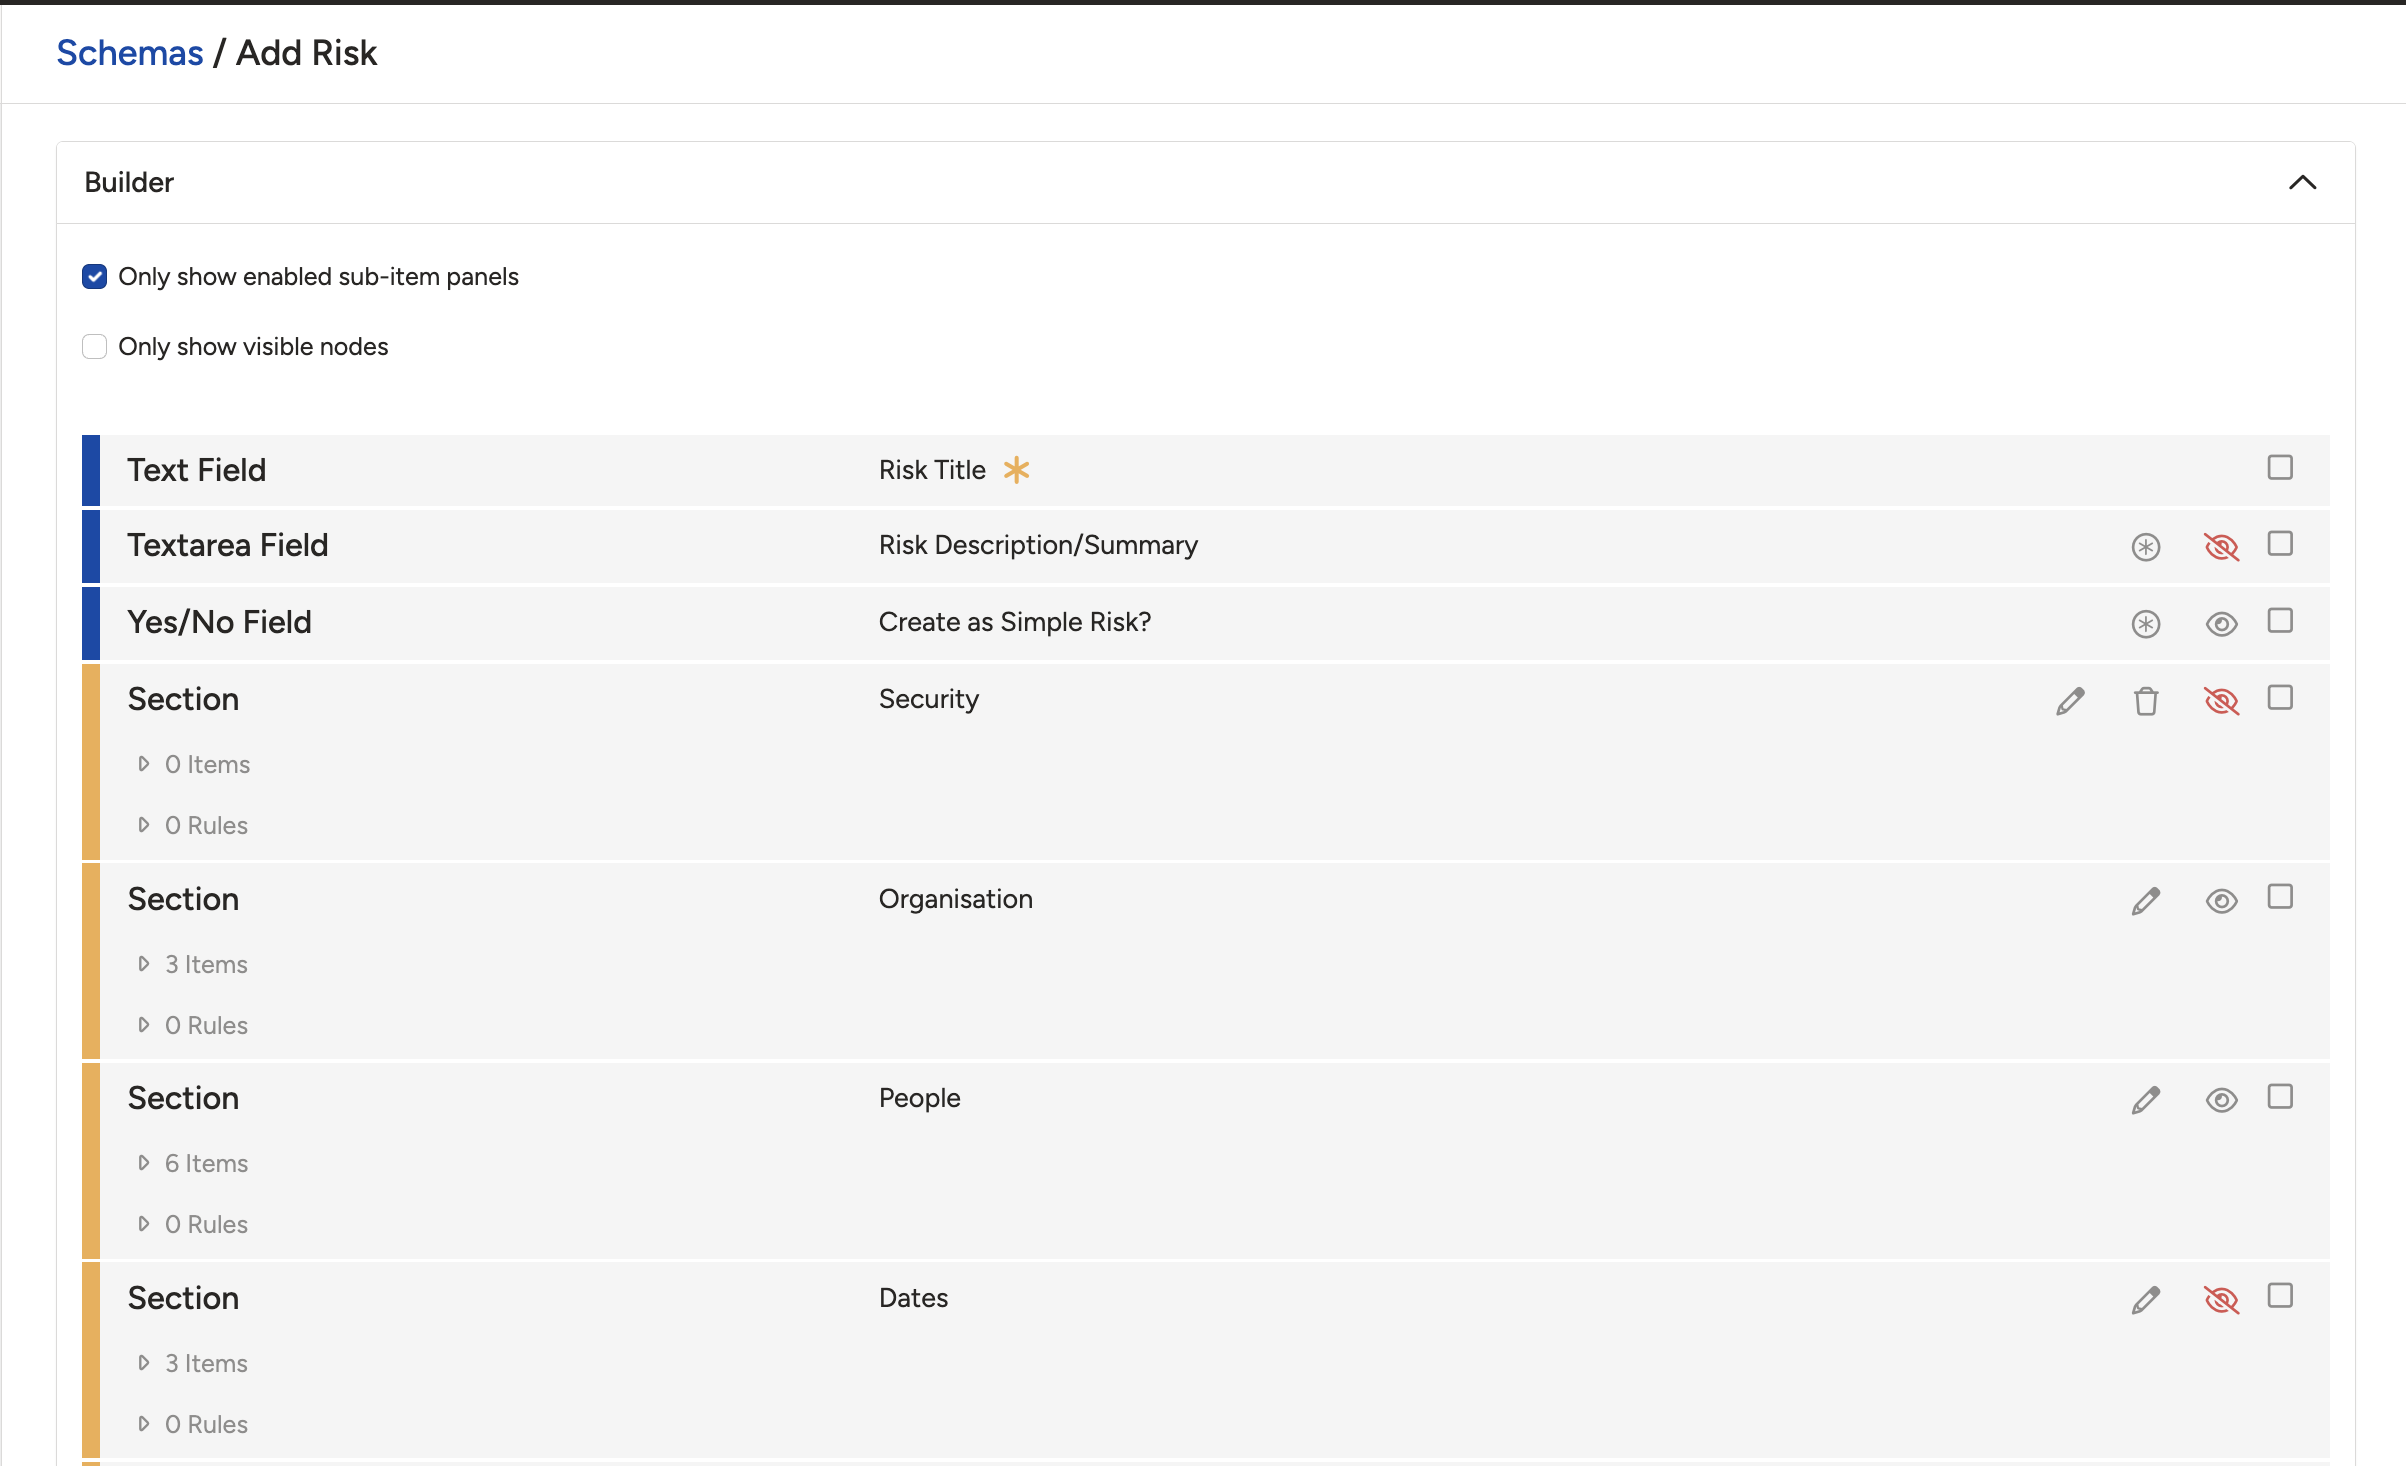
The Builder showing sections, fields, and action icons for configuring the form layout.
Two display filter checkboxes appear at the top of the builder:
- Only show enabled sub-item panels: Hides sub-item panels that are not enabled for the current custom type, keeping the builder focused.
- Only show visible nodes: Displays only the fields and sections that are currently visible based on your configured rules, making it easier to review the active form layout.
Each field and section has action icons on the right side:
| Icon | Description |
| Required [*] | Marks the field as required. Users must complete it before saving the record. |
| View [Eye] | Toggles visibility of a field or section on the schema. |
| Edit [Pencil] | Opens the edit panel for a specific section or field. |
| Delete [Bin] | Deletes a section. A section can only be deleted if it contains no items. Remove all fields from a section before deleting it. |
Expanding a section reveals additional options:
- Add Instruction: Adds a text instruction or guideline that appears at the top of the section on the form, visible to end users.
- Add Section: Creates a new section within the form.
- Transfer node here: Moves a selected field or instruction to this location. Only appears after you have selected one or more fields or instructions using their checkboxes.
Adding rules: Rules control field visibility and requirements based on conditions. Select the Rule option on a section to add a condition and effect. For example, if Create as Simple Risk? equals True, the Category field can be hidden. This keeps the form focused by only showing fields relevant to the user's choices.
Understanding Sections
Every new schema includes pre-existing sections that group core fields by type. Three sections are always present:
Dates
Automatically includes core date and datetime fields such as due dates and review dates.
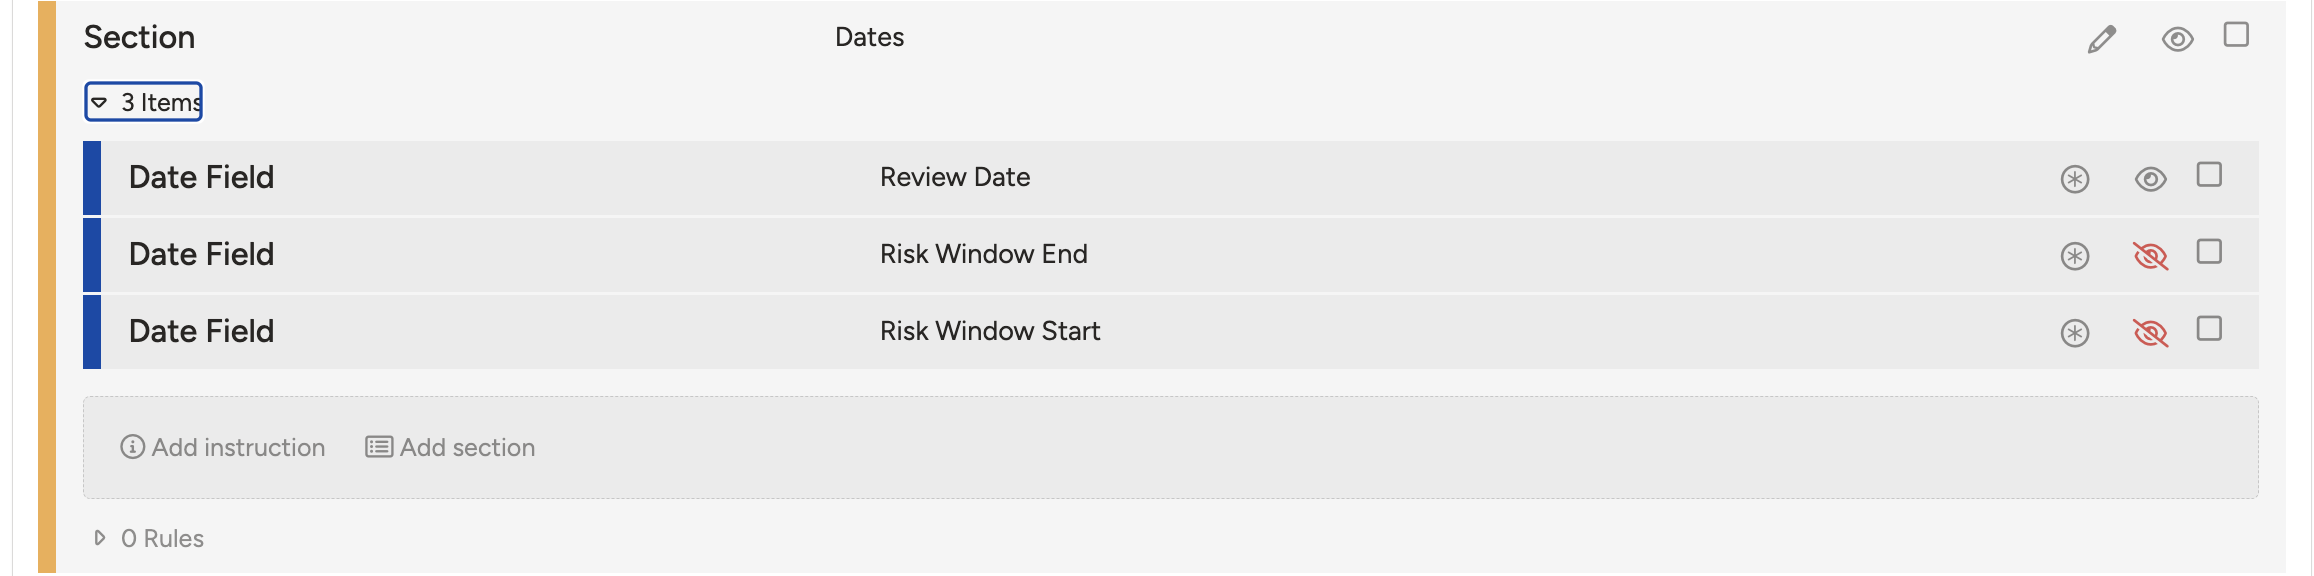
The Dates section automatically includes core date and datetime fields.
Linked Item
Shows modules connected to the current module. On a create form, these fields allow users to link a new record to existing records in related modules.
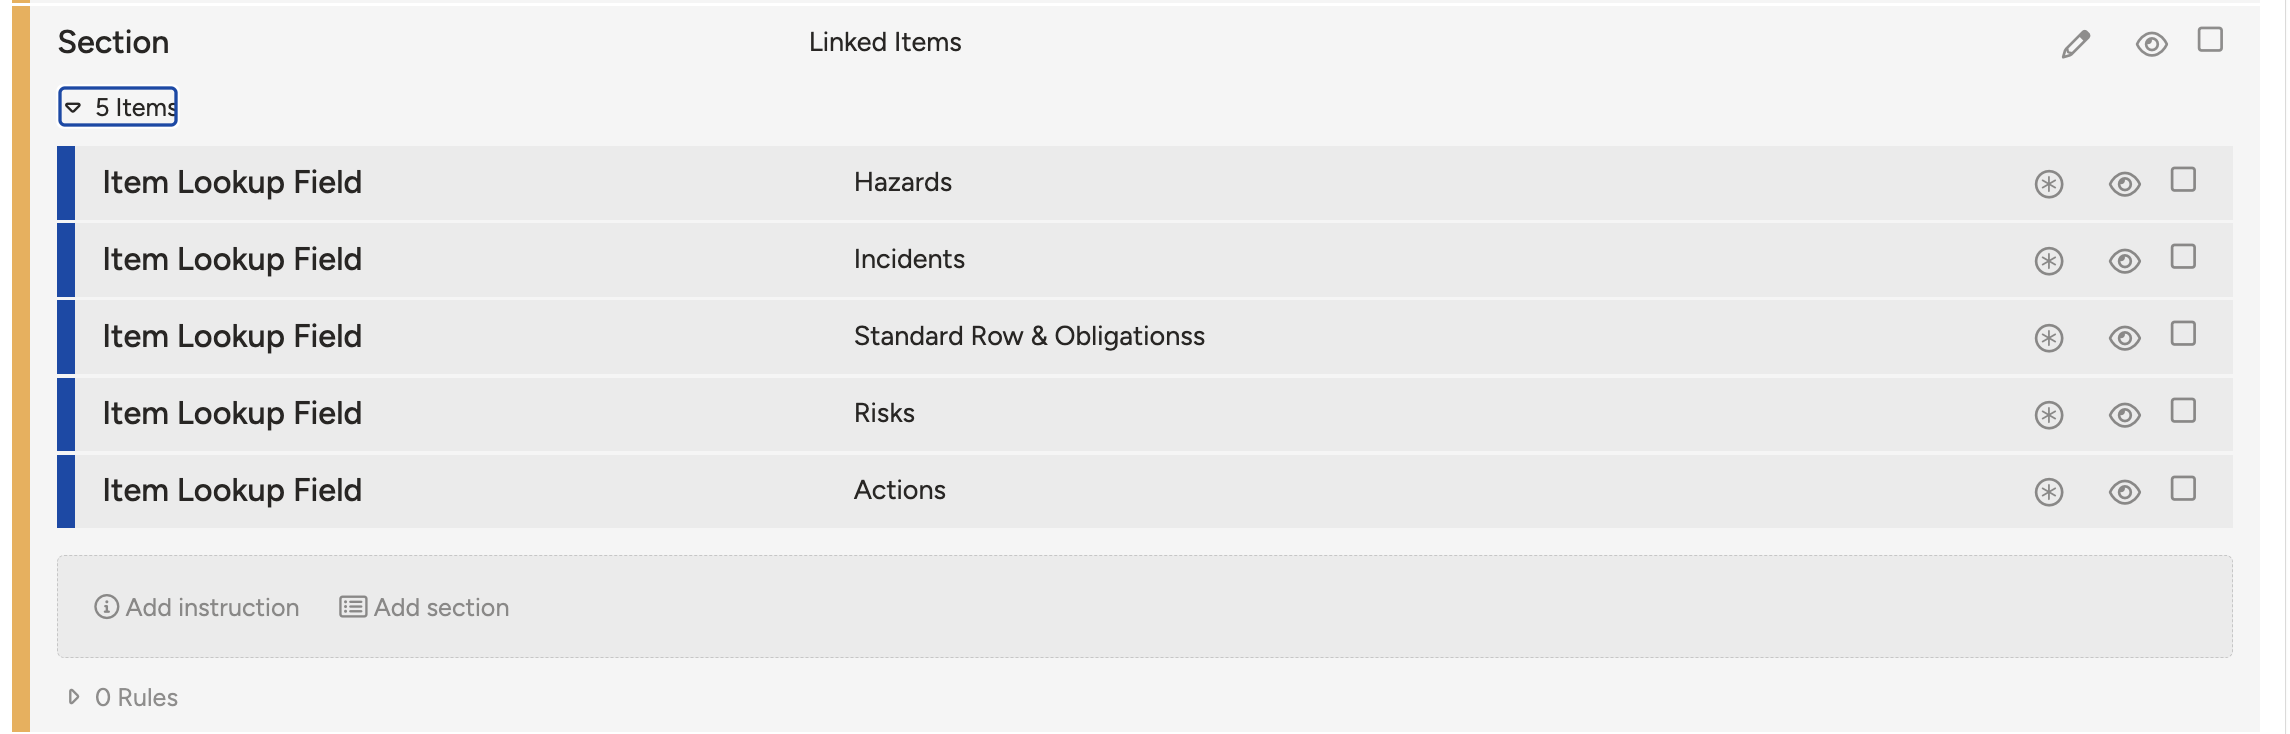
The Linked Item section shows related modules available for linking on the create form.
Extra Fields
Displays any custom fields created for the module. From here, you can move them to other sections or configure them further.
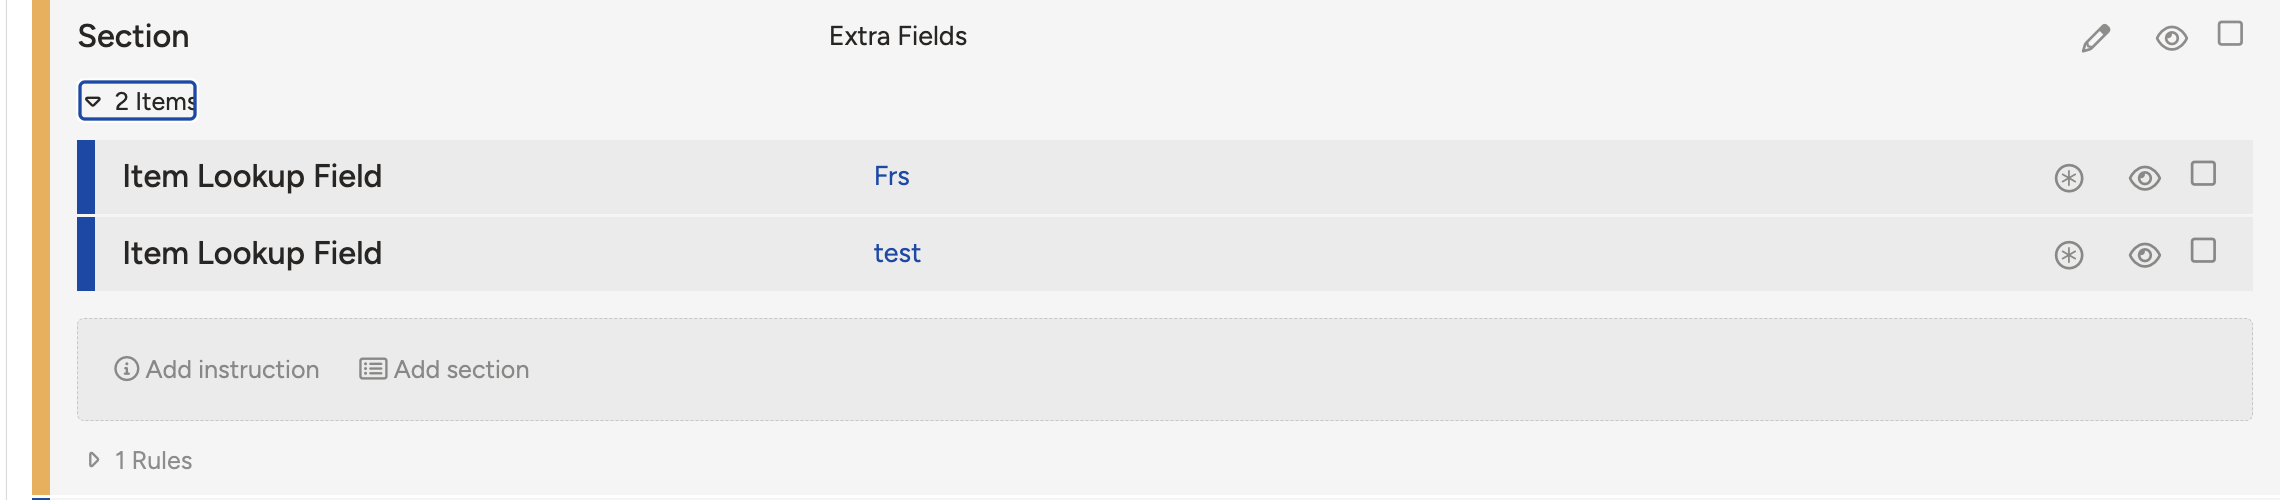
The Extra Fields section contains all custom fields created for the module.
Once you have finished configuring the builder, click Save at the bottom of the page. You can also save using the button at the top. Save frequently as unsaved changes are lost if you refresh or leave the page.
Return to the module and click Add. The form will open as a pop-up showing your customised layout. If the schema does not reflect recent changes, go to Admin > Schemas and use the Sync button.

The Add form opening as a pop-up with the schema's customised field layout applied.
Editing an Existing Schema
- Go to Admin > Schemas.
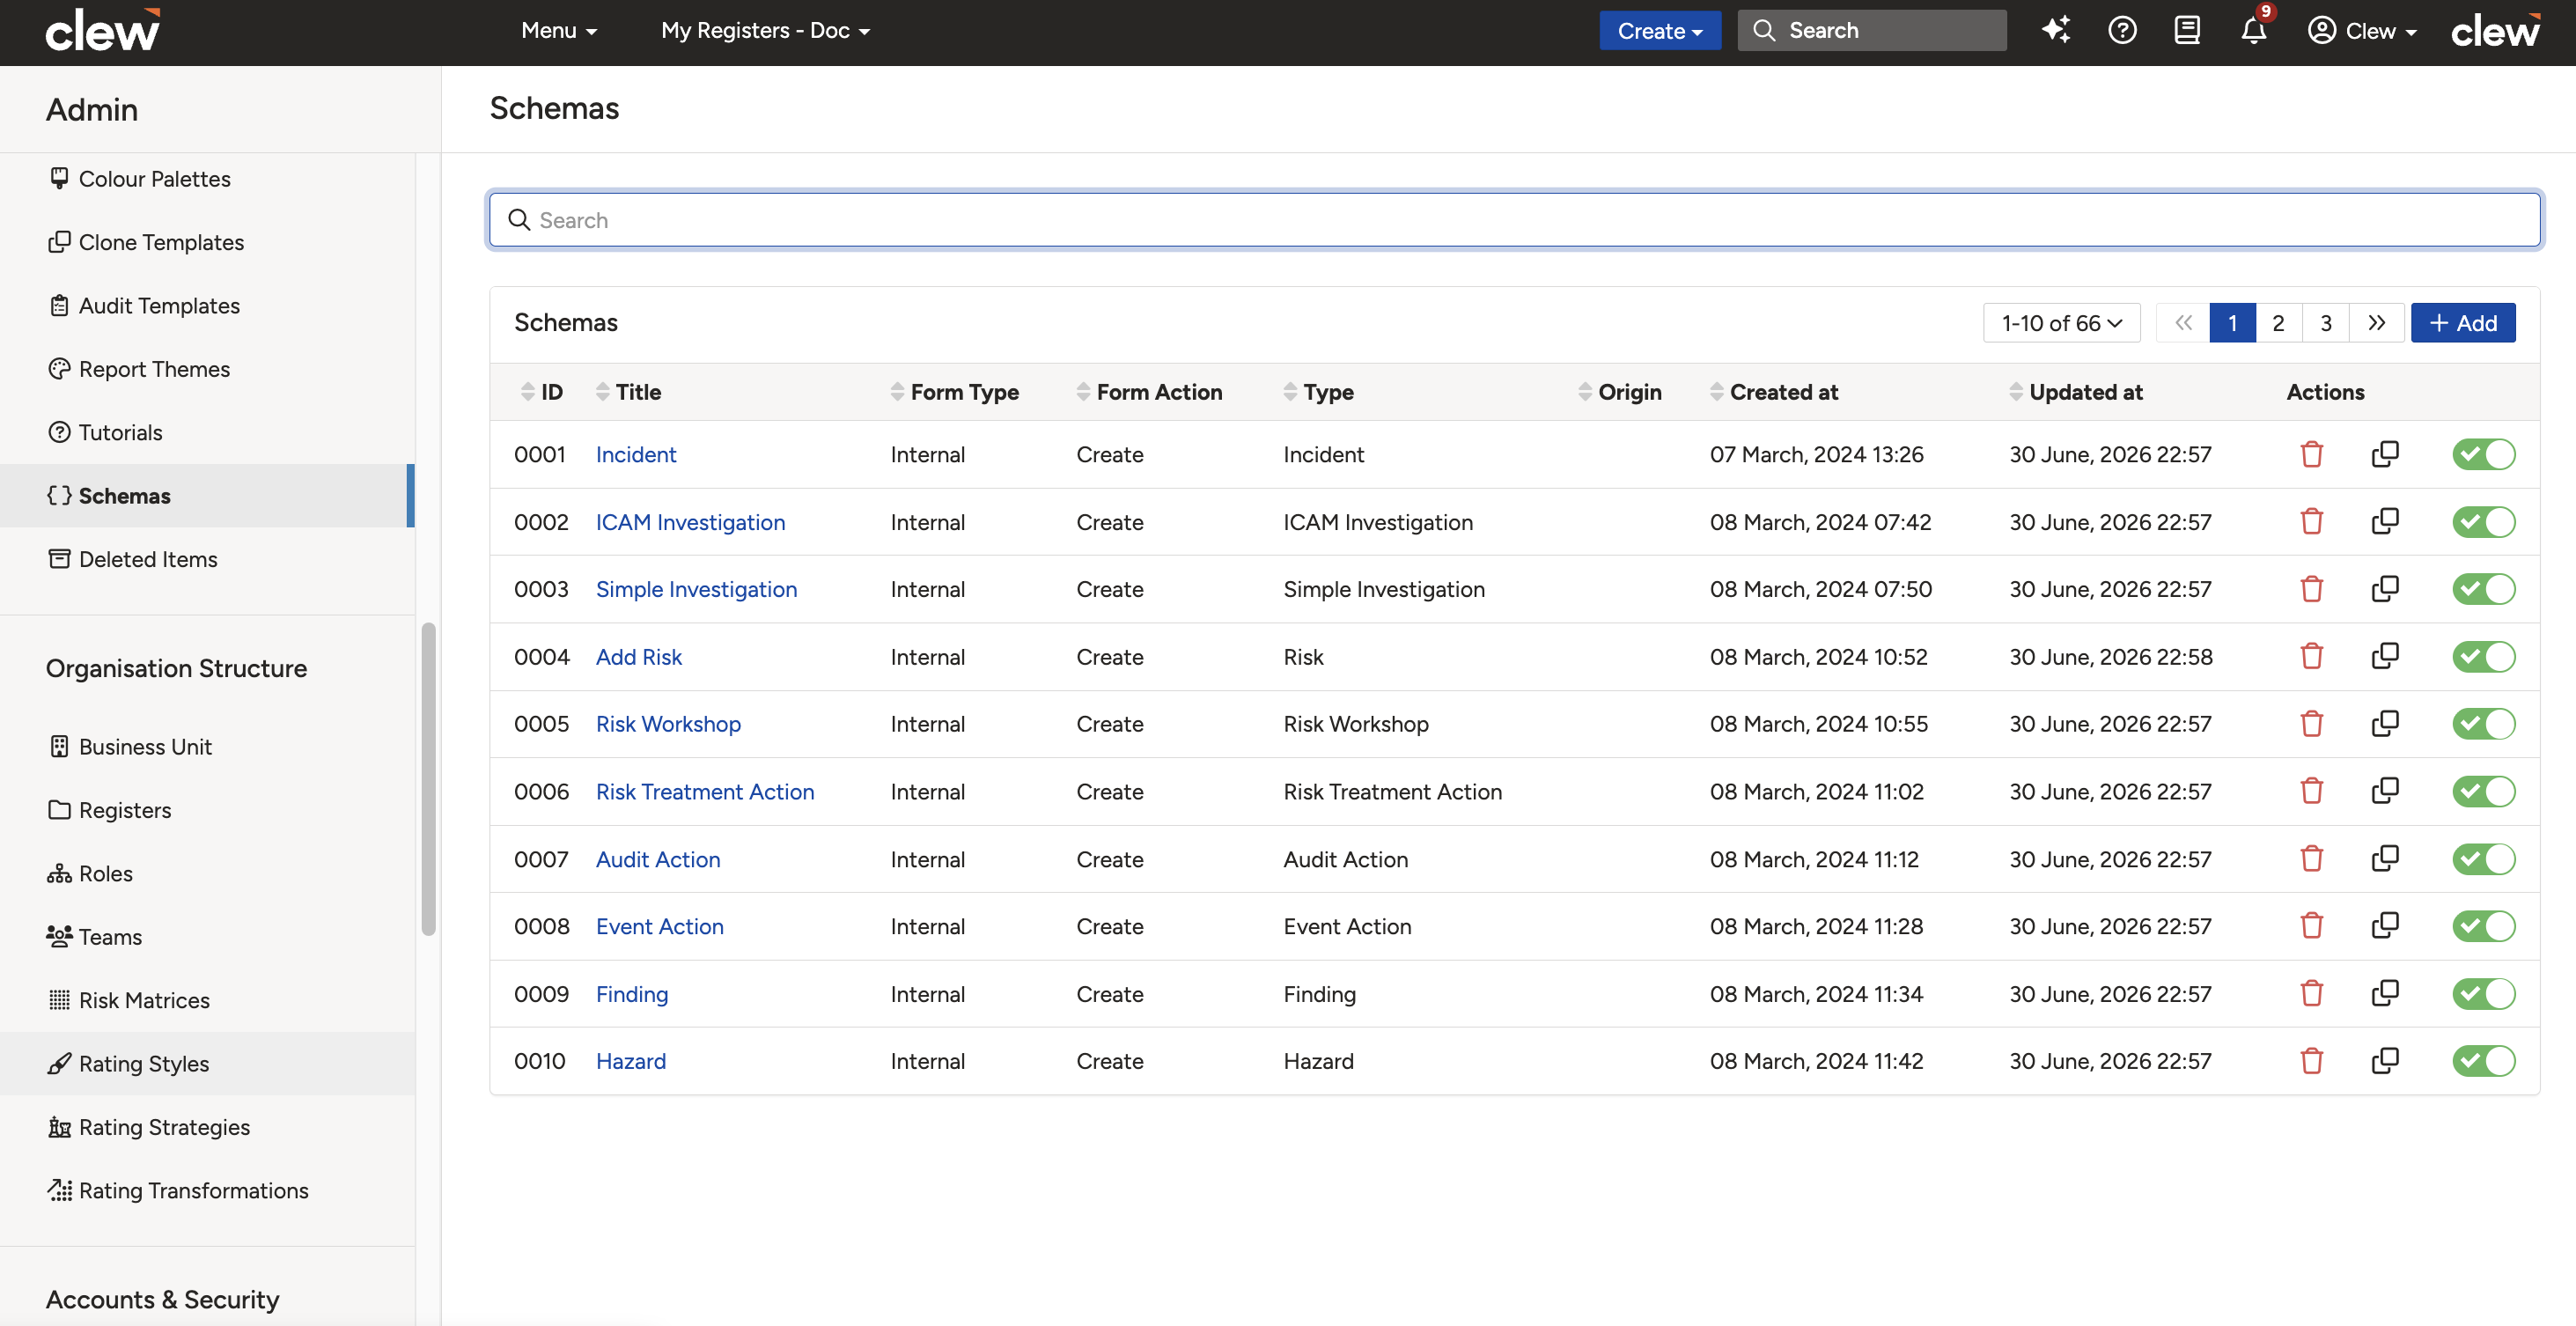
The Schemas list. Click the hyperlinked title to open and edit a schema.
- Click the hyperlinked title of the schema you want to update.
- Make your changes in the Builder following the same steps as when creating a schema. The process for editing an existing schema is identical to configuring a new one.
- Click Save when done.
5. Common Issues & Troubleshooting
| Issue | Likely Cause | Solution |
| A custom field has appeared or disappeared on the schema unexpectedly | A change was made to the custom field or custom type configuration | Go to the custom type and verify the field is enabled and set to display on the intended form. Sync the schema after confirming the settings. |
| Changes to a custom field or visibility settings are not appearing on the form | The server has not yet updated, or the schema has not been synchronised | Wait 1 to 2 minutes, then go to Admin > Schemas and click the Sync button. |
| A rule is not applying as expected | The rule conditions or hidden settings are misconfigured | Open the builder and review the rule conditions. Check the hidden field settings for the affected section to confirm the logic is correct. |
| A section cannot be deleted | The section still contains items (fields) | Move or remove all fields from the section first, then delete the empty section. |
Best practices:
- Save frequently in the builder. Refreshing or navigating away without saving will discard changes.
- After any change to a custom field, always sync the relevant schema to keep the form consistent.
- Use the Only show visible nodes filter when reviewing a complex schema to see only the currently active fields.
- Use clear schema titles that include the module, custom type, and form action so they are easy to identify in the admin list.
Frequently Asked Questions
Can I use the same schema for both creating and editing records?
No. Create and edit schemas are separate. You need to create one for each form action using the Form Action field.
Can I apply one schema to multiple custom types?
No. Each schema is tied to a specific module and custom type. Create a separate schema for each type that needs a different layout.
Why do my changes not appear after saving?
If changes are not appearing after saving the schema, go to Admin > Schemas and click Sync. This is especially important after changes to custom fields.
Where can I find all the fields available for a custom type?
Go to the relevant Custom Type page in Admin. All core fields and custom fields for that type are listed there.
Click a title to preview it here. Use the Open full article button to read the full version in a new tab.
▾Schemas & Forms Open full article »
Related section
Browse the Schemas & Forms articles, covering schemas, custom forms, and the other form configuration tools.
▾Workflows & Automations Open full article »
Related section
Browse the Workflows & Automations articles, covering workflows, statuses, transitions, and triggers that work alongside schemas.
Was this article helpful?
That’s Great!
Thank you for your feedback
Sorry! We couldn't be helpful
Thank you for your feedback
Feedback sent
We appreciate your effort and will try to fix the article