Triggers
How to create and configure triggers (business rules) to automate record updates, notifications, and escalations in the Clew Platform
Contents
- 1. Introduction & Context
- 2. Key Features & Functions
- 3. Requirements
- 4. Step-by-Step Guide
- 5. Common Issues & Troubleshooting
- 6. Related Articles
1. Introduction & Context
Triggers (also known as business rules) let you automate record updates, notifications, and escalations in the Clew Platform so that the right actions happen at the right time without manual intervention.
A trigger fires when a user performs a save action against a record, including creation, updates, linking, and deletion. You can also configure triggers to run on a daily schedule. Well-configured triggers enhance accountability by driving workflow automation and ensuring users are notified of important changes.
Who is it for? System Administrators who configure automation. All users are affected by triggers, which run in the background when records are saved.
What does it impact? Triggers can update field values, send notifications, log activity, and chain into other triggers across related modules. Changes take effect immediately once a trigger is enabled.
2. Key Features & Functions
Event types control when a trigger fires. Before events run before the record is saved (useful for setting default values or enforcing field values). After events run after the record is saved (useful for sending notifications or chaining to other triggers). The Daily event runs as a background job on a schedule. The Triggered Event type is designed to be called by another trigger, enabling cross-module automation.
Conditions define the criteria a record must meet before the trigger fires. All conditions use AND logic, meaning every condition must evaluate to true for the trigger to proceed.
Effects are the actions the trigger performs when it fires. Available effects depend on whether the event type is a Before or After event. Before events can set, clear, add to, or subtract from field values. After events can send notifications, log activity to the activity stream, or fire a Triggered Event on related records.
Priority controls execution order when multiple triggers fire at the same time. Highest runs first; Lowest runs last. The default is Average.
Forking is available on Daily triggers only. It creates a separate trigger execution per matching record. Enable with caution as misconfiguration can result in duplicate records.
3. Requirements
- System Administrator access is required to create or edit triggers.
- The module a trigger is assigned to cannot be changed after the trigger is saved. Select the correct module before saving.
- Triggers cannot be deleted, only deactivated. Use the Enable/Disable toggle to deactivate a trigger you no longer need.
- For Triggered Event triggers, the target trigger must be created first (on the target module) before the source trigger can reference it.
4. Step-by-Step Guide
Creating a Trigger
- Go to Admin > Triggers.
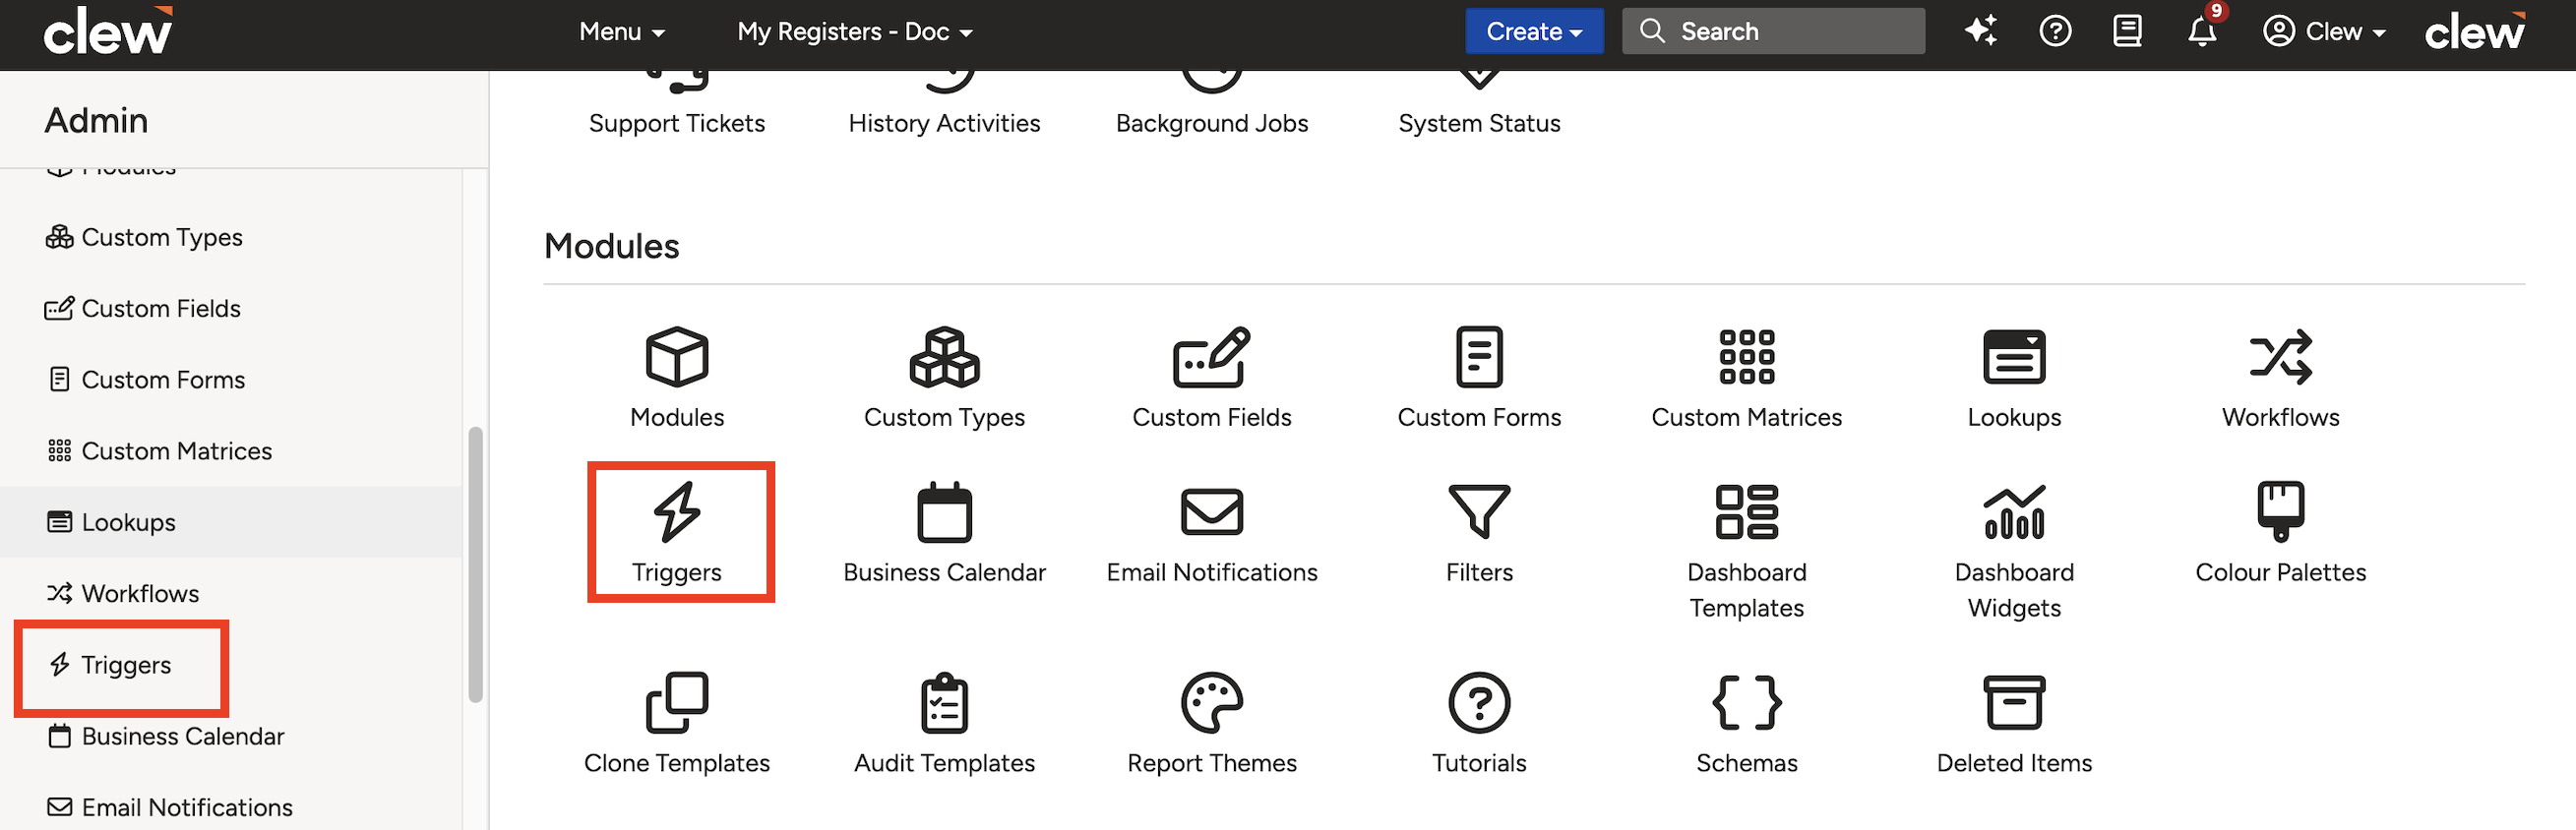
Navigate to Admin > Triggers to view and manage all configured triggers.
- Click Addto open the new trigger form.
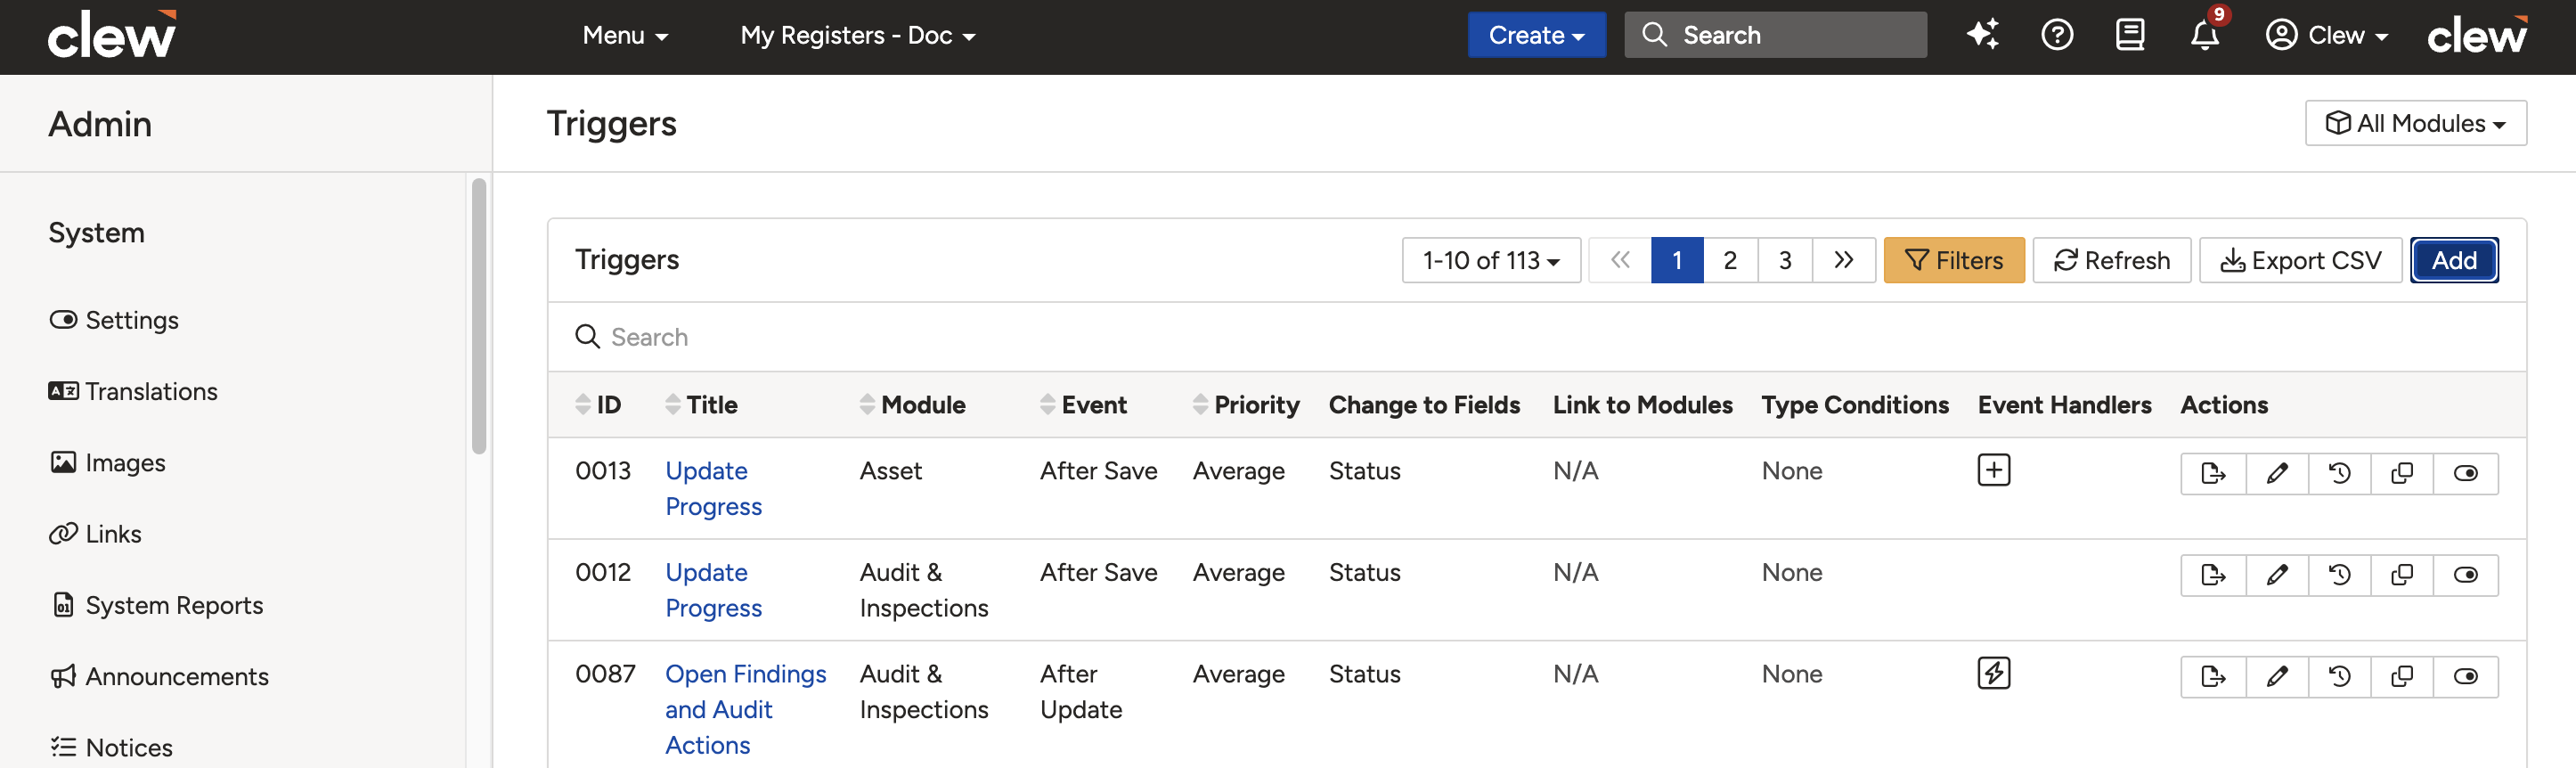
Click Add to open the new trigger form.
- Complete the trigger form using the field reference below.
Field Sub-field Description Title A descriptive name for the trigger. Use a name that makes the purpose and target module clear. Module The module this trigger applies to. This cannot be changed after the trigger is saved. Event Selection After Create Fires after a record is created. Useful for notifying stakeholders about new records such as incidents, complaints, or hazards. After Destroy Fires when a record is deleted. Useful for sending a notification to administrators. After Save Fires whenever a record is saved, including creation, updates, and deletion. After Update Fires only when a record is updated, not when it is first created. Before Create Fires before a record is created. Useful for setting default field values on new records. Before Save Fires before a record is saved, including creation, updates, and deletions. Before Update Fires before a record is updated. Daily Runs as a daily background job. Useful for status updates based on a date field, for example moving a record to Pending Review when its review date has passed. Triggered Event Designed to be called by another trigger. Useful for linked actions across modules, for example closing related actions when a parent record is closed. Priority Controls execution order when multiple triggers fire at the same time. Default is Average. Highest runs first; Lowest runs last. Enable / Disable Determines whether the trigger is active. Disabled triggers are saved but do not fire. Change to Fields (Optional) Restricts the trigger to fire only when a specific field changes, for example Status changing from Draft to Pending Review. Forking (Optional) Available on Daily triggers only. Creates a separate execution per matching record. Enable with caution as misconfiguration can produce duplicate records. - Click Saveto create the trigger. The trigger will appear in the list and conditions and effects can now be configured via the sub-panels.
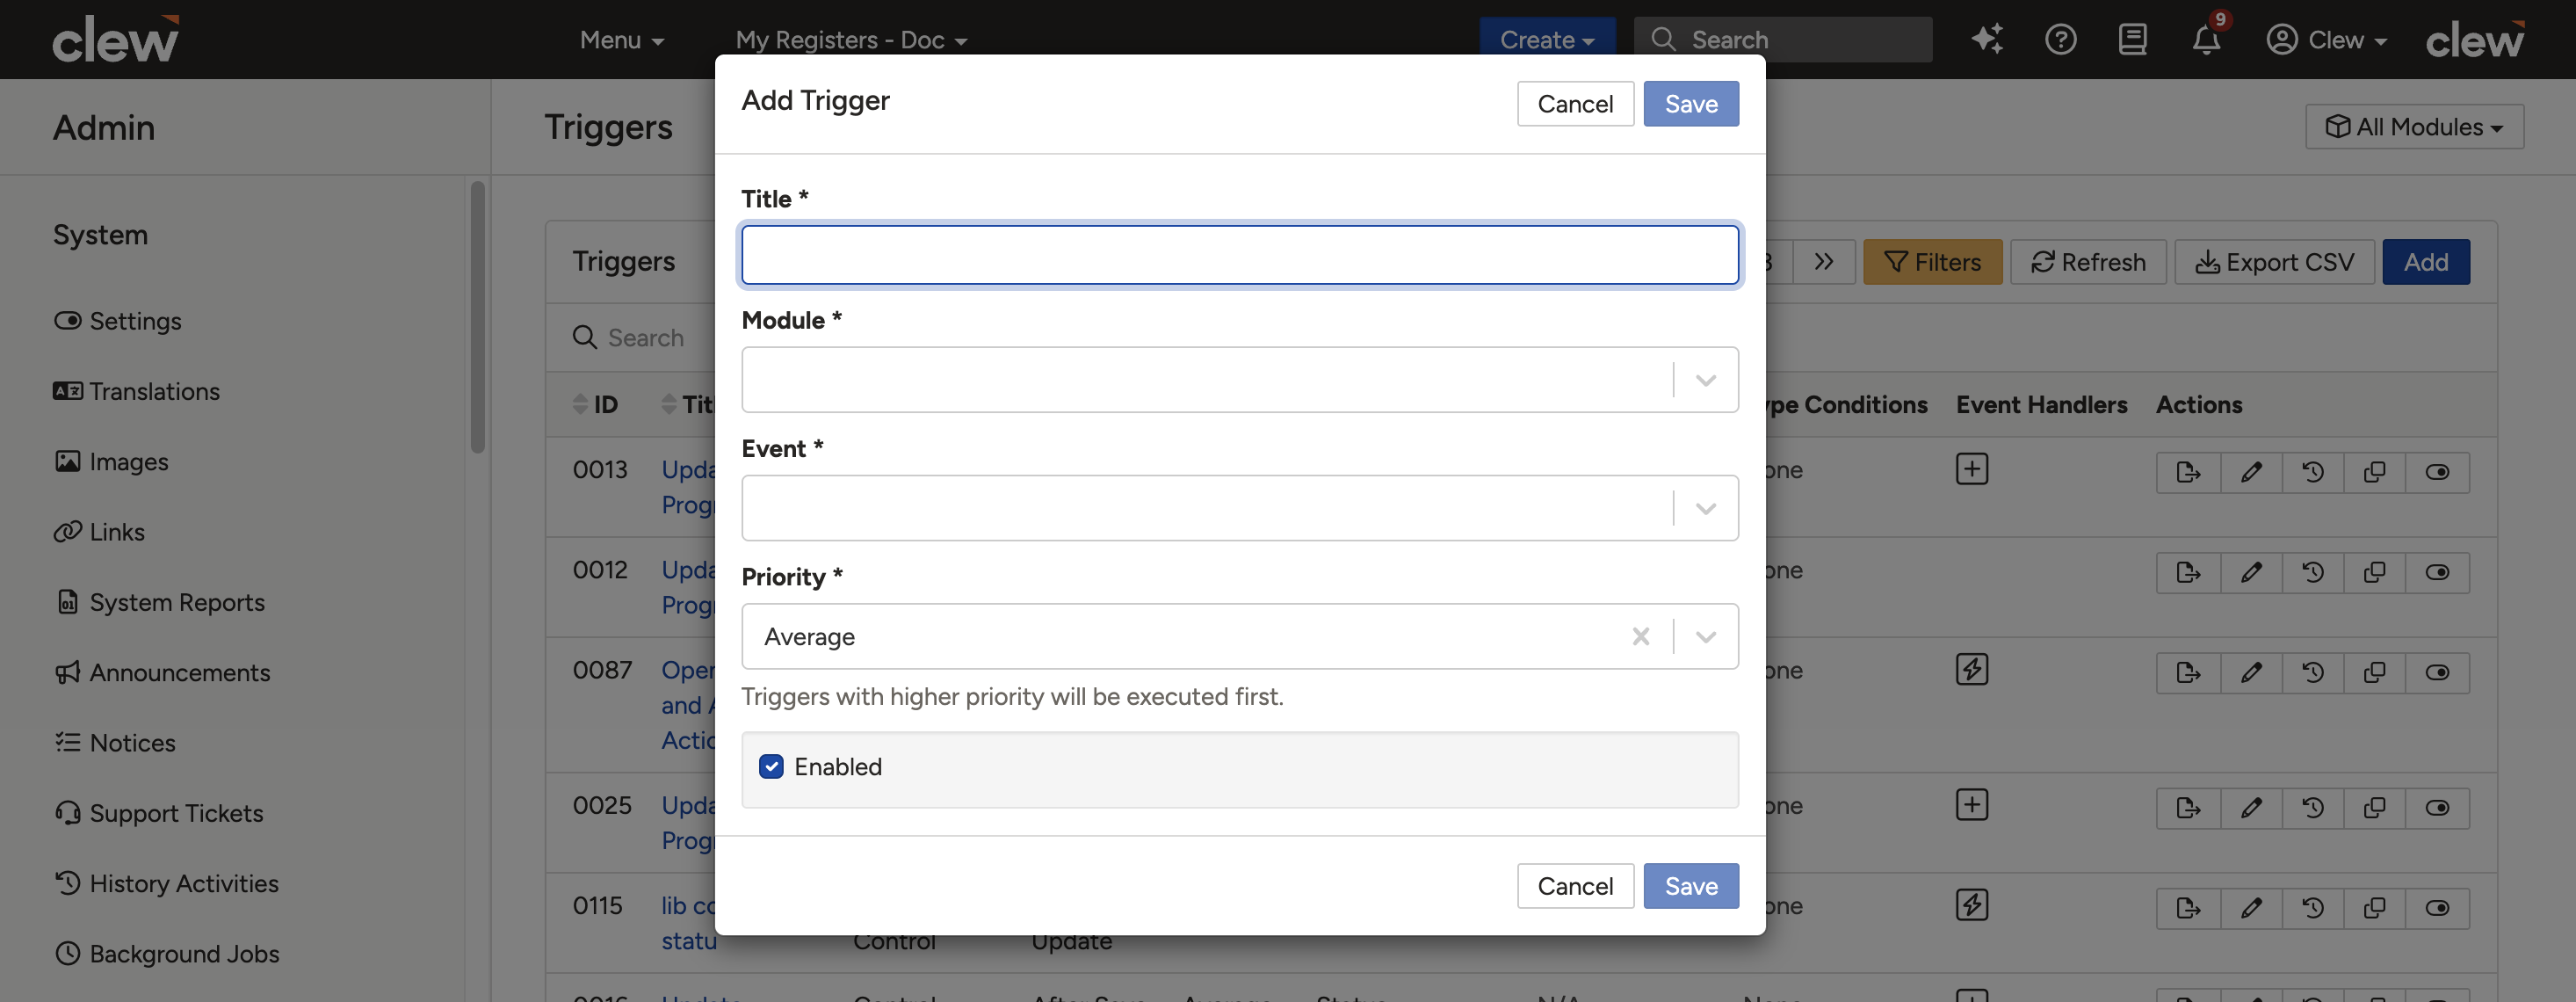
Once all fields are set, click Save to finalise the trigger configuration.
Setting Up Conditions
After saving the trigger, add conditions in the Conditions sub-panel to control when the trigger should fire.
The available condition types are:
- Compare a Field to a Value: Select a field from the module and compare it to a fixed value. The field list is pre-populated from the module's configured fields.
- Compare a Field to Another Field: Compare the value of one field against another field on the same record.
- All Related Items Are Closed or Has No Related Items: Returns true if no related items are linked, or if all related items are in a closed state. You can invert the result.
- Has One or More Related Items: Returns true if at least one related record exists via the selected relationship (for example Actions, Risks, or Controls). Returns false if no related items are present. You can invert the result.
- All Required Columns Are Filled: Specific to audit records. Returns true when all fields marked as required within the audit record have been completed.
Configuring Effects and Notifications
Use the sub-panels on the trigger record to define what happens when the trigger fires.
Effects
- Set a field to a value: Select a field and assign it a fixed value, or use a pointer to reference the value from another field or related record.
- Clear a field: Removes the current value from a selected field.
- Add a value to a field: Adds a number or duration to a number or date field.
- Subtract a value from a field: Subtracts a number or duration from a number or date field.
Activities
Select a field and add a default note. The entry will appear in the record's Activity Stream when the trigger fires.
Triggered Events
Select a Triggered Event trigger that should run when this trigger fires, and choose the related item type it should run on (for example Risks linked to the current record).
Triggered Notifications
Create a notification to be sent immediately when the trigger fires. The notification is configured in the same way as Email Notifications.
Example: Triggered Event Walkthrough
Scenario: An Action has become Overdue. All Risks linked to that Action need to move to Review Required because there is a potential breach and the linked Risks may now materialise.
This requires two triggers: a Triggered Event on the Risk module (the target) and an After Update trigger on the Action module (the source).
Step 1: Create the Triggered Event trigger on the Risk module
- Go to Admin > Triggers, select the Risk module, and click Add.
- Complete the form:
- Title: Use a name that references the source module, for example Action Overdue: Move Risk to Review Required.
- Event: Triggered Event
- Priority: Average
- Enabled: Leave ticked
- Add Conditionsto ensure only the correct Risks are updated.
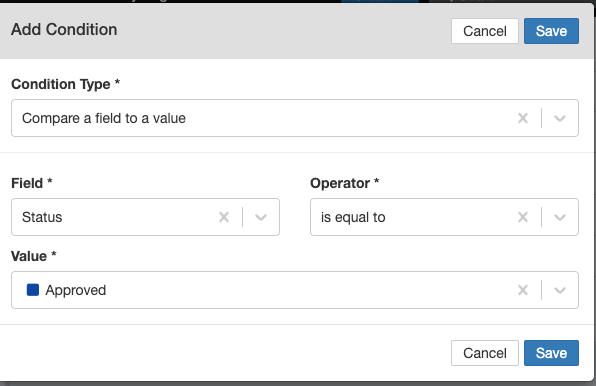
Example conditions on the Risk Triggered Event trigger, filtering which records should be updated.
- In the Effects sub-panel, set the Status field to Review Required.
Step 2: Create the After Update trigger on the Action module
- Go to Admin > Triggers, select the Action module, and click Add.
- Complete the form:
- Title: Use a descriptive name that includes the target module, for example Action Overdue: Trigger Risk Review.
- Event: After Update (or the event that matches when you want it to run)
- Priority: Average, unless multiple Triggered Events must run in a specific order.
- Change to Fields: Status
- Enabled: Leave ticked
- Add Conditions to restrict the trigger to Actions that have become Overdue.
- In the Triggered Events sub-panel, click Add and select the Triggered Event you created on the Risk module.
- Set the Related Itemsto determine which Risks the Triggered Event should run on:
- Parent Risks: Targets only the Risk in the Primary field of the Action.
- Risks: Targets all Risks related to the Action, both primary and secondary.
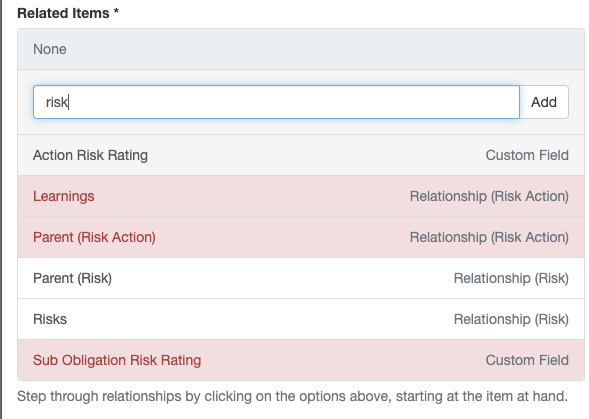
Triggered Events sub-panel showing the selected Triggered Event and the Related Items configuration.

Select Parent Risks to target only the primary Risk, or Risks to target all linked Risk records.
- Click Save.
5. Common Issues & Troubleshooting
| Issue | Likely Cause | Solution |
| Trigger is not executing | Trigger is disabled, wrong event type selected, incorrect field conditions, or a priority conflict with another trigger | Check Admin > Notices to see which triggers have executed. Confirm the trigger is enabled, the event type matches the action, the Change to Fields setting is correct, and no priority conflicts exist. |
| Duplicate records appearing after enabling forking | Forking misconfigured on a Daily trigger, causing the trigger to execute multiple times per record | Disable forking immediately and review the trigger conditions. Only re-enable forking once you have confirmed the conditions correctly scope the matching records. |
| Triggered Event does not run on related records | The Triggered Event trigger on the target module was not created first, or the Related Items selection is incorrect | Confirm the Triggered Event trigger exists on the target module and is enabled. Verify the Related Items setting on the source trigger points to the correct relationship type. |
| Module cannot be changed after saving | This is by design. The module is locked once the trigger is saved. | Deactivate the incorrect trigger and create a new one with the correct module selected. |
Best practices:
- Use the Admin > Notices page to audit trigger execution history when investigating unexpected behaviour.
- Name triggers clearly so the module, event, and purpose are obvious at a glance, for example Risk: After Update: Notify Owner on Status Change.
- Always create the Triggered Event target trigger first before building the source trigger that calls it.
- Test Daily triggers and forking configurations in a non-production environment before enabling them for live users.
- Keep conditions as specific as possible to avoid triggers firing on unintended records.
Click a title to preview it here. Use the Open full article button to read the full version in a new tab.
▾Workflows & Automations Open full article »
Related section
Browse the Workflows & Automations articles, covering workflows, statuses, transitions, and the notifications that triggers work alongside.
Was this article helpful?
That’s Great!
Thank you for your feedback
Sorry! We couldn't be helpful
Thank you for your feedback
Feedback sent
We appreciate your effort and will try to fix the article